Snow Retention Systems for Metal Roofs: History, Methods, Failures & Layout Theory
This four-section educational guide explains how snow retention evolved, how modern systems attach to metal roofing, which installation practices commonly fail, and why proper load distribution and row spacing are fundamental to snow guard system design.
Understanding Snow Retention Before Selecting a System
This resource is intended to explain the principles behind snow retention—not to replace project-specific product selection, spacing guidance, engineering review, or manufacturer installation instructions. The course follows the evolution from early “Field” and “Fence” methods through modern pad-style and bar-style systems, then examines common failures and layout theory.
For a specific roof, use the SnoBlox-Snojax spacing, compatibility, installation, and product-selection resources linked below. HistoryOfSnowRetention.com remains focused on education, while those resources provide project-specific product and layout information.
About This Educational Resource
This course was developed from SnoBlox-Snojax educational materials covering the history, evolution, attachment methods, installation practices, observed failures, and layout principles of snow retention systems. The course includes field photographs, product examples, and technical references used throughout the original training material.
For product-specific selection, spacing, compatibility, and installation information, use the linked SnoBlox-Snojax resources. HistoryOfSnowRetention.com is intended to remain the educational reference site.
Working on a Specific Metal Roof?
Use the appropriate project resource rather than relying on this educational course alone.
History of Snow Retention and Why It’s Needed Today
History of Snow Retention and Why It's Needed Today
Old methods - Snow guards of various materials and methods can be dated back centuries to Europe. From stones to logs, these primitive systems protected the roofs from snow and ice slides. The main reason for snow retention was to insulate the structures from extreme weather by holding snow on the roof. These methods and materials added tremendous weight to the roof structure and a threat of falling rocks.
There were two primitive methods for holding snow on roofs. One was with rocks that were staggered on the roof creating a “Field”. Today’s pad style guards use this method to hold the snow and ice in place by using multiple, staggered rows. This method locks the snow in place until it melts. The other method was with logs that created a “Fence”. Today’s bar systems use the “Fence” method to create a barrier to hold snow and ice.
The Field method uses multiple staggered rows to hold snow where it lands until it melts. The Fence method uses continuous barriers, such as modern bar systems, to restrain snow and ice across the roof.
-
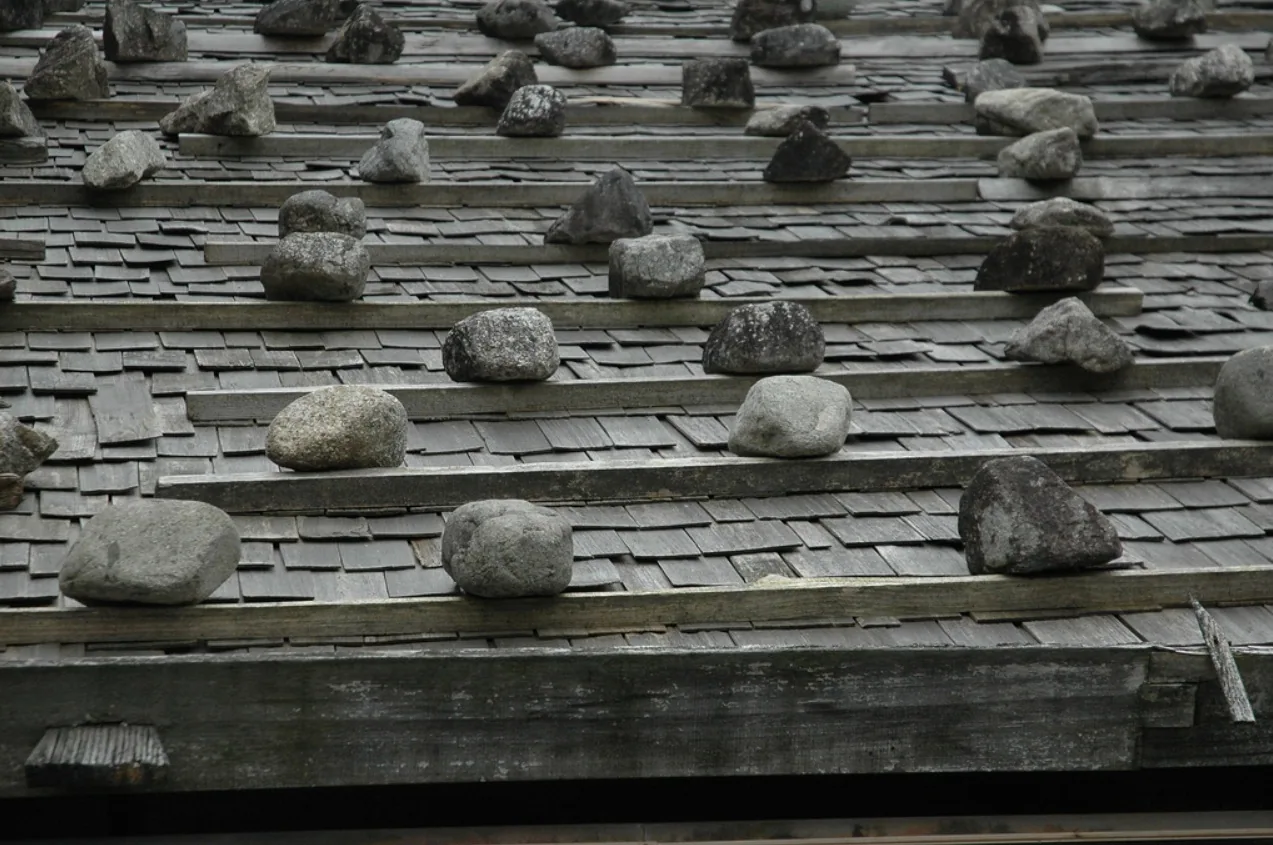
Notice that the rocks are arranged in multiple staggered rows up the entire roof surface creating a “Field” type layout. Today’s pad style snow guards should use this type of “Field” method.
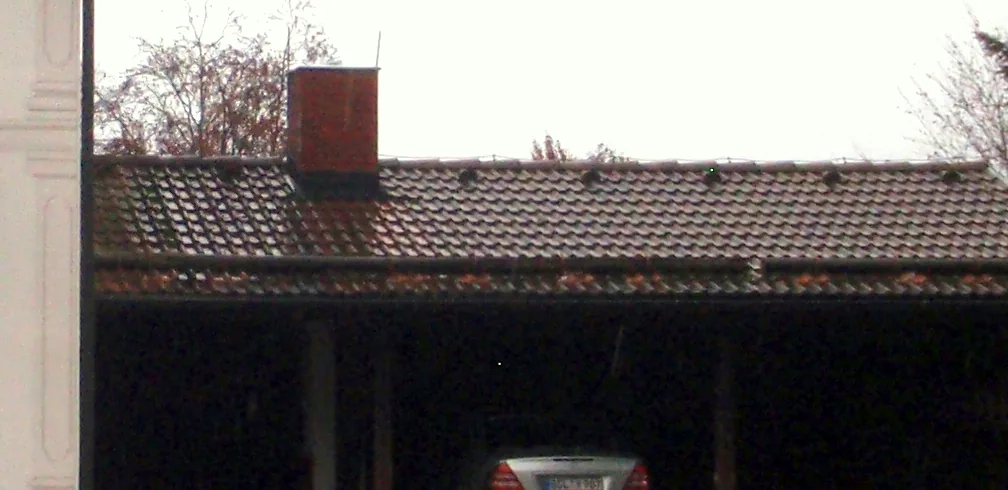
A log “Fence” protects this 3 car garage in Germany.
Multiple rows of logs protect this roof and pedestrians. This style system, known as a “Fence”, was effective at keeping snow and ice from sliding. Today’s bar systems should be designed with this type of “Fence” method.
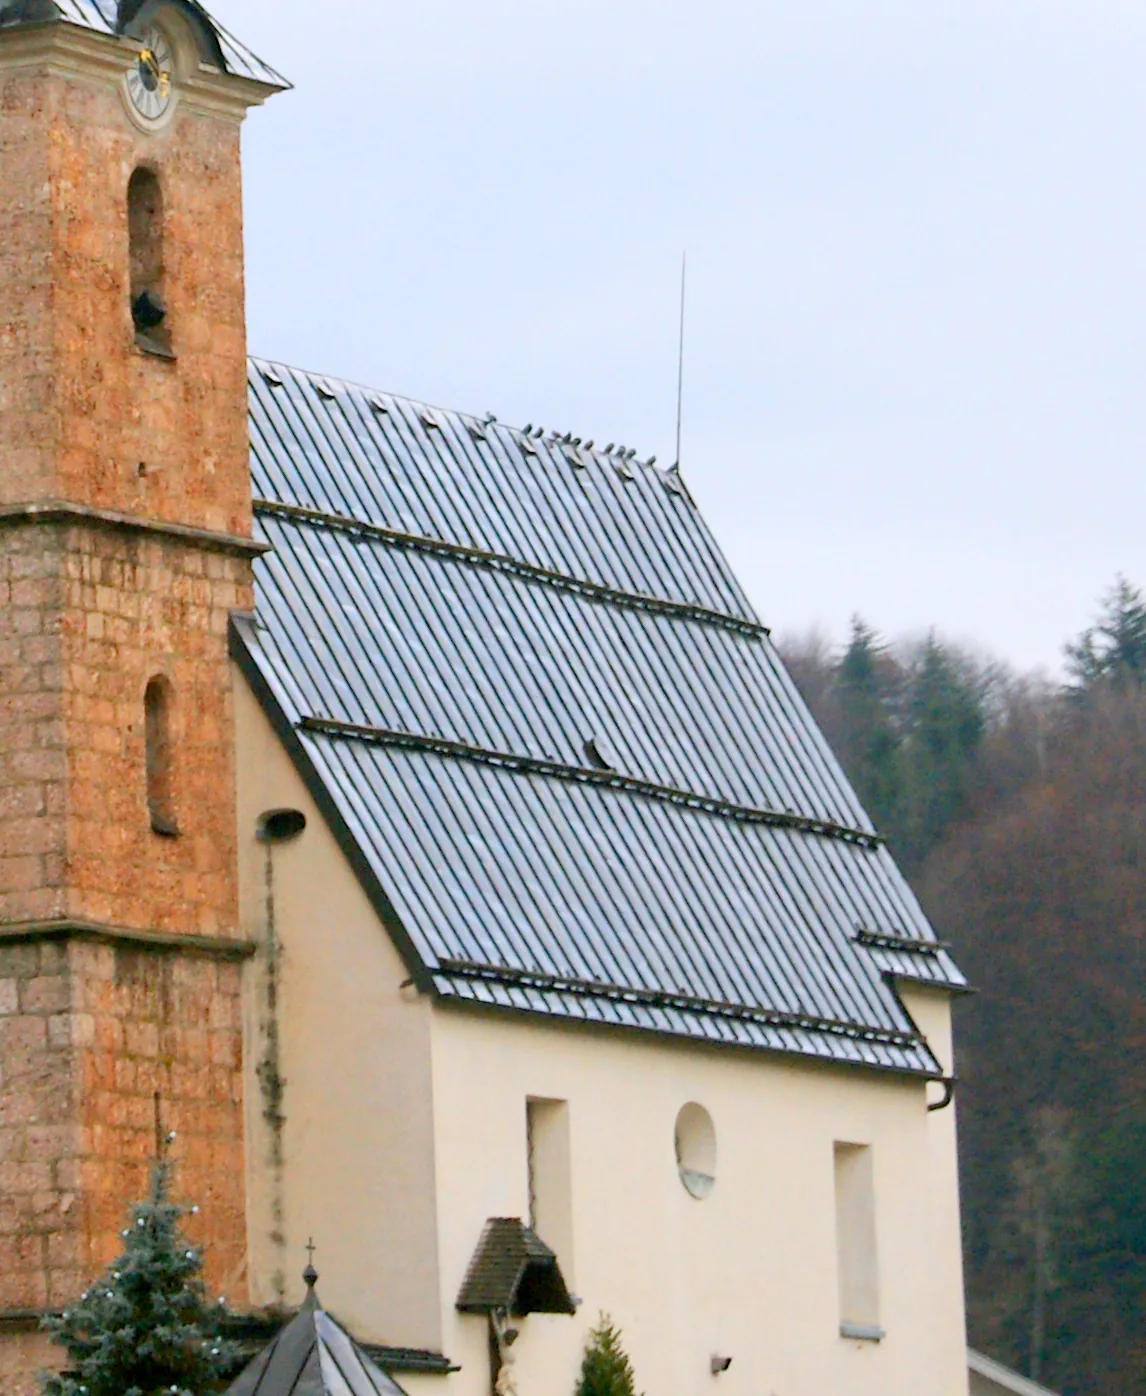
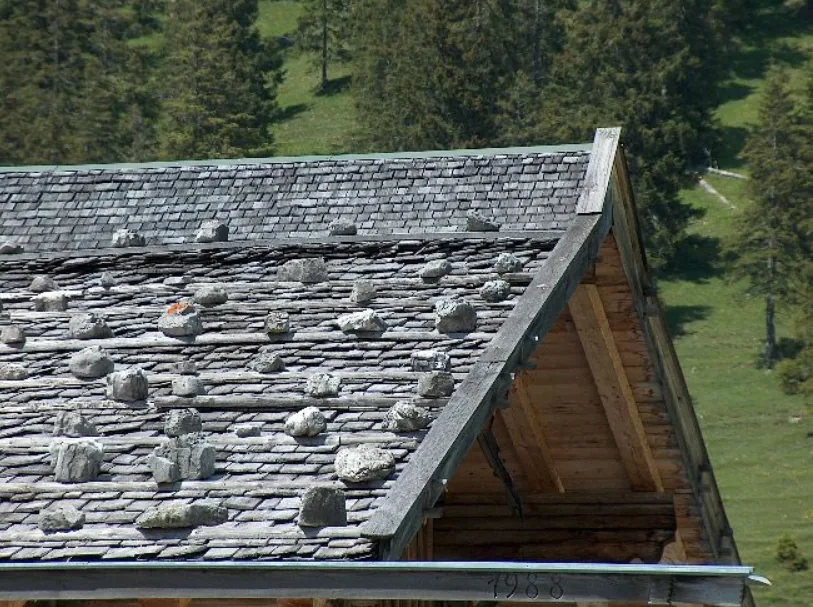
Once again, notice the multiple rows create a “Field” that holds snow and ice where it lands until it is completely melted. The original snow retention design concepts remain the same to this day however modern snow guards are very different in appearance.
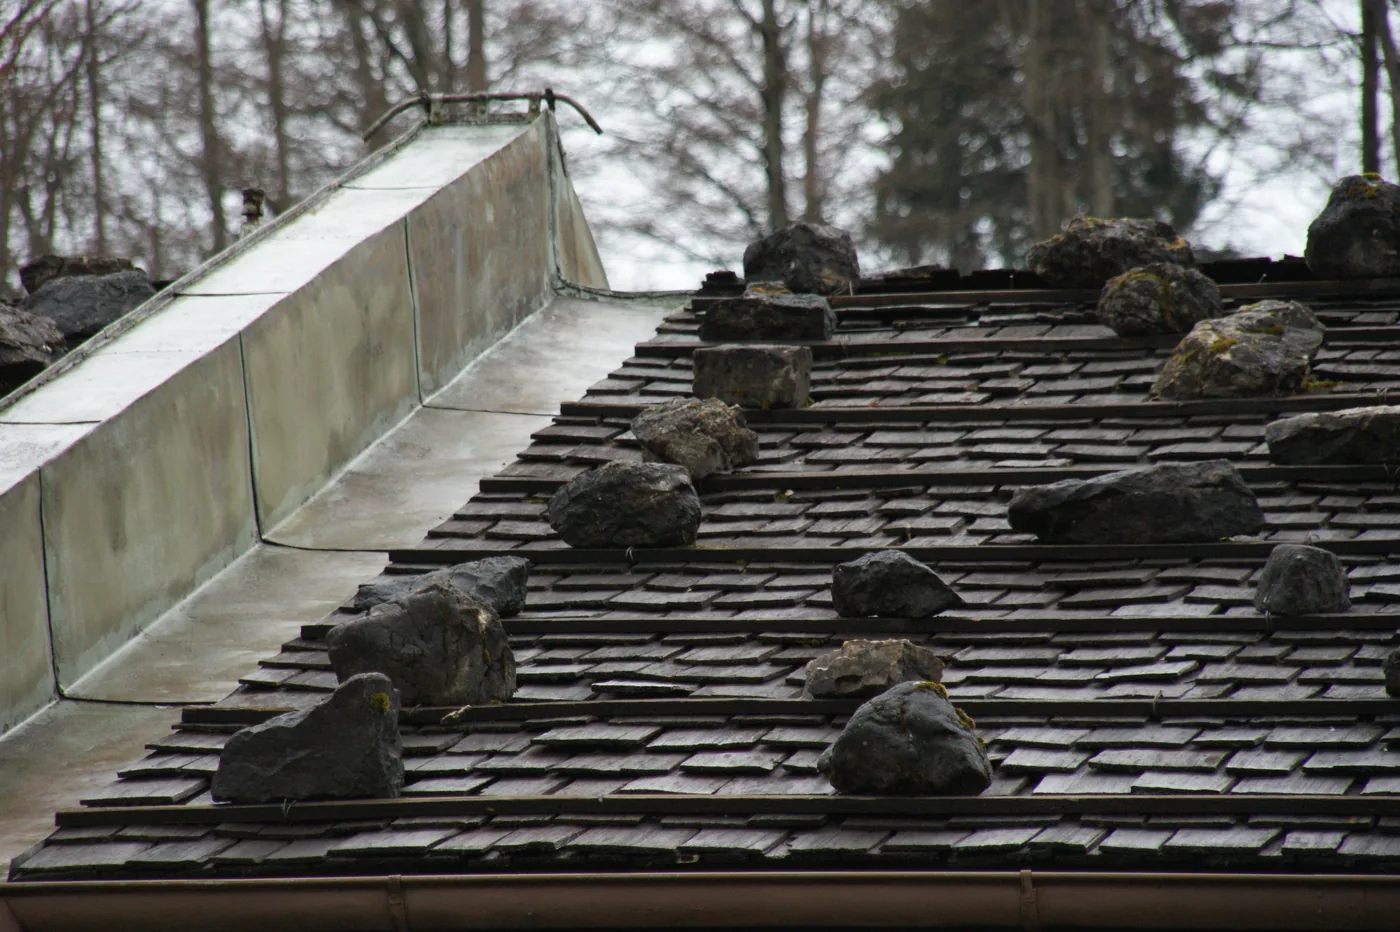 Another
example of an early “Field” layout using multiple rows of heavy
stones to prevent snow and ice from sliding.
Another
example of an early “Field” layout using multiple rows of heavy
stones to prevent snow and ice from sliding.
Why do modern metal roofs need snow guards ?
Modern metal roofs can shed accumulated snow and ice suddenly because their low-friction surfaces become even more slippery as meltwater forms between the roof panel and the snow. A properly designed snow retention system helps control that movement and reduce risks below the eave.
Today’s modern metal roof panel coatings are designed to be low-friction in order to self clean. However, this creates a huge problem when snow and ice accumulates on the roof. As the temperature increases, a layer of water forms between the roof panel and the snow. This allows the snow to rapidly release and slide down the roof. This causes countless personal injuries, millions of dollars in property damage, liability claims, and business disruptions worldwide.
Most metal roofs in areas that get snow should be protected against these slides by utilizing a properly designed snow retention system. In terms of overall cost vs. the damage prevented, snow guard systems are a tremendous value and one of the most important safety considerations for a metal roof.
-
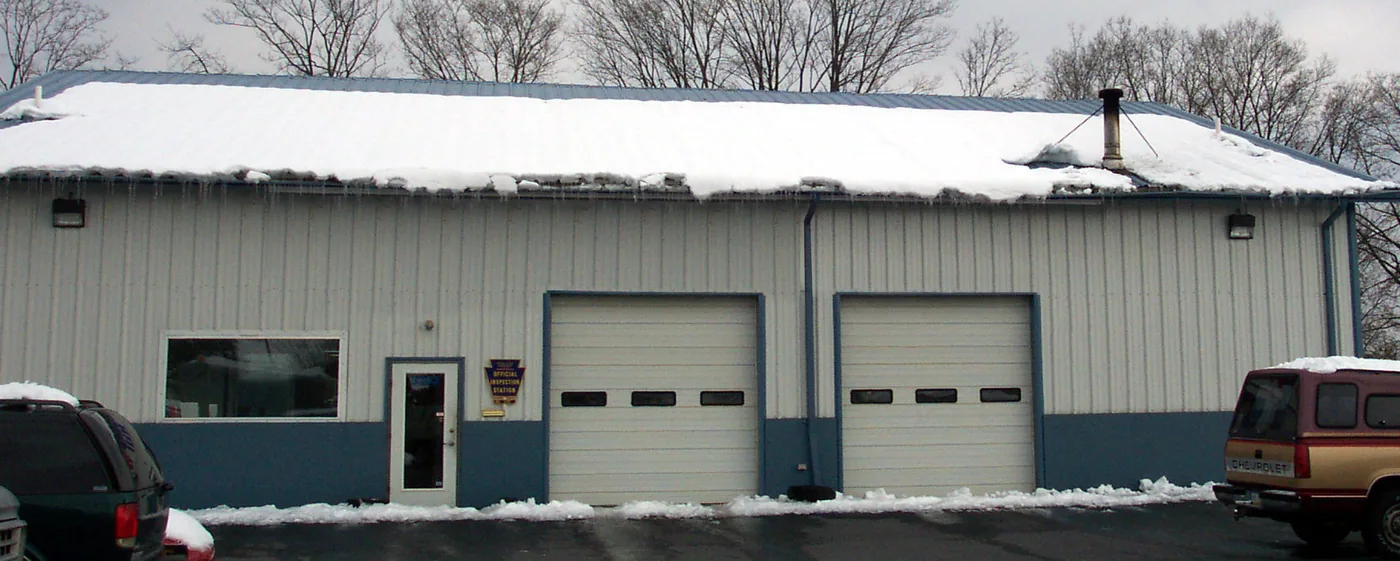
Just a few inches of snow and ice can cause thousands of dollars in property damage or kill an innocent pedestrian without warning. The majority of metal roofs in snow load areas are not adequately equipped to prevent these disasters. Fortunately, today’s snow guard systems can be designed for new construction or retrofit.
-
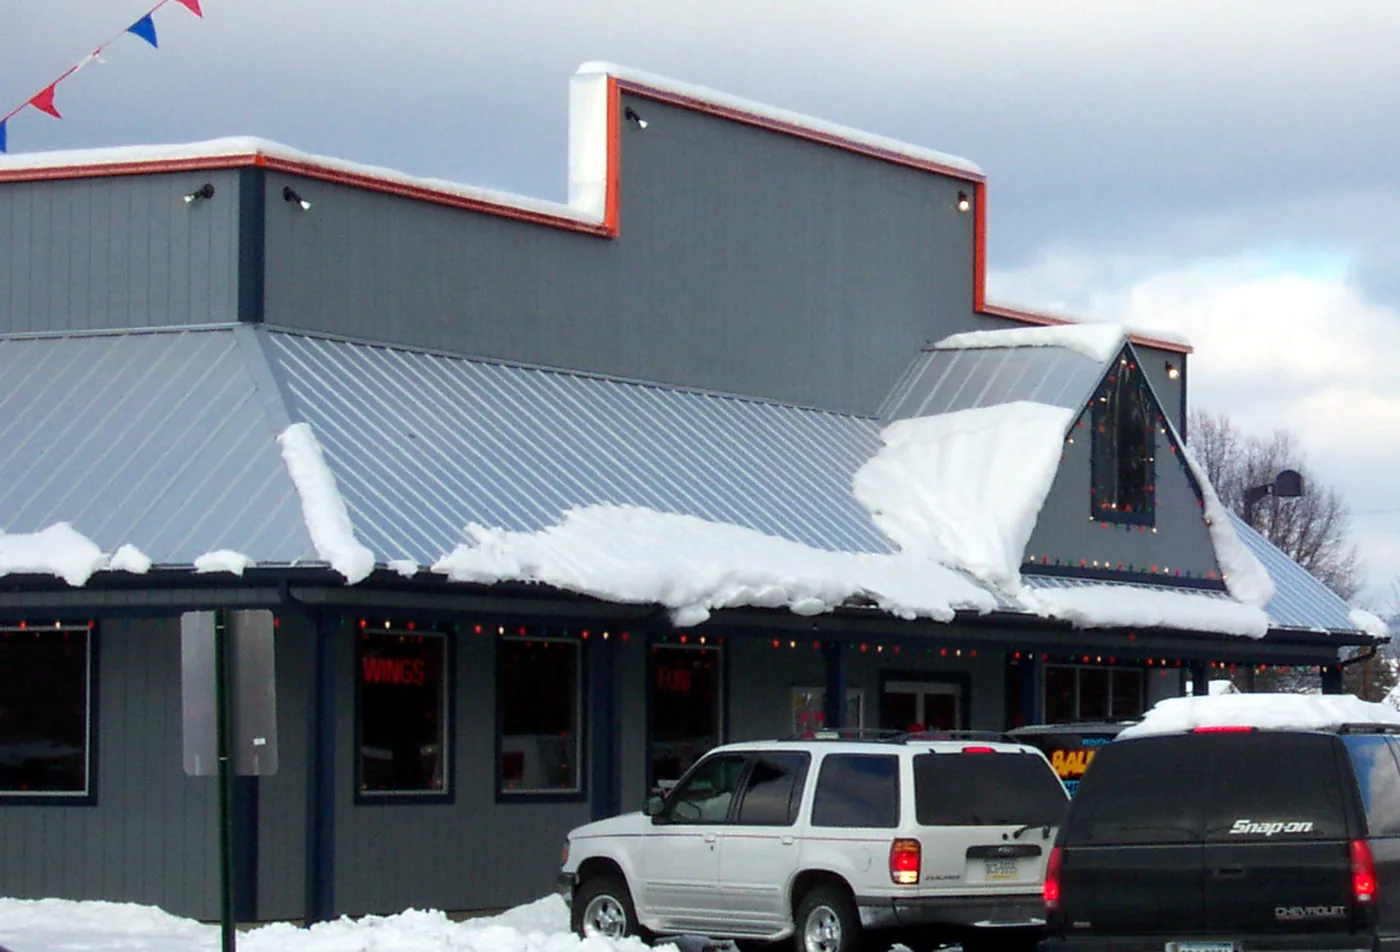
Although this eave is only a few feet high, it can still avalanche hundreds of pounds of snow and ice in seconds on a vehicle or an unsuspecting pedestrian. The building owner and the insurance company that underwrite this property have a responsibility to provide protection for pedestrians and employees.
The cost of one lawsuit or emergency room visit for a major injury could easily exceed the cost of a properly designed and installed snow guard system. However, the potential liability exposure could be in the millions if someone were to be seriously injured or killed.
-
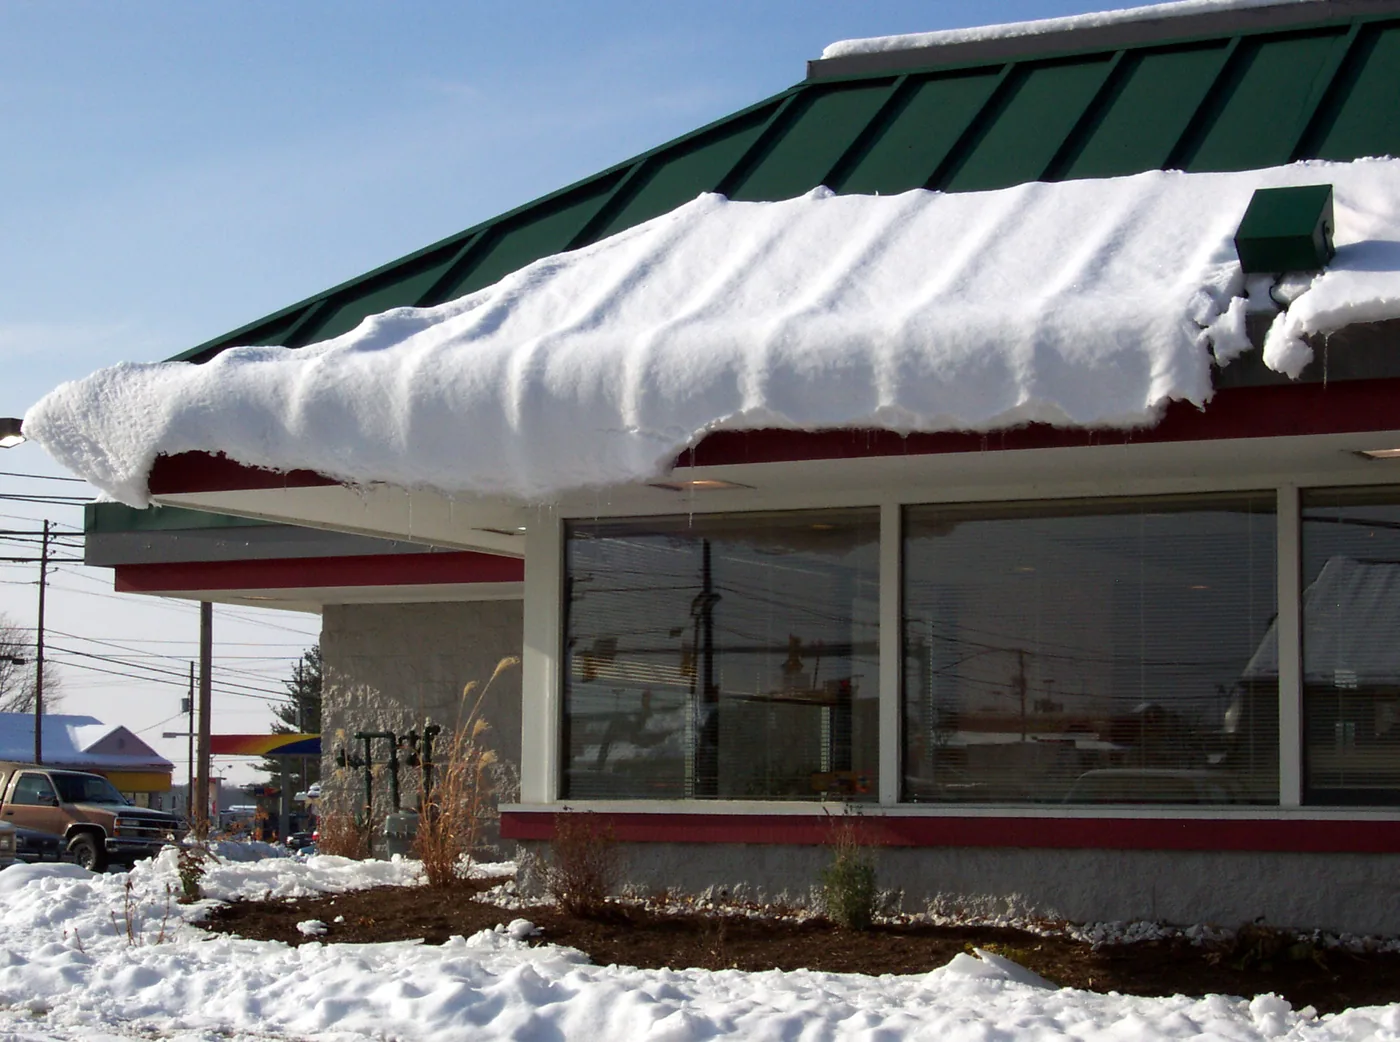
The extra overhang of this roof design helps minimize the danger to the windows from this curling snow. However, the light fixtures on the roof and the landscaping below are still at risk.
Snow Retention is sometimes overlooked in the building specification and sales process. Unfortunately, there are very few areas that mandate snow retention for metal roofs. It’s imperative that design professionals, property owners, insurance companies, and contractors be informed about how metal roofs shed snow and ice.
-
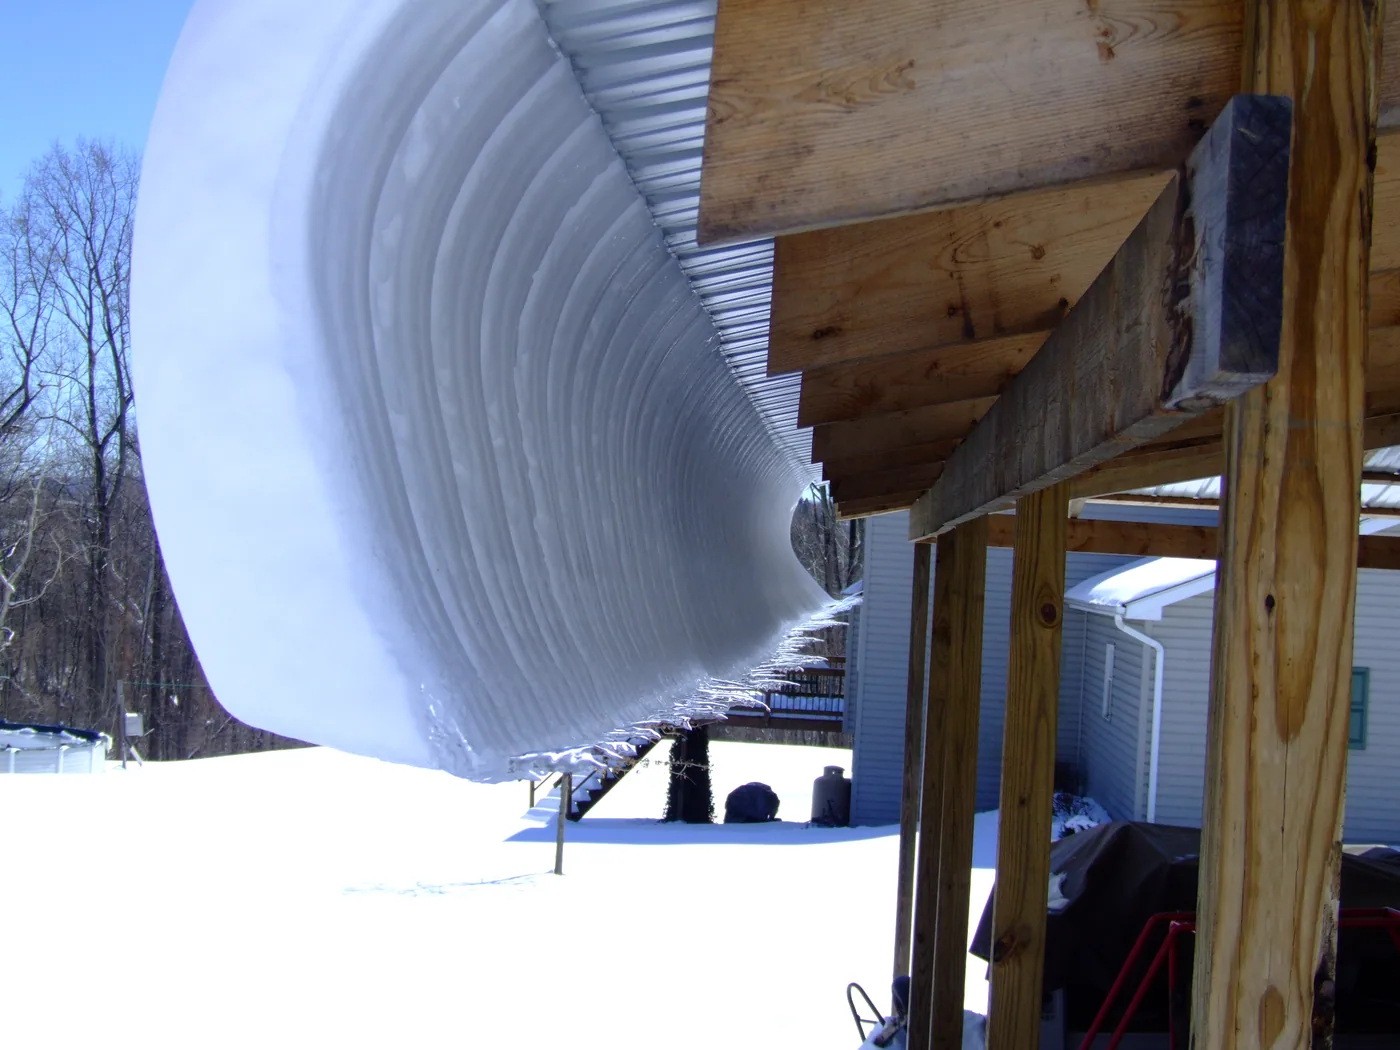
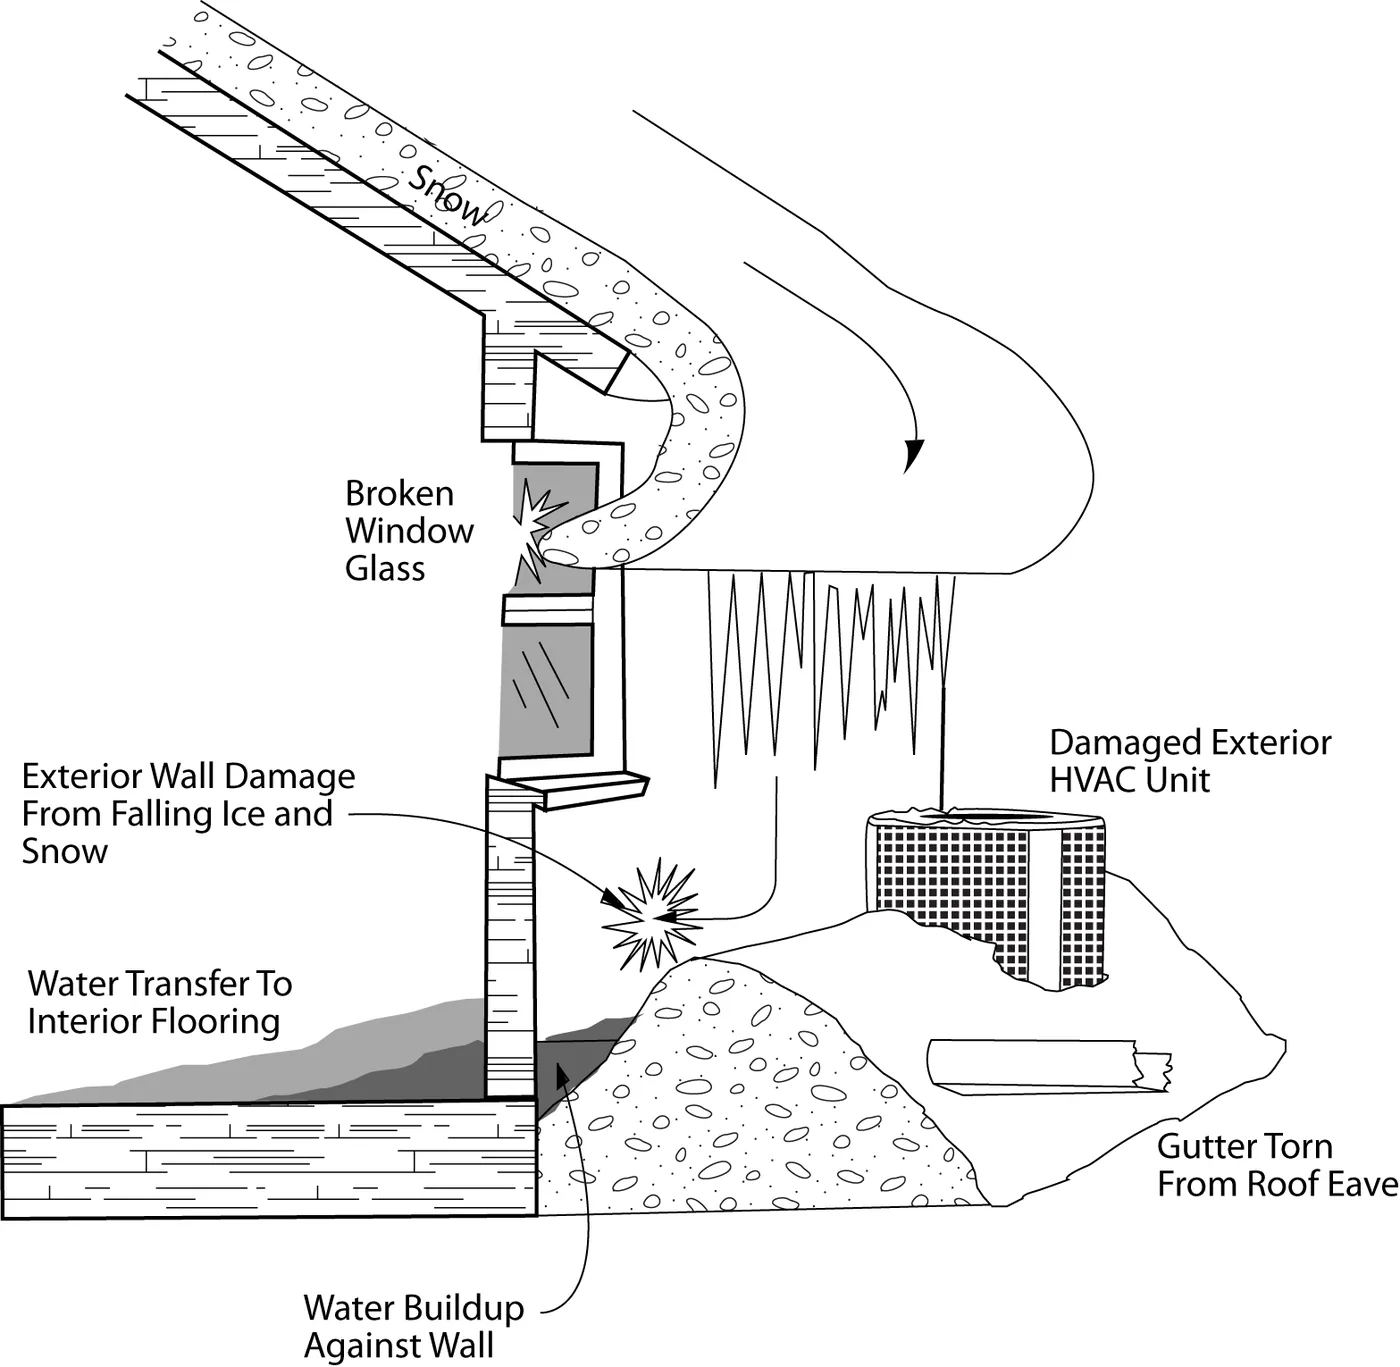
Curling snow develops from slow sliding snow on metal roofs. This dangerous occurrence can be avoided by holding the snow and ice on the roof until it can safely melt off.
-
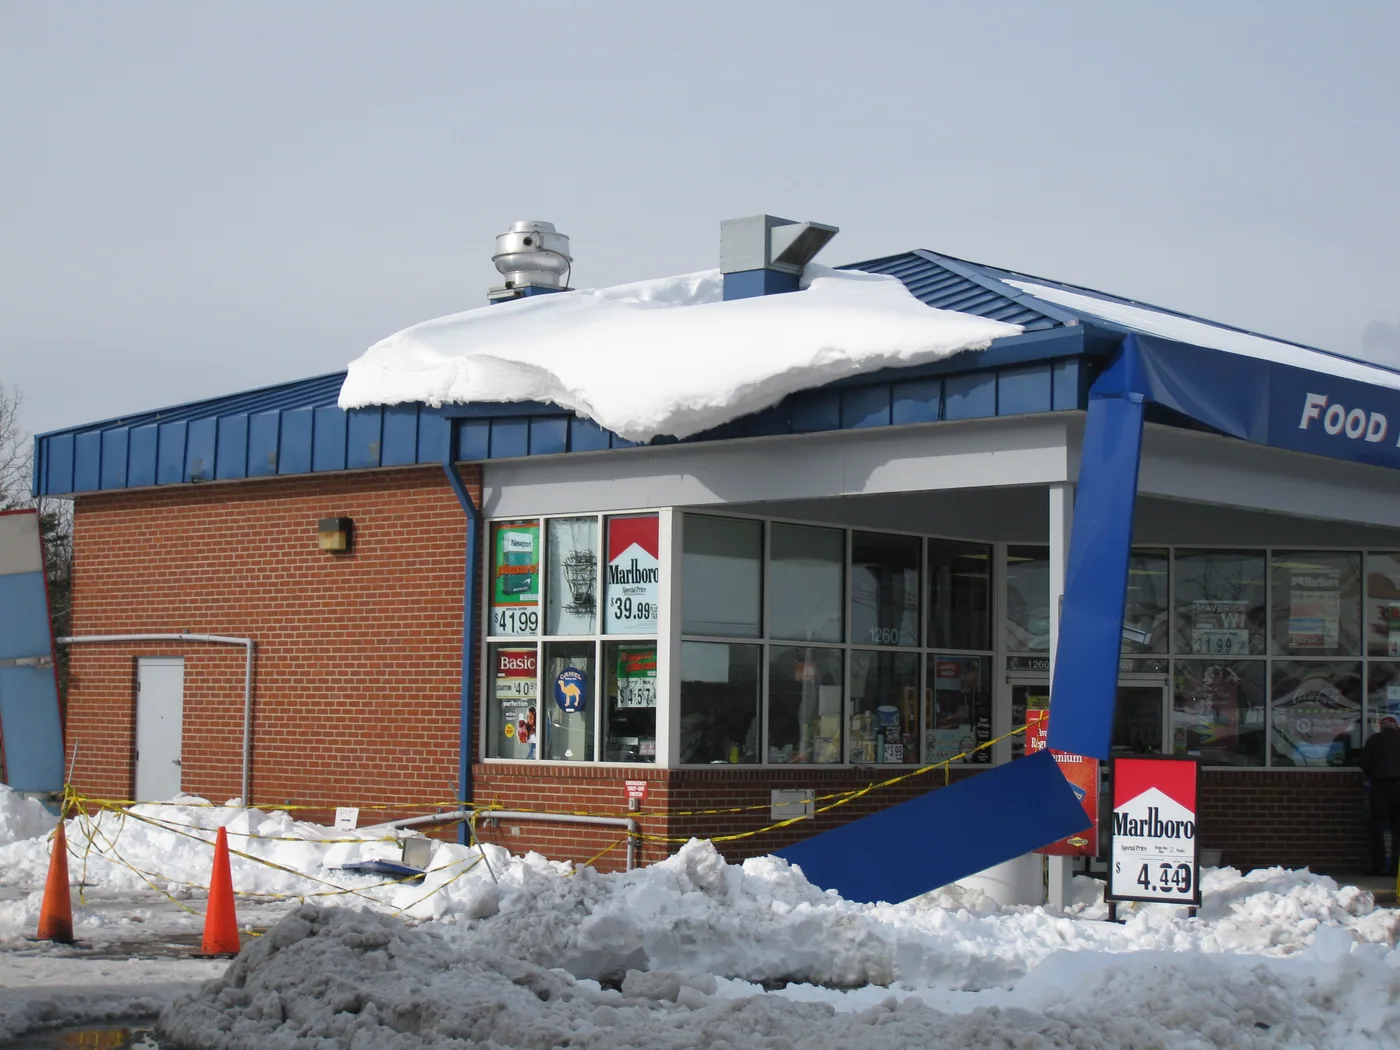
This building has sustained major damage from sliding snow and ice. A small investment in a properly designed snow retention system would have prevented thousands of dollars in damage.
-
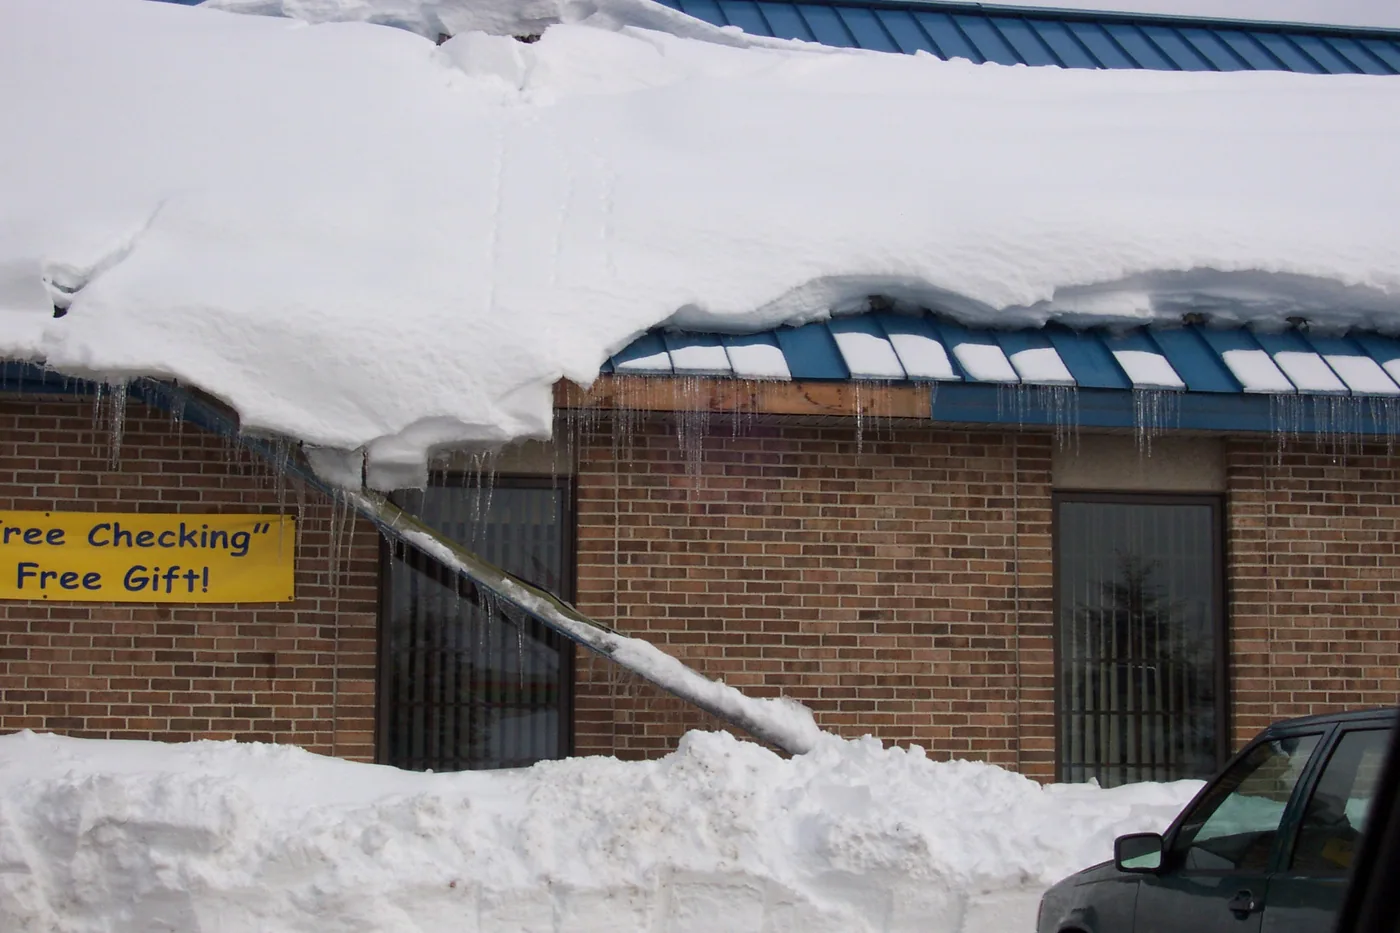
This gutter damage was a result of improper use of seam mounted snow guards. We will discuss this common mistake later in the course.
-
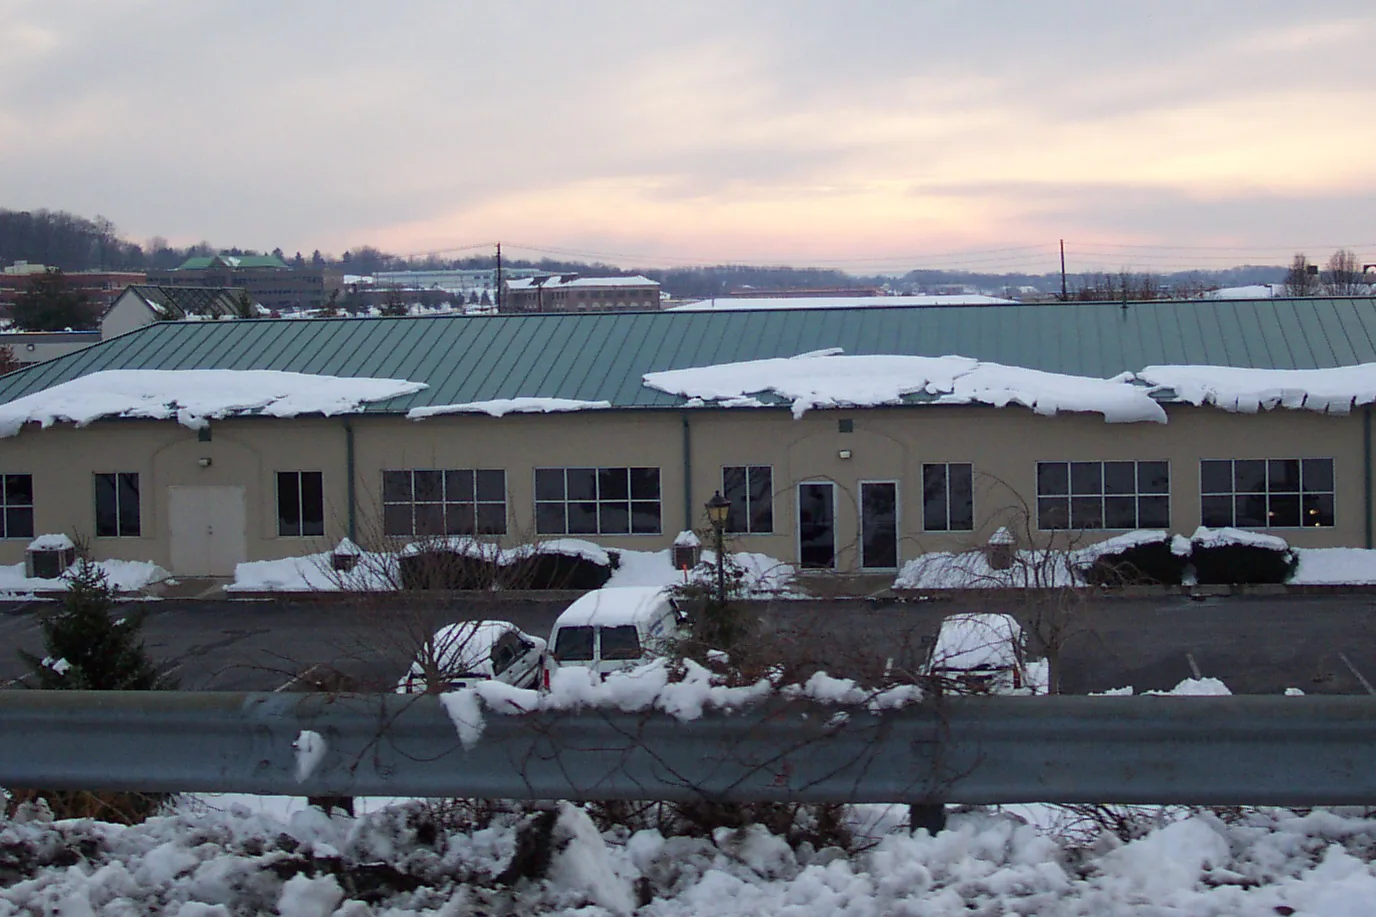
Unprotected roofs can experience snow and ice avalanches. This dangerous situation can result in gutter damage, ruined landscaping, vehicle damage or worse, pedestrian injury or death.
-
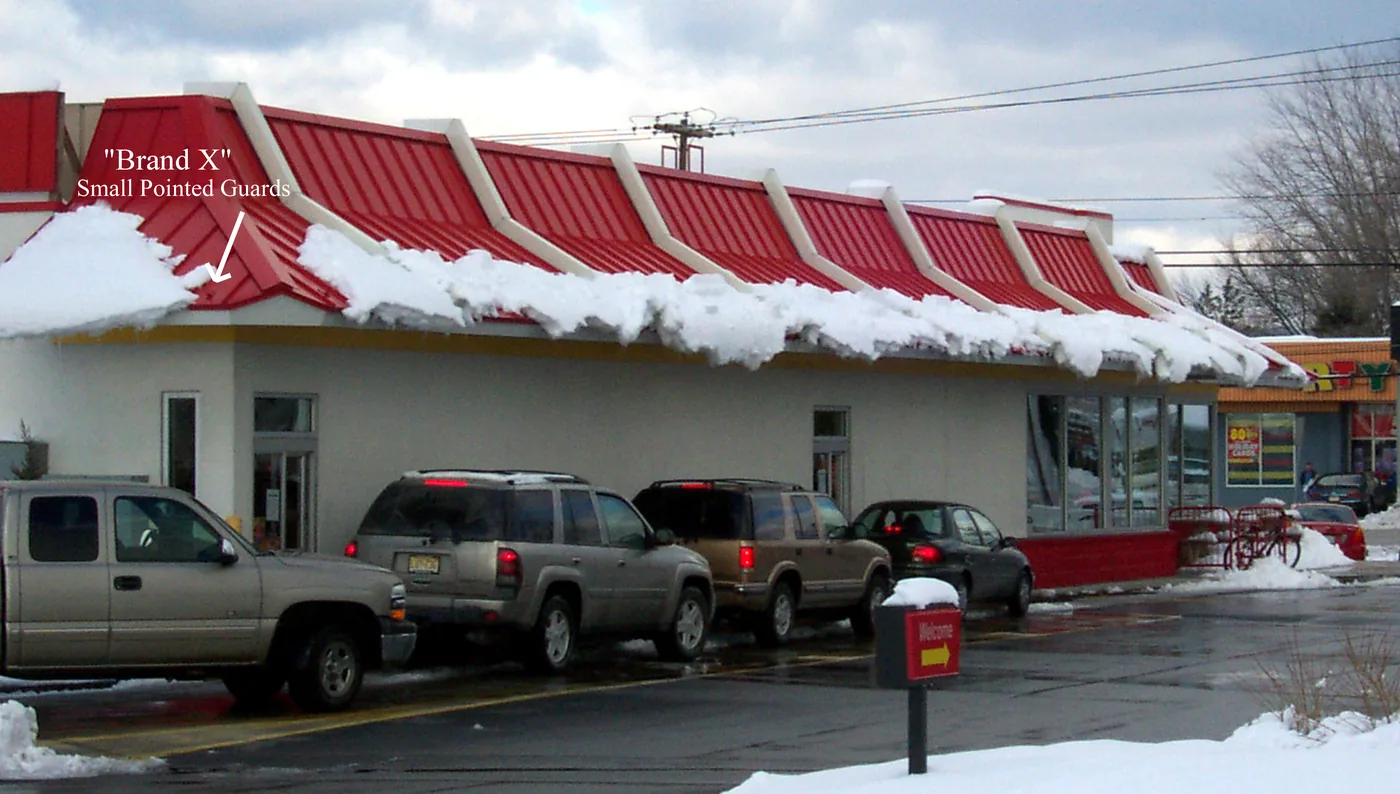
How many vehicles have been slammed by a chunk of snow or ice at this drive-thru over the years? In terms of liability exposure for the restaurant owner, a properly specified snow guard system is the most logical solution to this problem.
-
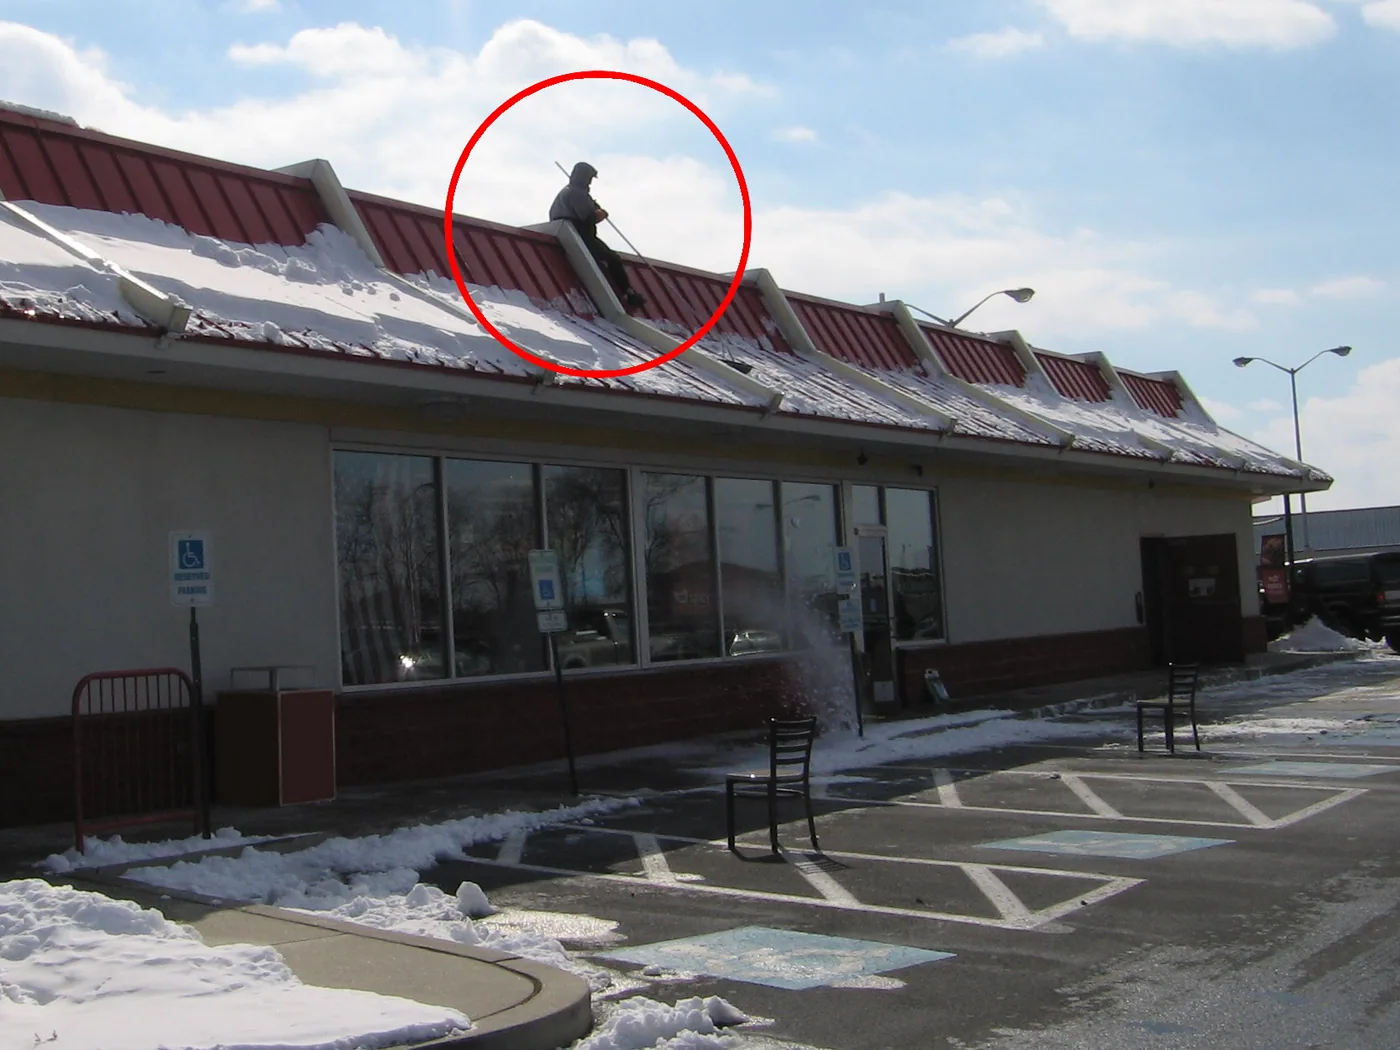
This is the same restaurant photographed from the opposite side of the building. The sidewalk is closed off during business hours while an employee hangs off the side of the roof to manually remove snow from the panels. This is another disaster waiting to happen.
-
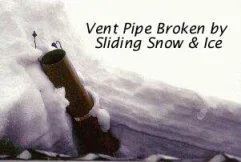
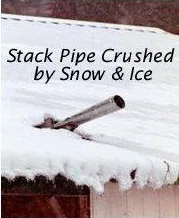
Vent pipes and chimneys are the most common victims of sliding snow and ice. Thousands are replaced annually; however the best solution is to fix the cause of the problem.
-
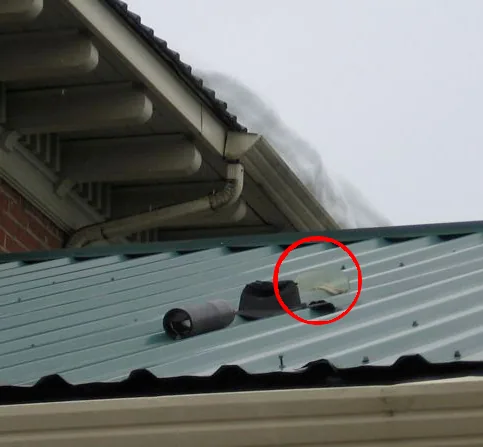
A broken vent pipe from snow and ice slides. Notice that there was some kind of snow guard upslope of the broken vent. Vent saving devices specifically designed for this application or a full snow guard system is the best solution to keep this from happening again.
-
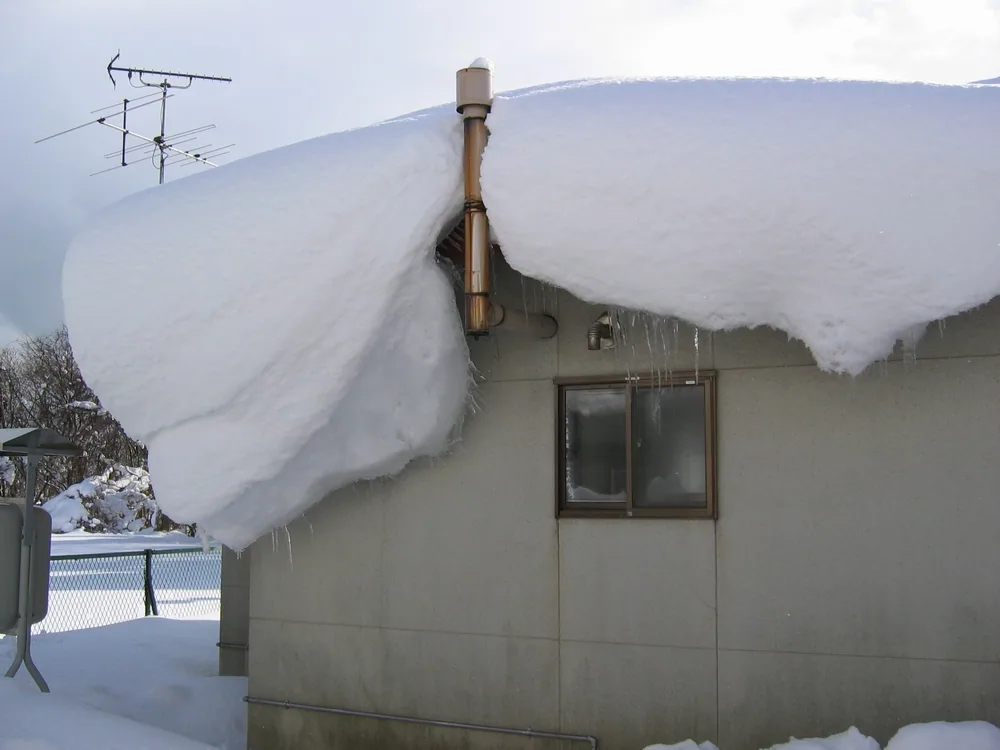
Specially designed, standalone vent and chimney protection devices are a great option to prevent damage to this chimney. We will discuss these later in the next section.
-
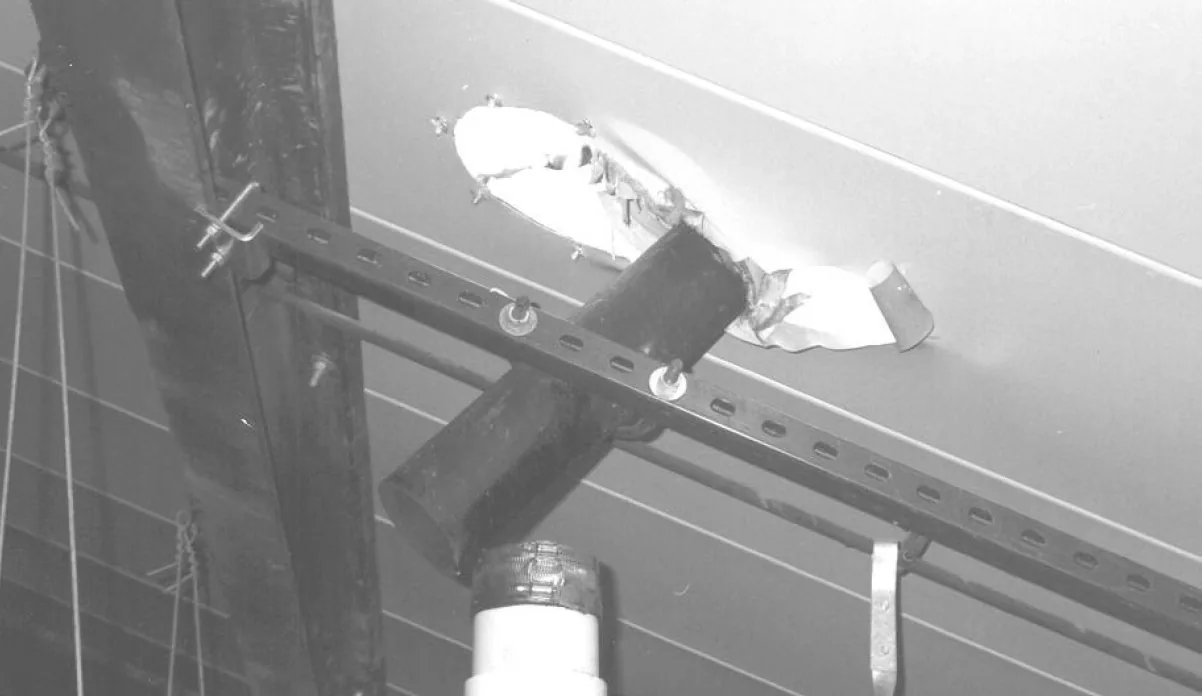
The U.S. Military documented this torn roof panel. This is the worst case scenario resulting from a plumbing stack failure from sliding snow and ice.
-
Metal roof panels ripped open by sliding snow and ice. Imagine the cost difference between a snow guard system and replacing this entire roof area.
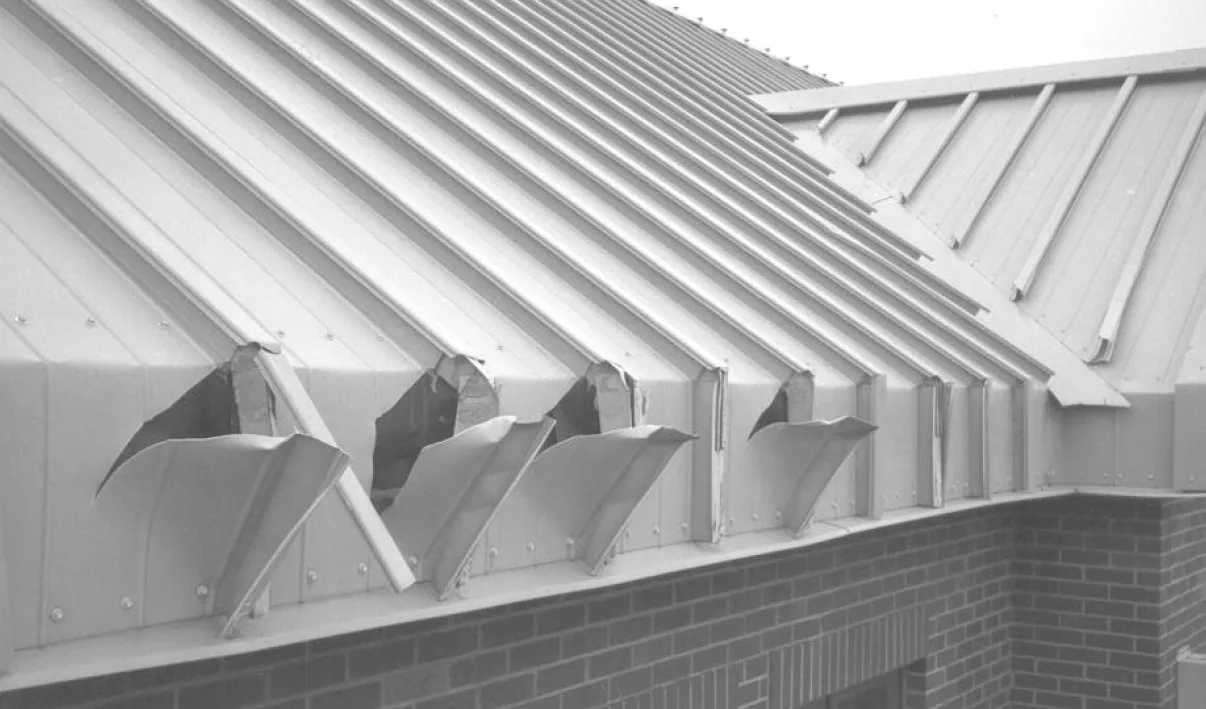
Snow retention has evolved greatly over the years, emerging from decades of limited attachment options. In just the last 35 years we have seen the introduction of injection molded polycarbonate snow guards, non-penetrating seam clamps, and adhesives designed to bond plastics to metals with incredible strength. Just as the metal roofing industry has grown and become a more financially viable option, so have snow retention products. Snow retention is still an afterthought to many, although it’s function is crucial. No other roofing component provides such huge benefits at such a small cost.
Let’s study some of today’s snow guard products and methods in Section 2.
Modern Snow Retention Products and Installation Methods
Let’s discuss the two main methods of modern snow retention. Pad style guards are used to create “Field” type layouts and Bar systems are used to create “Fence” style layouts.
Types of Pad Style Snow Guards
|
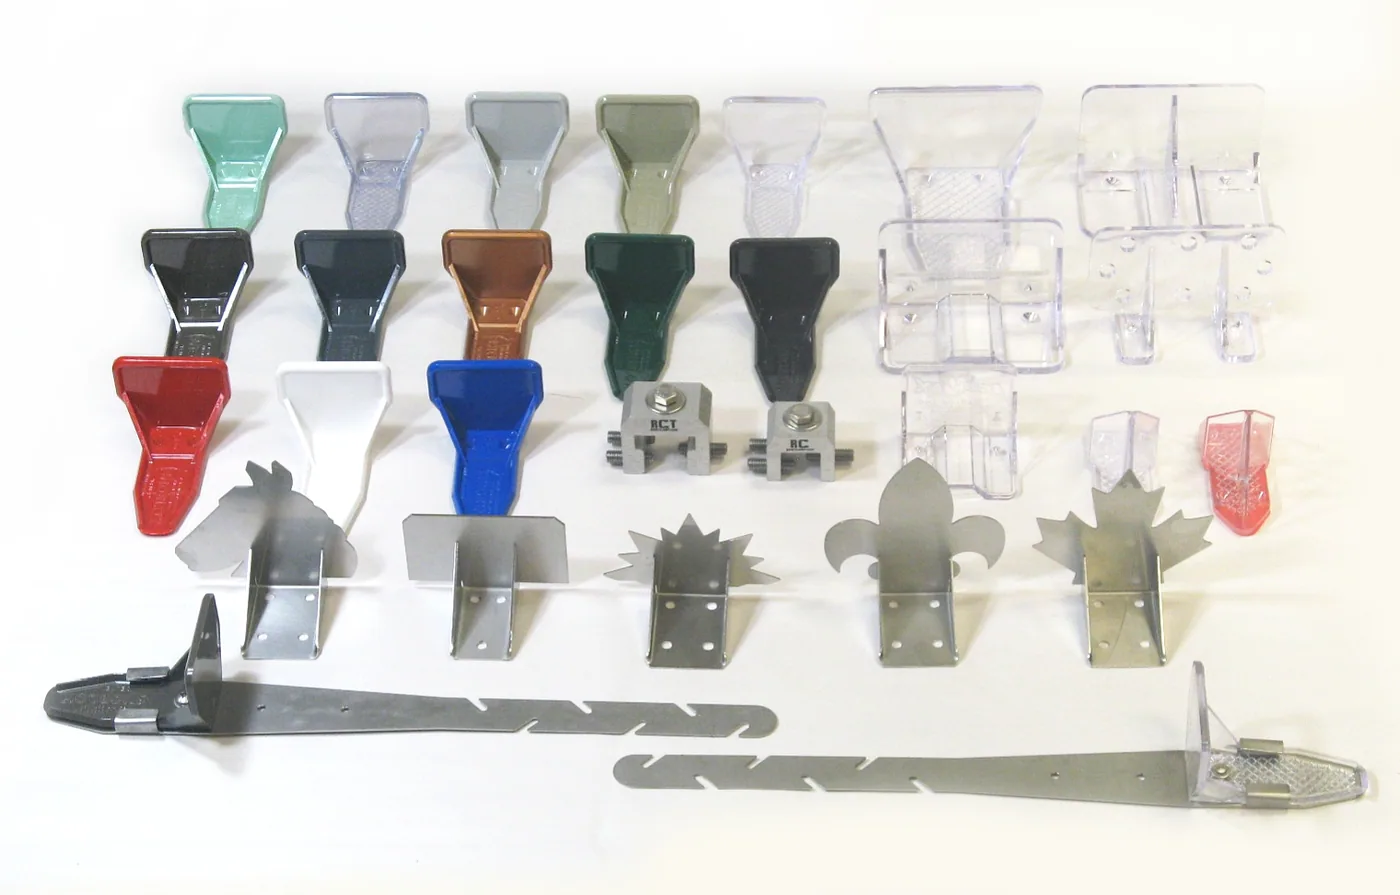
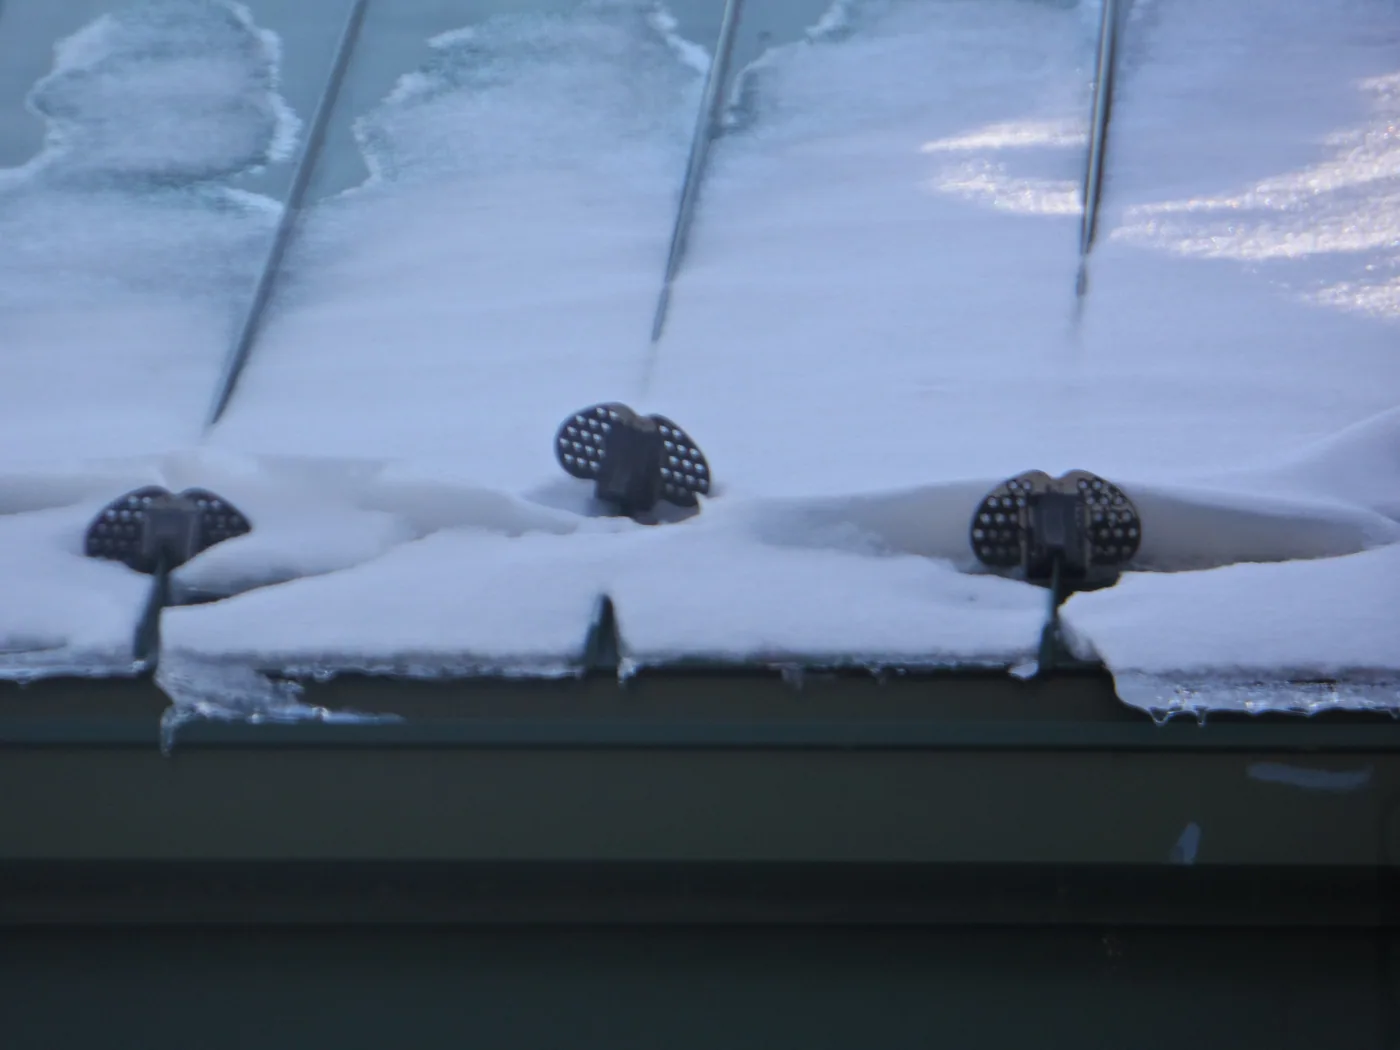
Snow guards are available in many shapes, sizes, styles, and colors. Some models are designed to hold the snow and ice on the roof until it safely melts. Other models minimize dangers by breaking up the snow and ice as it slides. Certain models are a universal fit while others are designed for specific panel applications. Let’s take a look at some of the snow guard options on the market. |
Polycarbonate vs. Metal
The most popular "pad style" snow guards are made of polycarbonate. Prior to 1976, snow guards were made of metal and sometimes led to serious corrosion problems on steel roofs. This was due to a dissimilar metal reaction that can occur between two different metal alloys exposed to the outside environment. To combat this problem in his own metal building business, a man by the name of Jack McMullen invented and patented the world’s first polycarbonate snow guard that truly revolutionized the snow guard industry.
Besides eliminating dissimilar metal reactions on metal roofing,
clear polycarbonate snow guards have other advantages. Once
installed, they are practically invisible and do not detract from the
building's appearance. The clear snow guards enable the UV rays to
transmit through the guard to assist in the curing of the adhesive
and/or sealants. They will never rot, rust or corrode and will
usually outlast the life of the roof.
Not all polycarbonate snow guards are created equal. There are many different grades of polycarbonate used to make snow guards. Prices can fluctuate based on the grade of polycarbonate and where they are made. Products that are not lab tested with published test results are usually cheaper and are unpredictable in the field. This is because cheaper grades of polycarbonate are used to keep the cost down and the profit margin up. Reputable manufacturer's use a UV stabilized, virgin grade, Lexan® or equal quality of polycarbonate to ensure the product will last the life of the roof.
Snow Guards that are made of stainless steel do not get brittle
like cast aluminum guards and are one of the strongest "pad
style" snow guards in the metal category.
Independent lab testing shows that they still are not as strong as
polycarbonate because they tend to bend permanently when overloaded.
Testing proved that most UV stable polycarbonate snow guards are semi
flexible and will return to their original shape when overloaded.
There are some polycarbonate guards that have been tested to
withstand over 6,000 lbs. of sheer force in the testing lab.
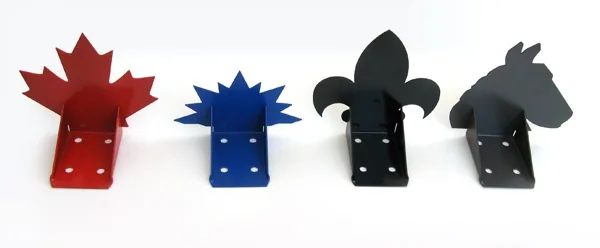
Decorative
metal snow guards are a good choice cosmetically and can be
powder coated to color match the roof, however these guards are
limited to screw down attachment and should only be used on non
floating mechanically fastened metal roofs. Polycarbonate snow
guards are universal in nature and are generally stronger, less
expensive, may be glued or screwed, can straddle minor ribs, and are
available in many stock colors.
Pad Style
Pad-style snow guards are individual retention devices that work together as a system. In this course, they are intended to be arranged in staggered rows that create a Field pattern rather than a single straight line.
The oldest and most popular snow guard design is the "pad style" snow guard. "Pad style" snow guards are individual snow retention products that are mounted in the lower portion of the roof panel and work together as a complete system to protect the roof from snow slides. "Pad style" guards are most commonly made from UV stabilized polycarbonate, stainless steel or cast metal. Some other materials used to make "pad style" snow guards are bronze, copper, aluminum and mild steel.
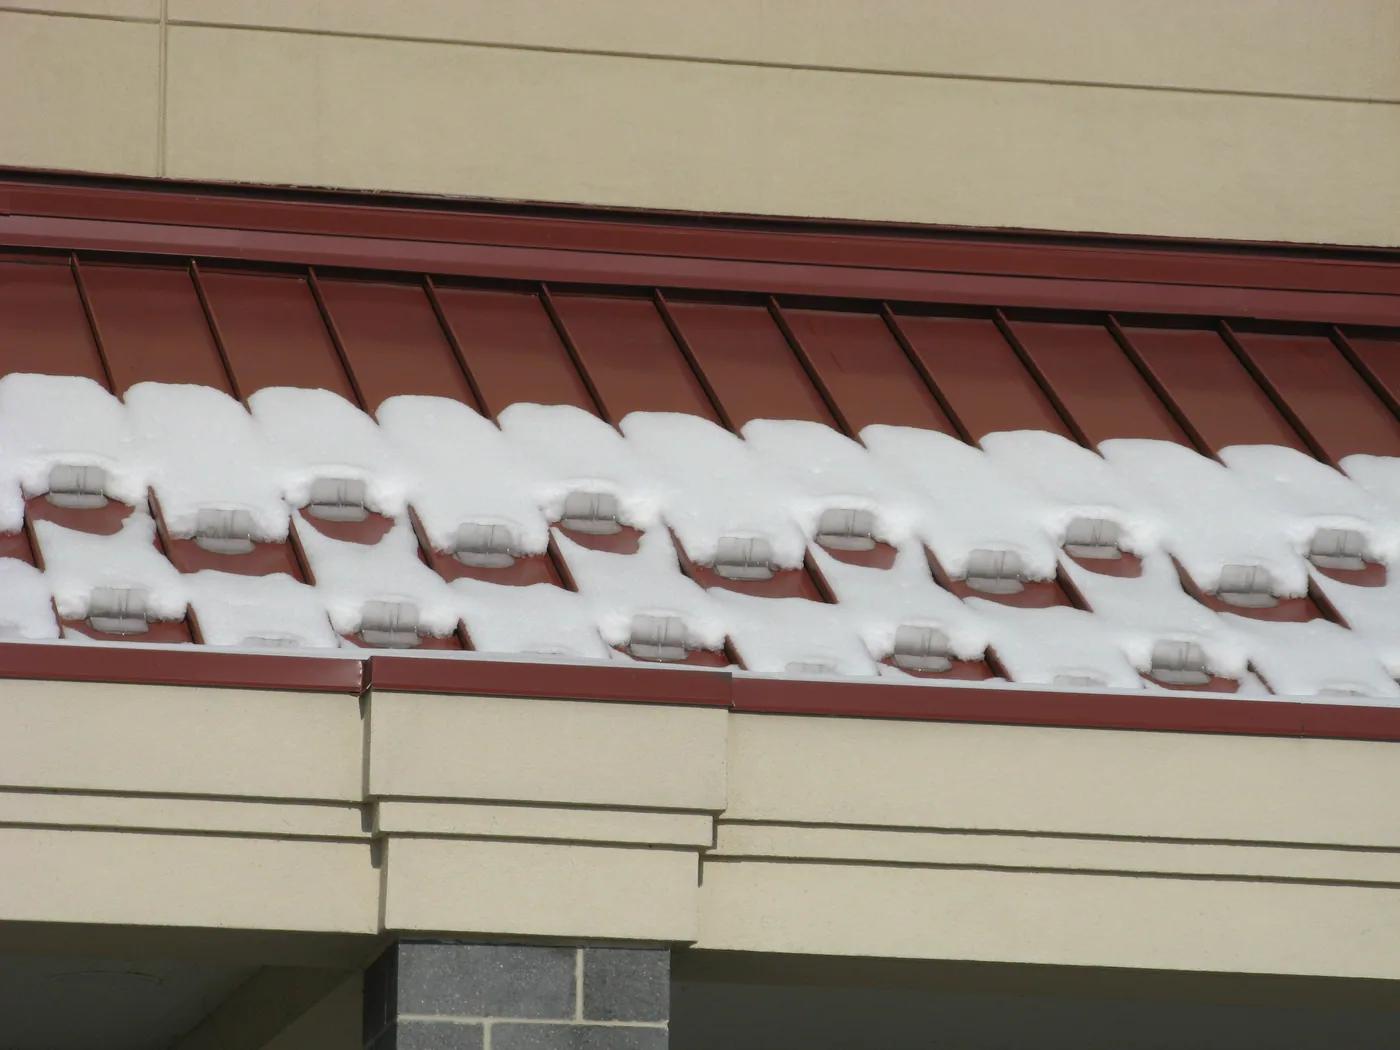
Most pad style failures result from improper layout. They should always be used in staggered rows that create a “Field”, not in a straight line that creates a “Fence”.
|
|
|
Take notice how the staggered pattern effectively holds the snow and ice in place, protecting pedestrian traffic and the cars below. |
"Pad style" snow guards historically have been the most widely used product of the snow retention industry. When designed properly in a “Field” pattern, they are very effective at holding snow and ice. |

"Pad Style" Features To Consider
Strength.
A snow guard should never be used on a project unless it has been professionally tested by an unbiased third party testing facility. Any reputable snow guard manufacturer should willingly provide and/or publicly publish those test results. Without testing, there is no way to determine if the guard being considered for the project will be appropriate for a specification with a load-based safety factor.
Shape.
Verify with the manufacturer that the guard specified is the best choice for the particular roof panels being installed.
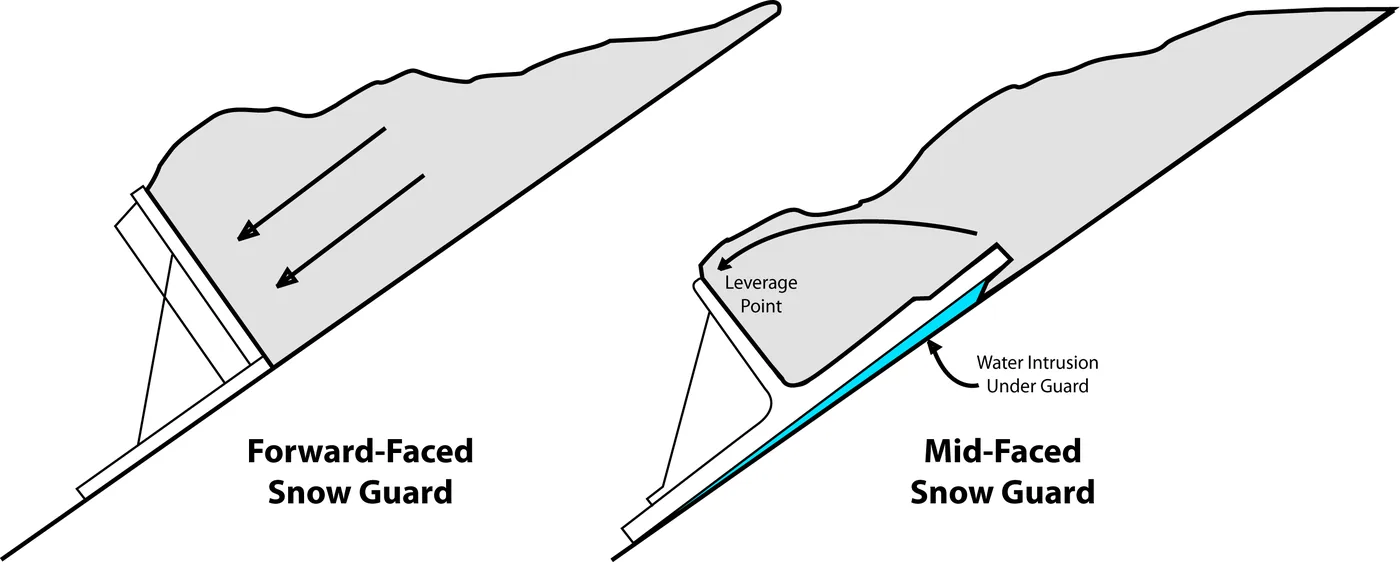
Guards with flat, forward mounted faces tend to have better leverage against heavy, sustained snow loads. The faces should be perpendicular to the roof panel for maximum holding strength. Mid-faced snow guard designs tend to allow the load to leverage the front of the base up and away from the attachment point.
Faces that are pointed, angled, or sloped tend to "slice" the snow and ice into smaller pieces and usually don't retain it on the roof very long.
Guards are most effective when mounted down in the center of the roof panel, where the snow and ice actually moves. For maximum holding strength, many models are designed to mount on a flat surface or straddle over a minor rib to stay centered in the flat portion of the panel.
Attachment Methods.
Adhesive: The development of modern construction adhesives have paved the way for the polycarbonate snow guards to become one of the fastest growing snow retention segments in the world. Adhesive mounting is considered by many experts to be the safest mounting solution to avoid panel damage.
|
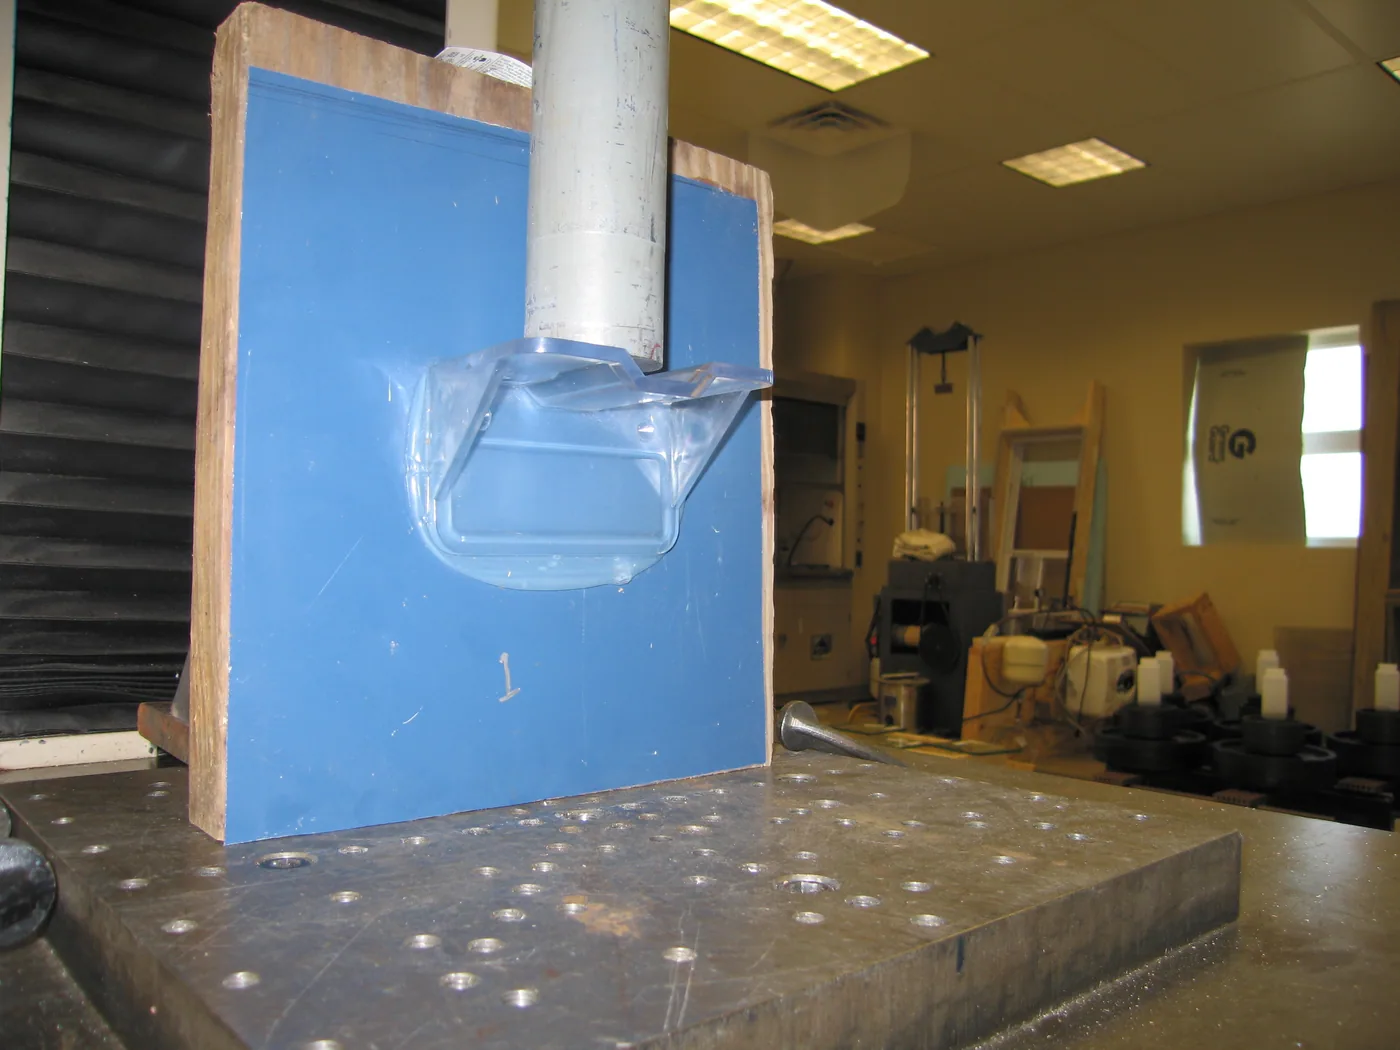
Architectural Testing, Inc. (ATI) tested this adhesive mounted polycarbonate snow guard to 1,561 lbs. |
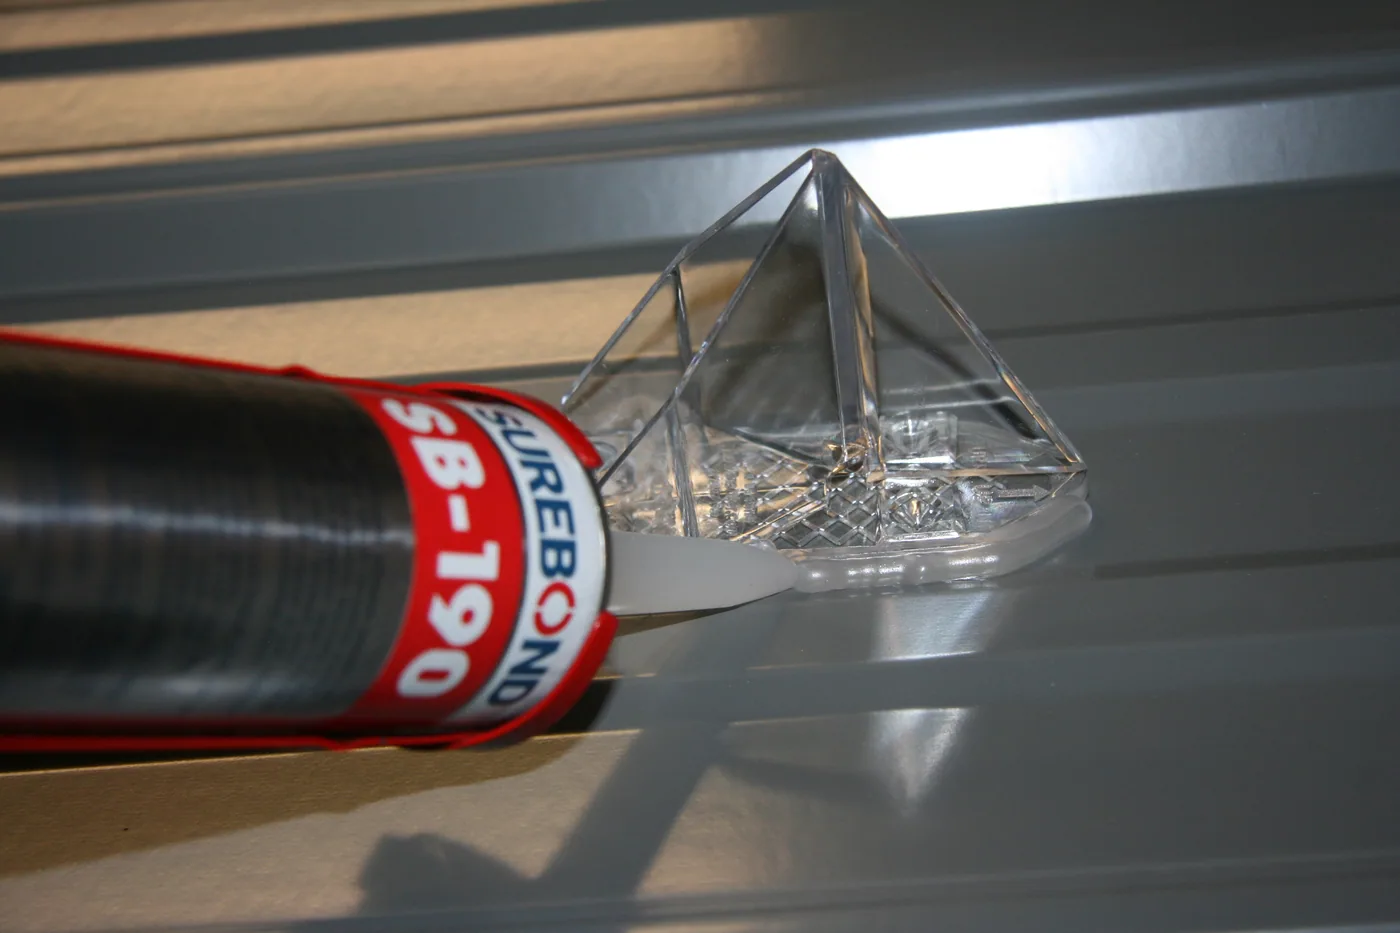
After testing many adhesives over the years, the best performer continues to be Surebond SB-190 due to its 2,000lbs./sq. inch tensile strength and 500% elongation. This adhesive creates a chemical bond as it cures to the polycarbonate and is safe to use on most factory painted roof panels. Once installed, Surebond reaches 90% strength in 14 days above 50°F, and has a minimum application temperature of 50°F.
This is the most versatile type of attachment and the least
likely to cause damage to the roofing panel if the guard becomes
overloaded. Generally, the worst that can happen, if overloaded, is
that the guard will release from the panel harmlessly. The snow
guard can then be re-attached in the same spot without adverse
effects to the roof or the guard.
Clear polycarbonate "pad style" guards can be attached with Surebond SB-190 on just about every panel manufactured today, except round corrugated panels, EPDM style membranes, slate or shingle style panels. Glue down guard systems are just as strong and effective as any other type of snow retention if they are properly designed and installed using a professional layout. Although adhesive attachment may require several more staggered rows, it is often the safest and least expensive option.
Mechanical: "Pad style" guards can also be mechanically fastened with a non-corrosive #14 neoprene washered screw. A silicone sealant or a foam pad must be applied to the underside of the guard to create a weather tight seal. A screw down snow guard system is a great choice for exposed fastener roof panels such as the popular 9” and 12” R-panels. This type of attachment is as old as metal roofing itself, however there are some things to consider. Screws must be driven into at least 2” of solid structural wood, a metal purlin, or at least 2” of wood blocking. The metal panels alone will not hold the screws and the guard will eventually pull out, leaving holes that could be a catalyst for roof leaks. Use an exterior grade, all-weather sealant that can be applied at low temperatures on the underside to keep water from forming under the guards. If water would be allowed to form under the guard it could potentially freeze and pop the guards off the roof. According to independent ATI lab tests, screw down guards are able to hold 300%-400% more snow load than adhesive mounted guards, so fewer rows may be necessary with this system design. Always remember that on longer roof slopes, multiple rows are important to stop the snow and ice movement before it begins.
|
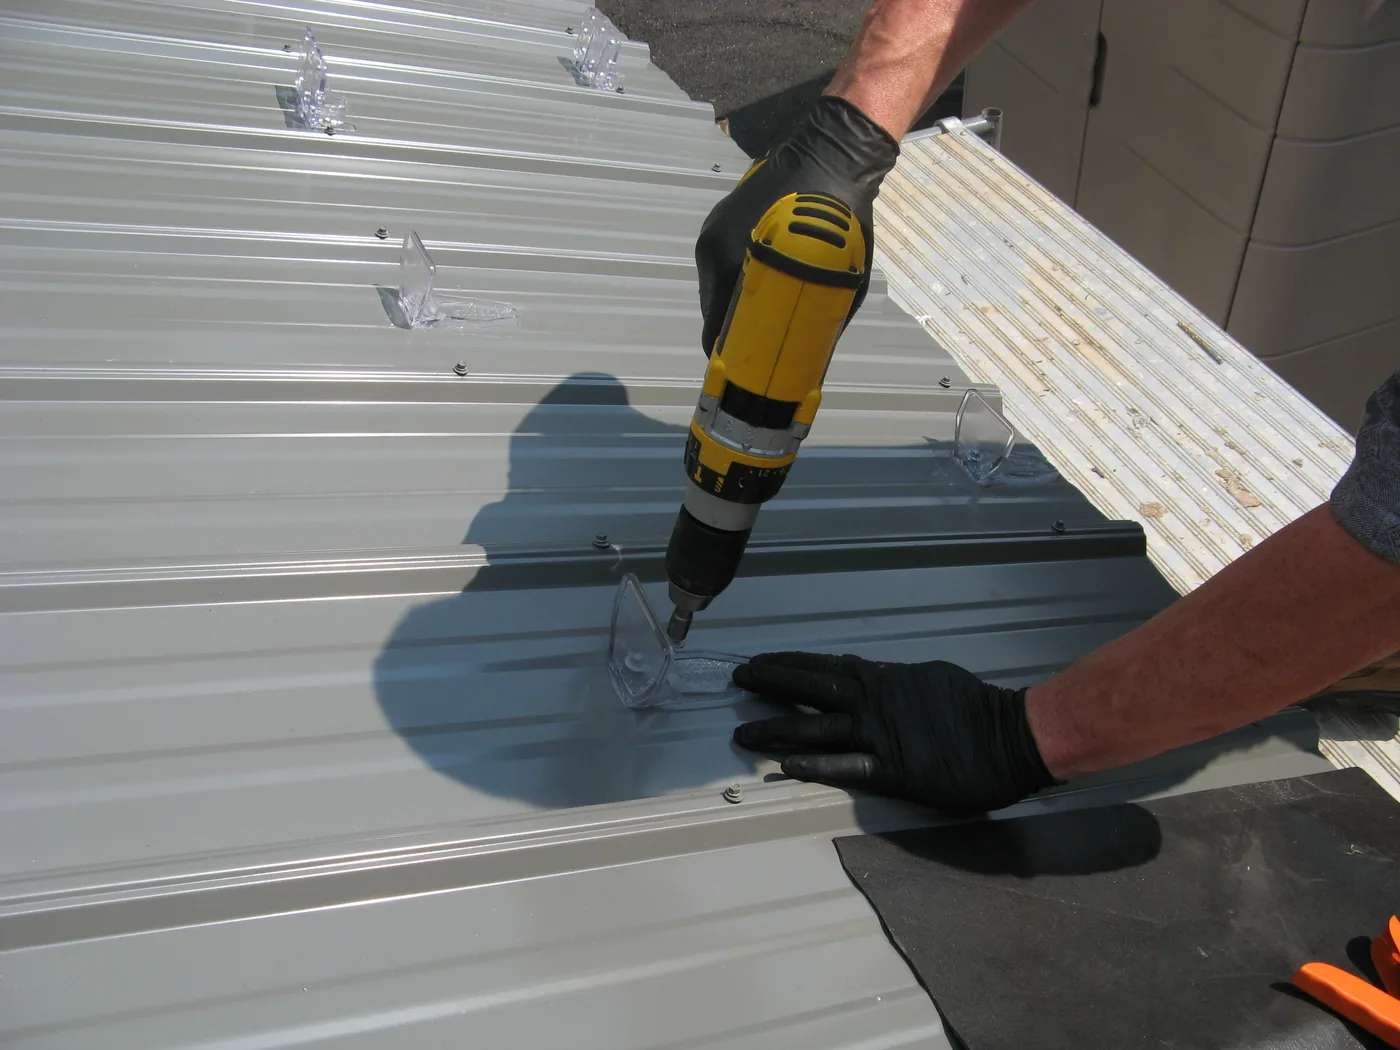
Typical screw-down installation using #14 galvanized screws with neoprene washers. Silicone sealant is important to prevent water from getting under the guards and causing leaks or unsightly mold spots. Notice that the rows are staggered where the screws go into the purlins. |
3M VHB Tape: Another type of adhesive attachment is 3M VHB, 2-sided, acrylic, pressure sensitive tape that is used in conjunction with SB-190 to seal around the perimeter. While this type of attachment seems attractive and simple, it is considered a "light duty" adhesive application, but is a viable option for colder weather installations. This attachment method should only be used with a pointed snow guard that breaks up snow and ice. Snow guards with flat faces are designed to hold the snow load for longer periods therefore they need a much stronger adhesive such as Surebond SB-190.
Here is a pointed snow breaker style guard being installed with clear VHB tape with a bead of Surebond SB190 around the perimeter. The Surebond adds additional shear strength and the VHB holds the guard securely in place while the adhesive fully cures. This attachment method is highly recommended for all VHB installations but should only be used on pointed guards that break up snow and ice. This technique is commonly used for cold weather installations and is better than just using VHB by itself but not as strong as using Surebond on the entire underside.
Seam Mounted: Individual seam mounted snow guards are sometimes a popular choice due to the ease of installation. However, individual guards are mounted on the seam above the flat panel area where the snow and ice actually moves. They are not as effective at stopping the movement of snow and ice as snow guards mounted in the center of the panel.
As snow melts, it is pulled into the lowest part of the panel by gravity where it can slide under or beside a high seam mounted snow guard. The wider the standing seam panel, the less effective this style of snow guard is at holding snow. Since the snow and ice can actually twist these guards as it slides by, seam damage is more likely to occur. The most effective type of seam mounted snow guard system uses a series of bar with ice stoppers that extends down to the panel to block the snow and ice from sliding.
|
In this example, multiple rows of seam mounted snow guards still can’t prevent snow and ice from sliding dangerously into the parking lot. Adding a series of pad style guards mounted in the center of the flat could help prevent this problem in the future. |
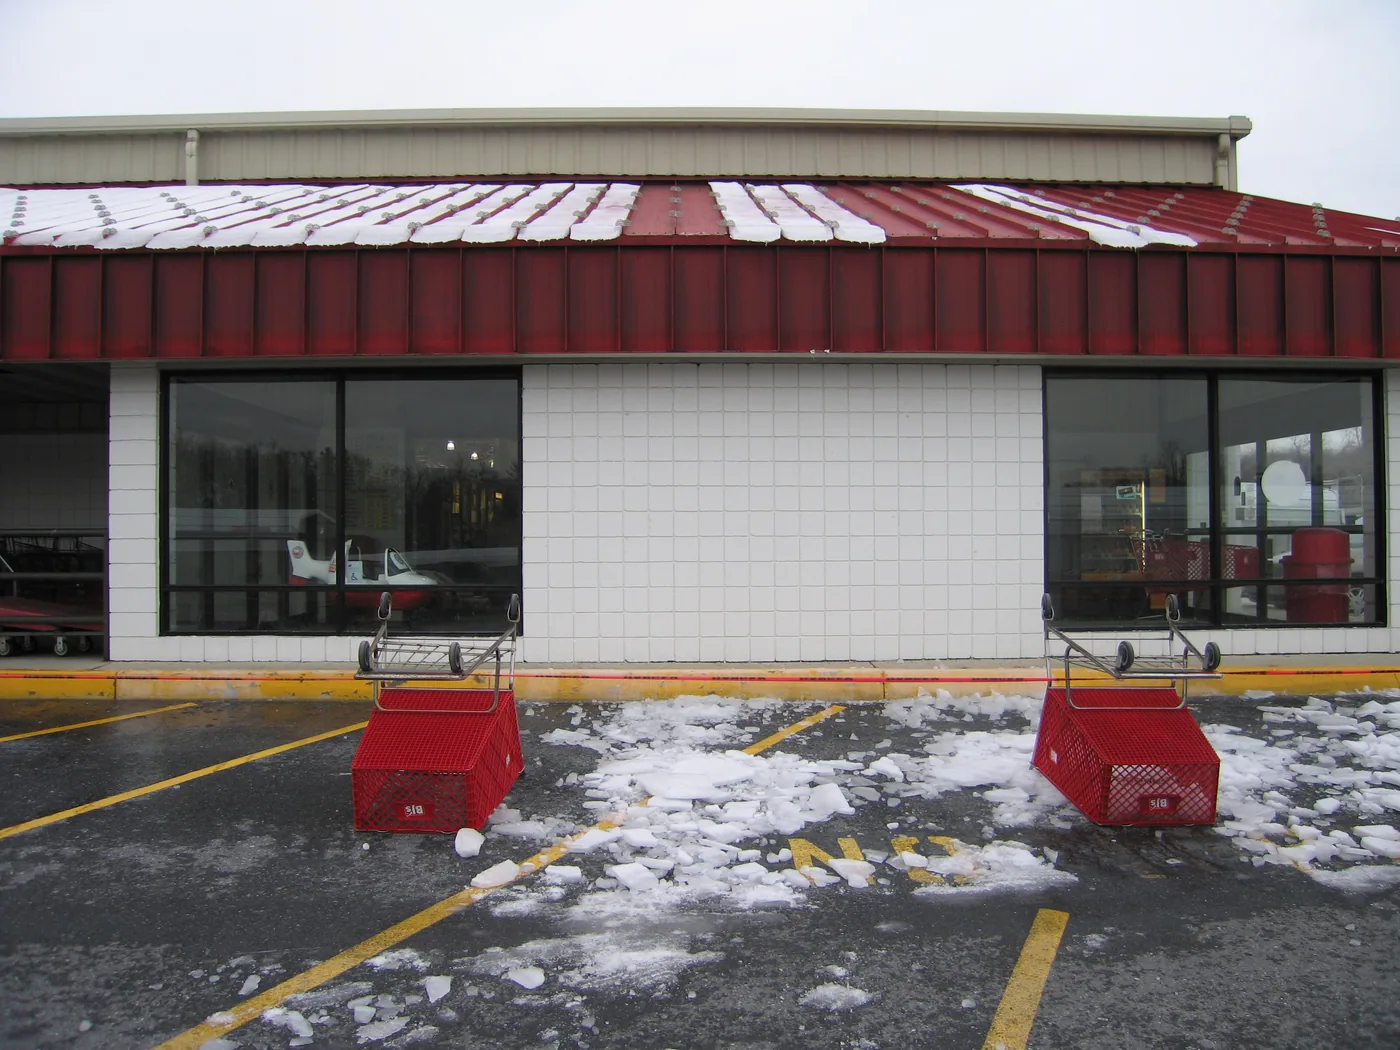
Snow Guard Layout.
The best time to request a layout is when the project is in the planning phase. Once the layout is calculated, the architect can include the proper information in the specifications PRIOR to the job going out for bid. This mandates a standard for the installer to uphold.
A specification that calls for snow guards without a project specific layout can become a liability for the building owner in the future. Snow retention is a safety item and without a professional layout and proper installation there is an increased risk factor to pedestrians, gutters, cars, landscaping and equipment below.
Most snow guard manufacturers are happy to consult with architects, contractors and homeowners free of charge to be sure the project is designed properly. Reputable manufacturers will provide free design services.
Depending on the panel being used, snow guards should be properly matched to be sure that the guards fit flush on the panel. Keeping the guards centered on the pan will provide the most efficient holding strength. Matching the correct guard to the specific project is the first step in designing a quality snow guard system. Keep in mind, all snow guards don’t fit all roof panels.
|
|
Polycarbonate guards are very versatile and can be used on just about all metal panels. |
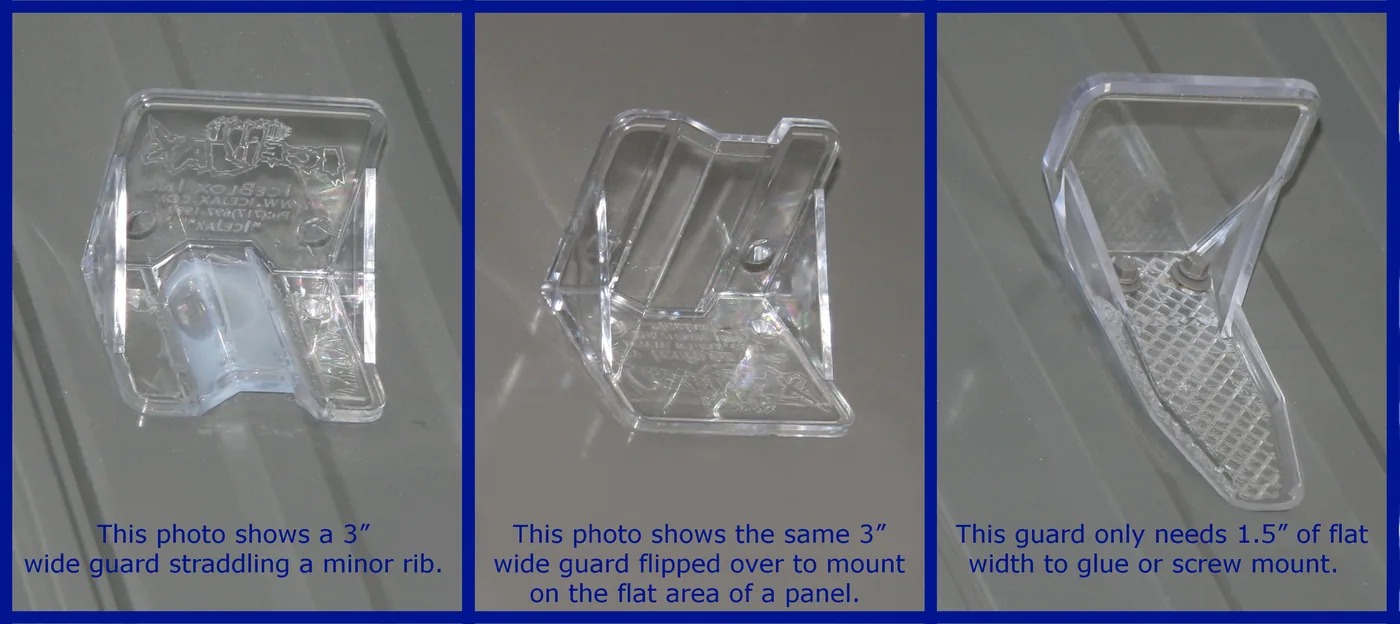
There are instances when it’s necessary to break up the snow and ice while still allowing it come off the roof in a controlled manner. The solution to this is a wedge shaped snow breaker style guard. This product can be mounted with screws, adhesive, or a combination of VHB and Surebond.
This design is contrary to the conventional snow retention systems of today that are designed to hold snow and ice on the roof, usually by creating a holding field with a staggered pattern. This design allows the snow and ice to slowly shed itself from the panel while the guard slices it into safer, smaller pieces before reaching the roof’s edge. This can be most beneficial in areas where winter weather conditions can sometimes exceed the roof snow load design.
|
This design breaks up snow and ice while still allowing it to come off the roof. This is a great solution to light snow load roof systems, isolated placement, and controlling snow avalanche on solar panels. |
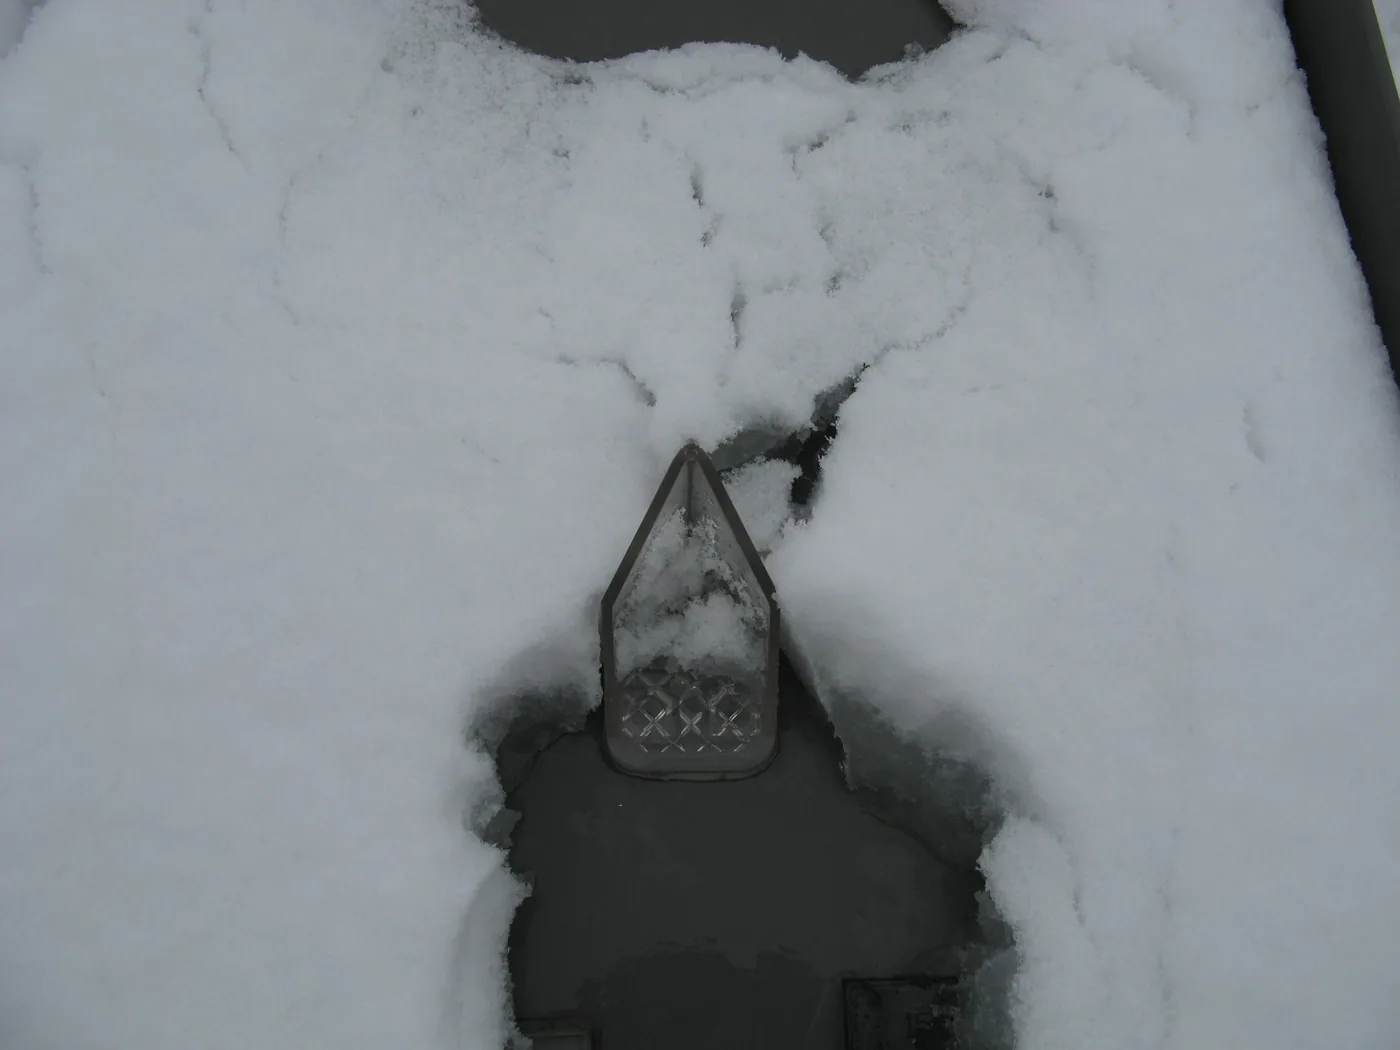
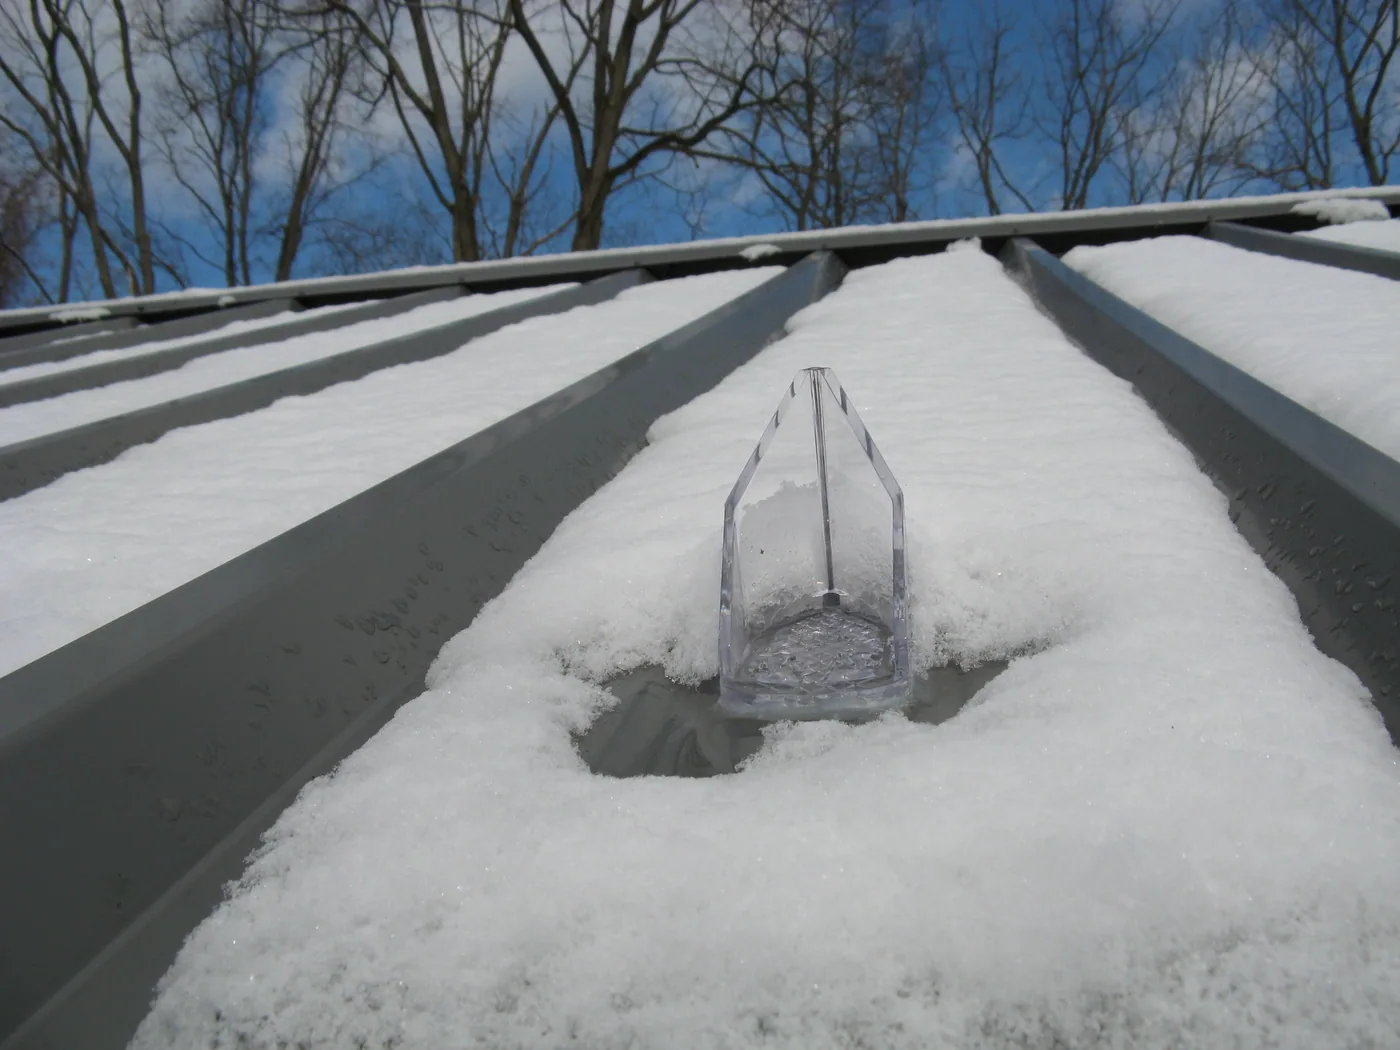
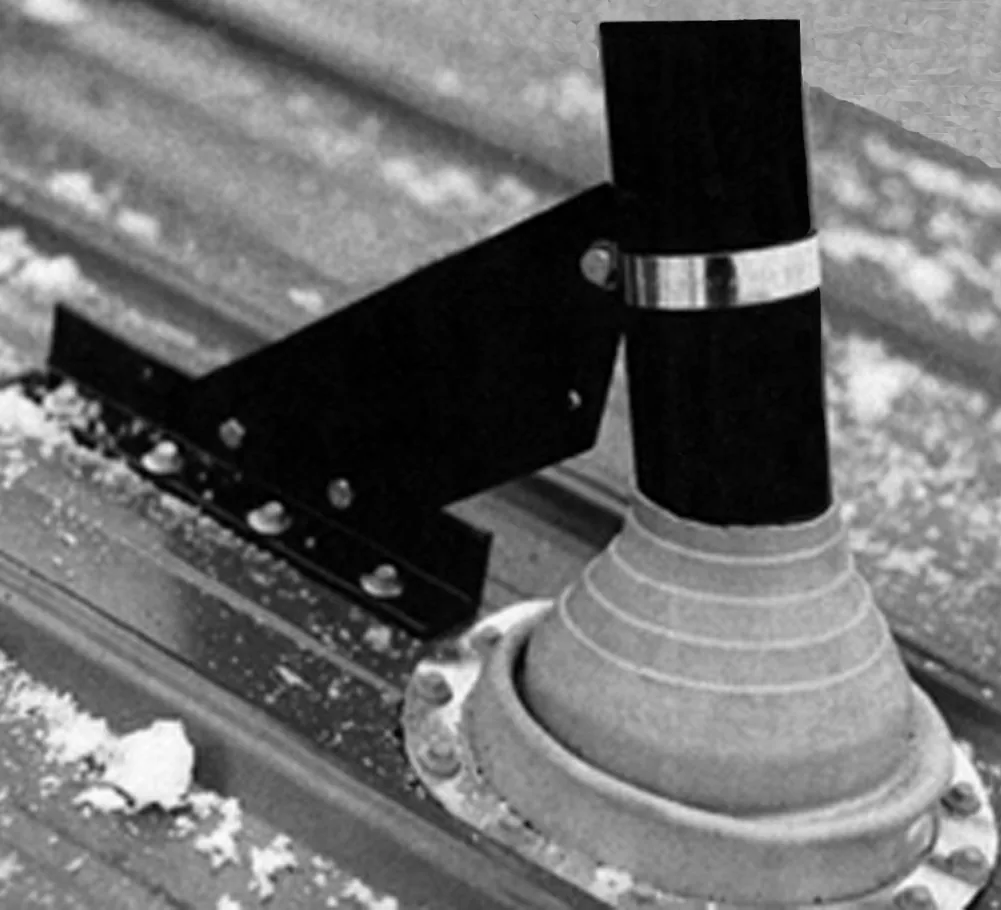
Specially designed products will protect vent pipes, chimneys, antennas, and masts from damage. They can be very effective as standalone products or as part of a full snow guard system. These vent saving devices work by splitting and diverting the snow around the pipes. They also stabilize the roof stacks with steel cable that wraps around the pipes to prevent them from being broken.
|
Here is an example of a very simple vent saving device. It is mechanically fastened upslope of the vent pipe, and a stabilizer fin is used to secure the stack. This product is very effective at diverting snow and ice around roof vents, chimneys and masts. |
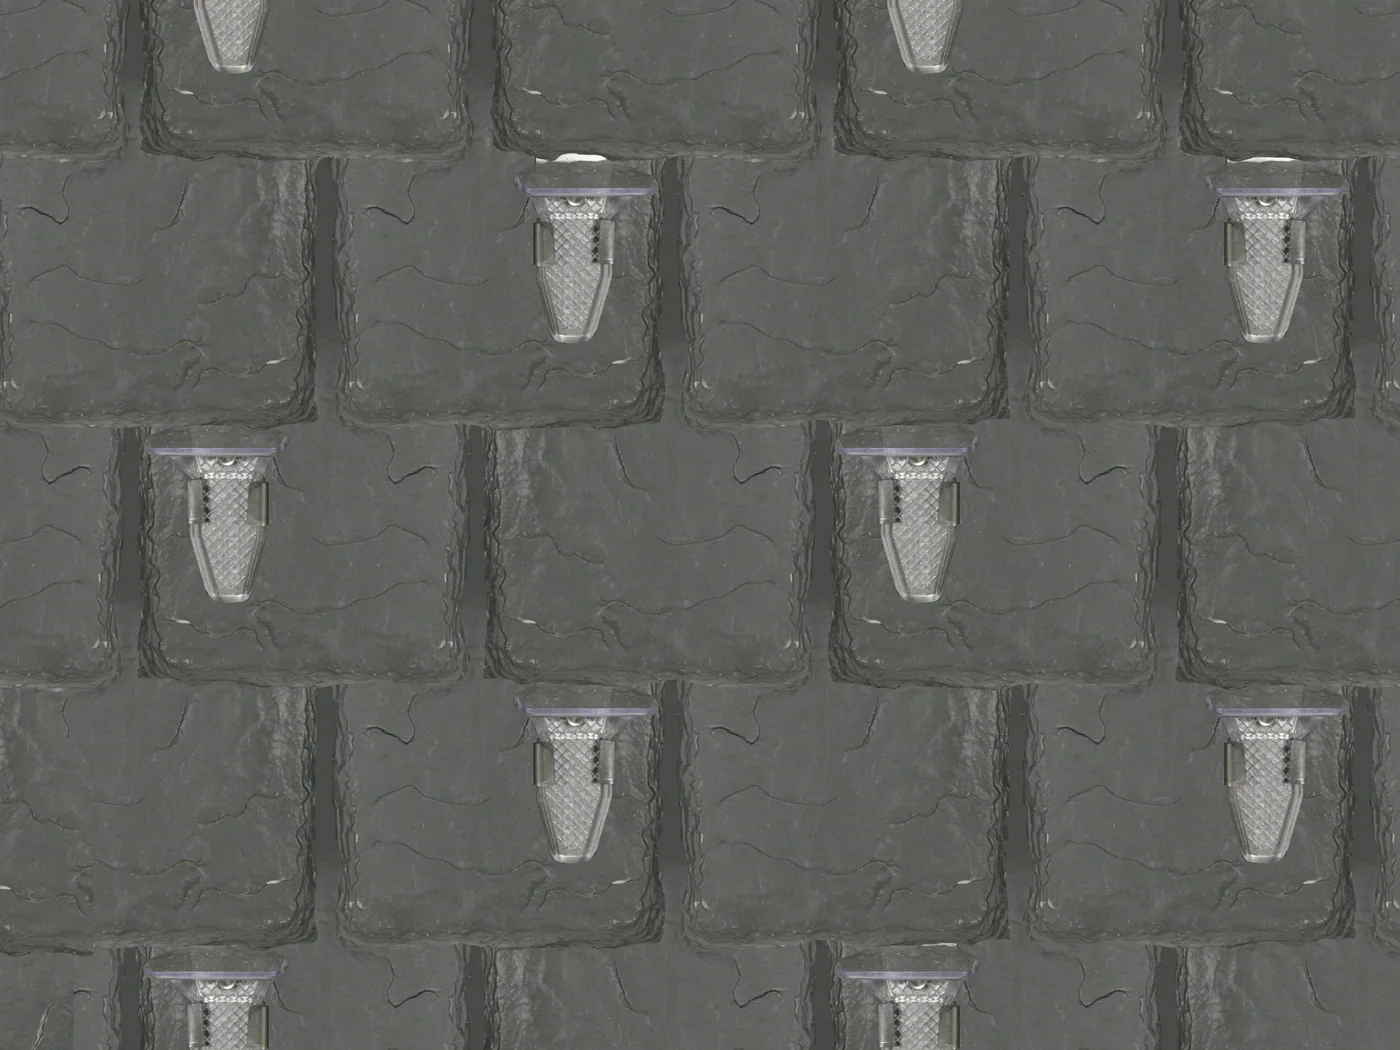
Slate, asphalt shingle, and composite shingle roof systems have always posed a problem when it comes to controlling the snow load. Adhesives are not very effective on these roofing materials and mechanical fastening of brackets or guards is extremely difficult.
Specially designed brackets have been developed to solve this challenge. These stainless steel straps can be used for new or retrofit projects and can be sourced in various colors. They can be attached with nails or can be hooked onto existing roofing nails already in place.
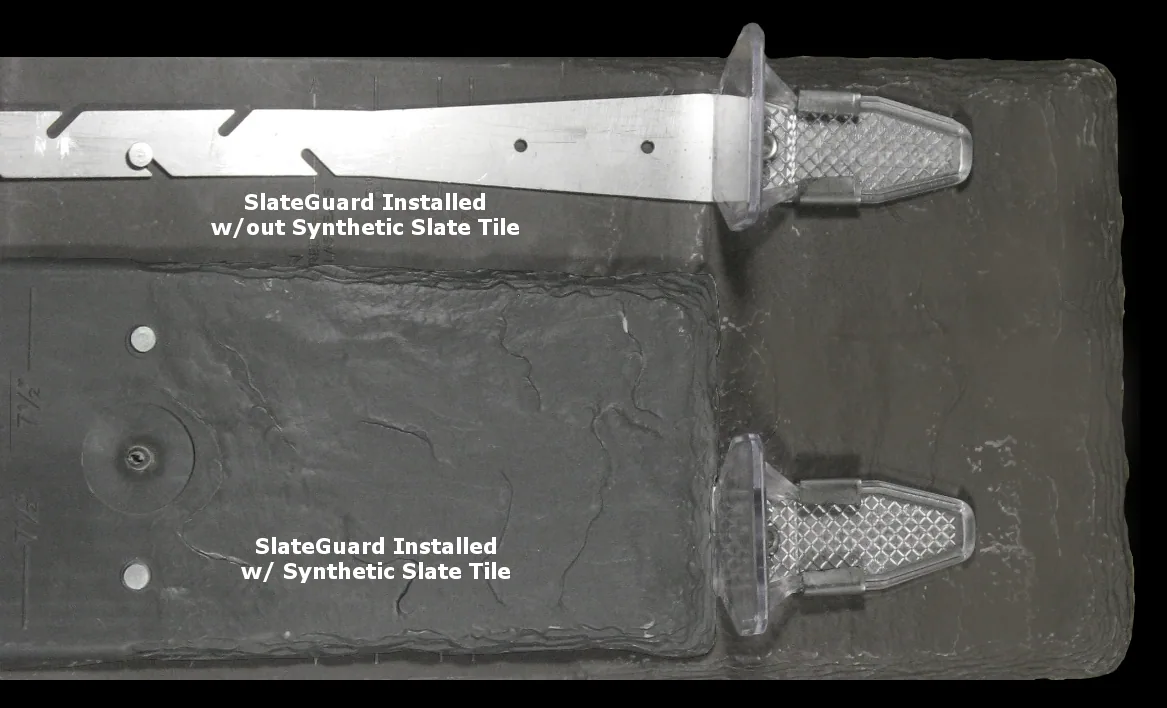
Installation and layout of this style guard should closely follow the manufacturer’s recommendations based on the project specific data.
|
This pad style guard is attached to a 304 stainless steel strap. That allows a composite tile roof to have an effective snow guard system without screws or adhesive. |
|
|
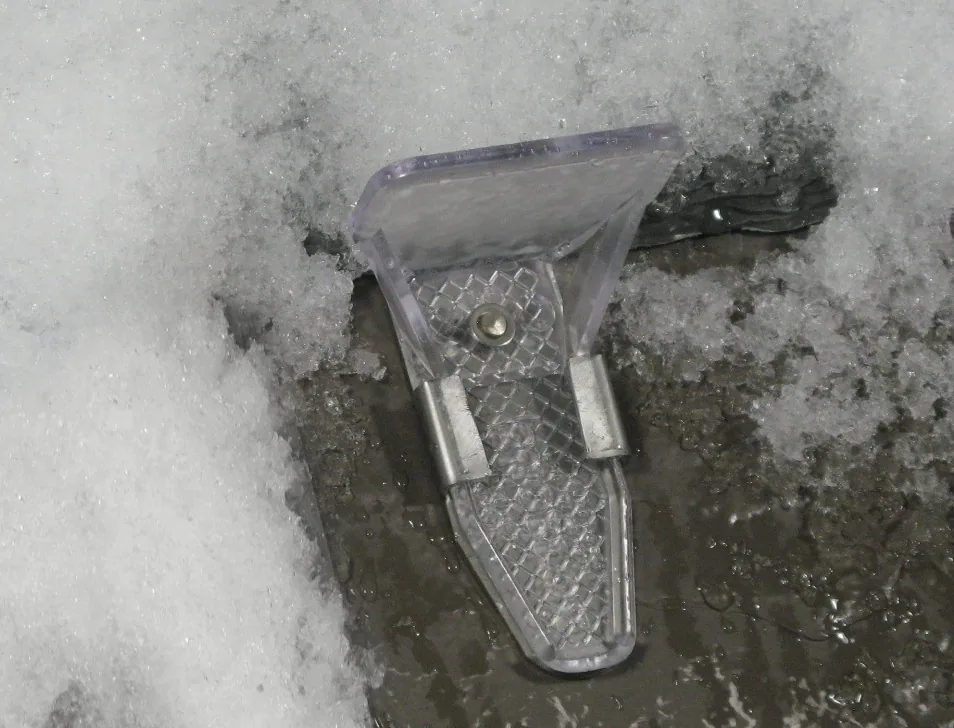
A nice feature of metal snow guards is the ability to use them for cosmetic appeal as well as for snow retention. There are various decorative designs available today, the most common being made of 304 stainless steel. These can be powder-coated to match the roof and must be mechanically fastened. Although they can be used as decoration, they must still be installed with a professional layout to avoid overloading. |
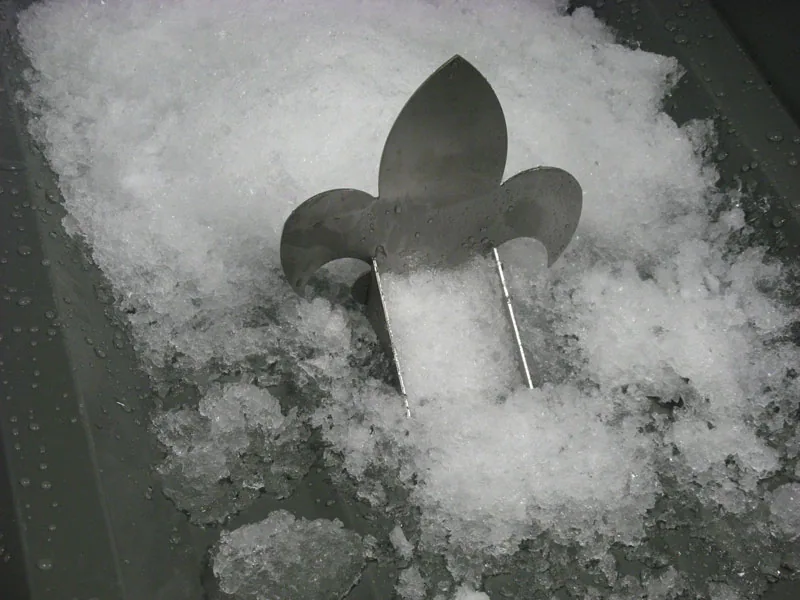
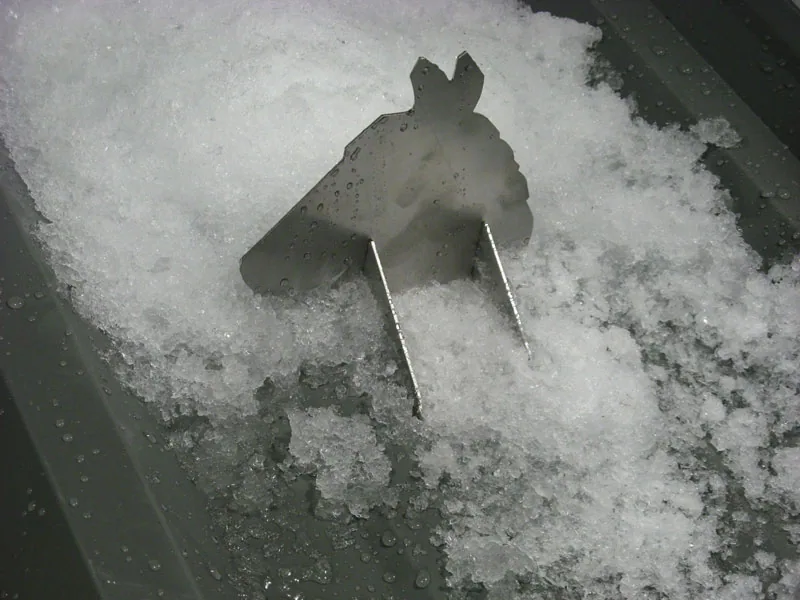
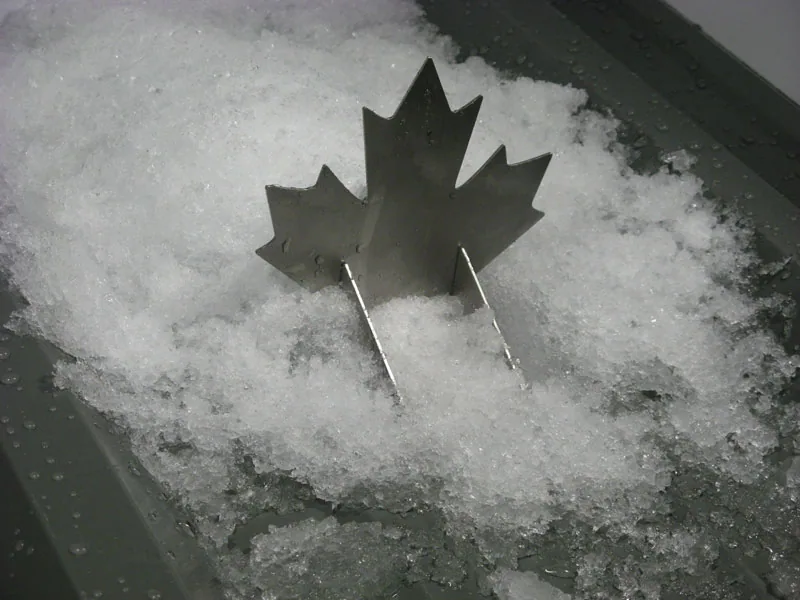
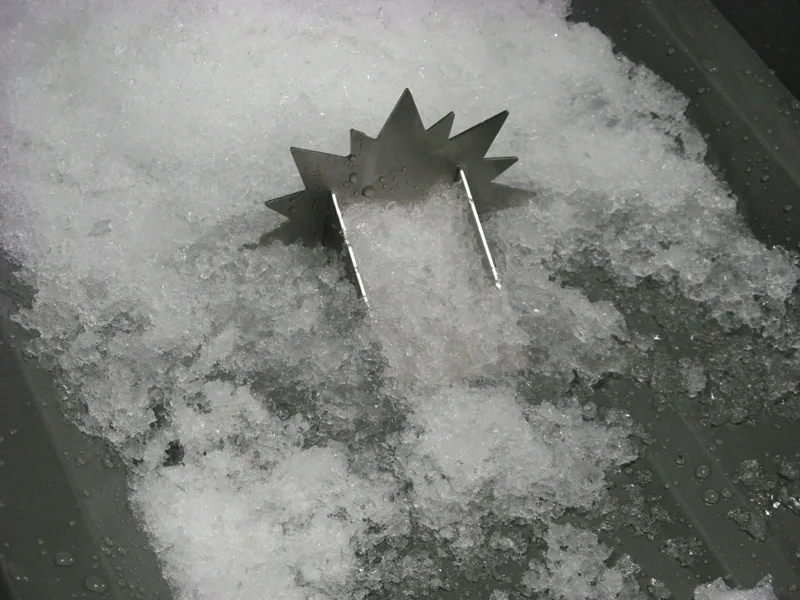
Clamp on Bar Systems
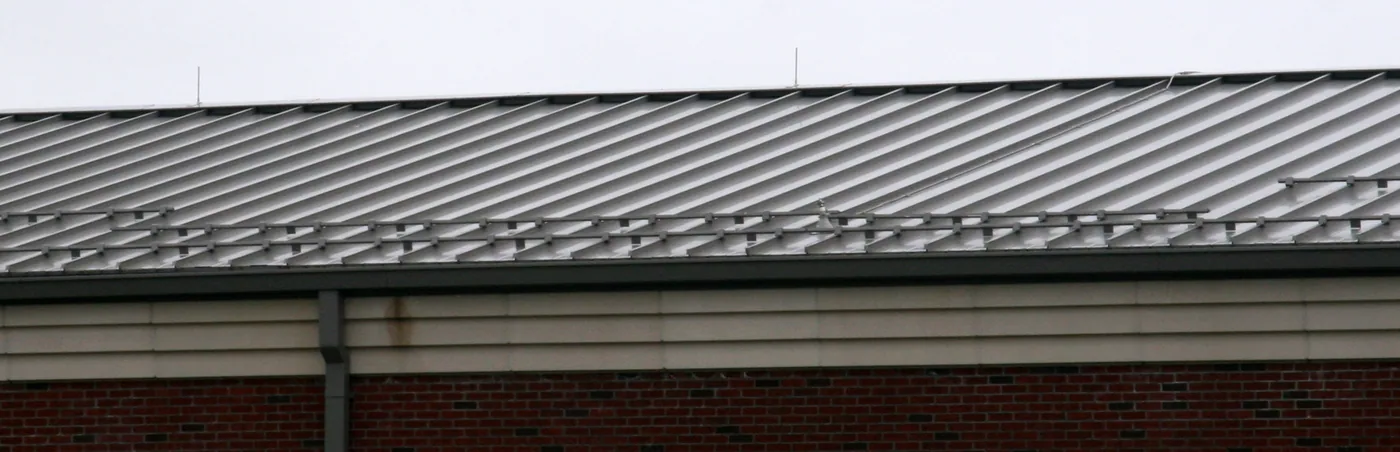
A clamp-on bar system is a Fence-style snow retention system used on standing seam metal roofing. Modern versions use non-penetrating seam clamps and horizontal bars so snow can be restrained without fastening through the roof panel.
The History
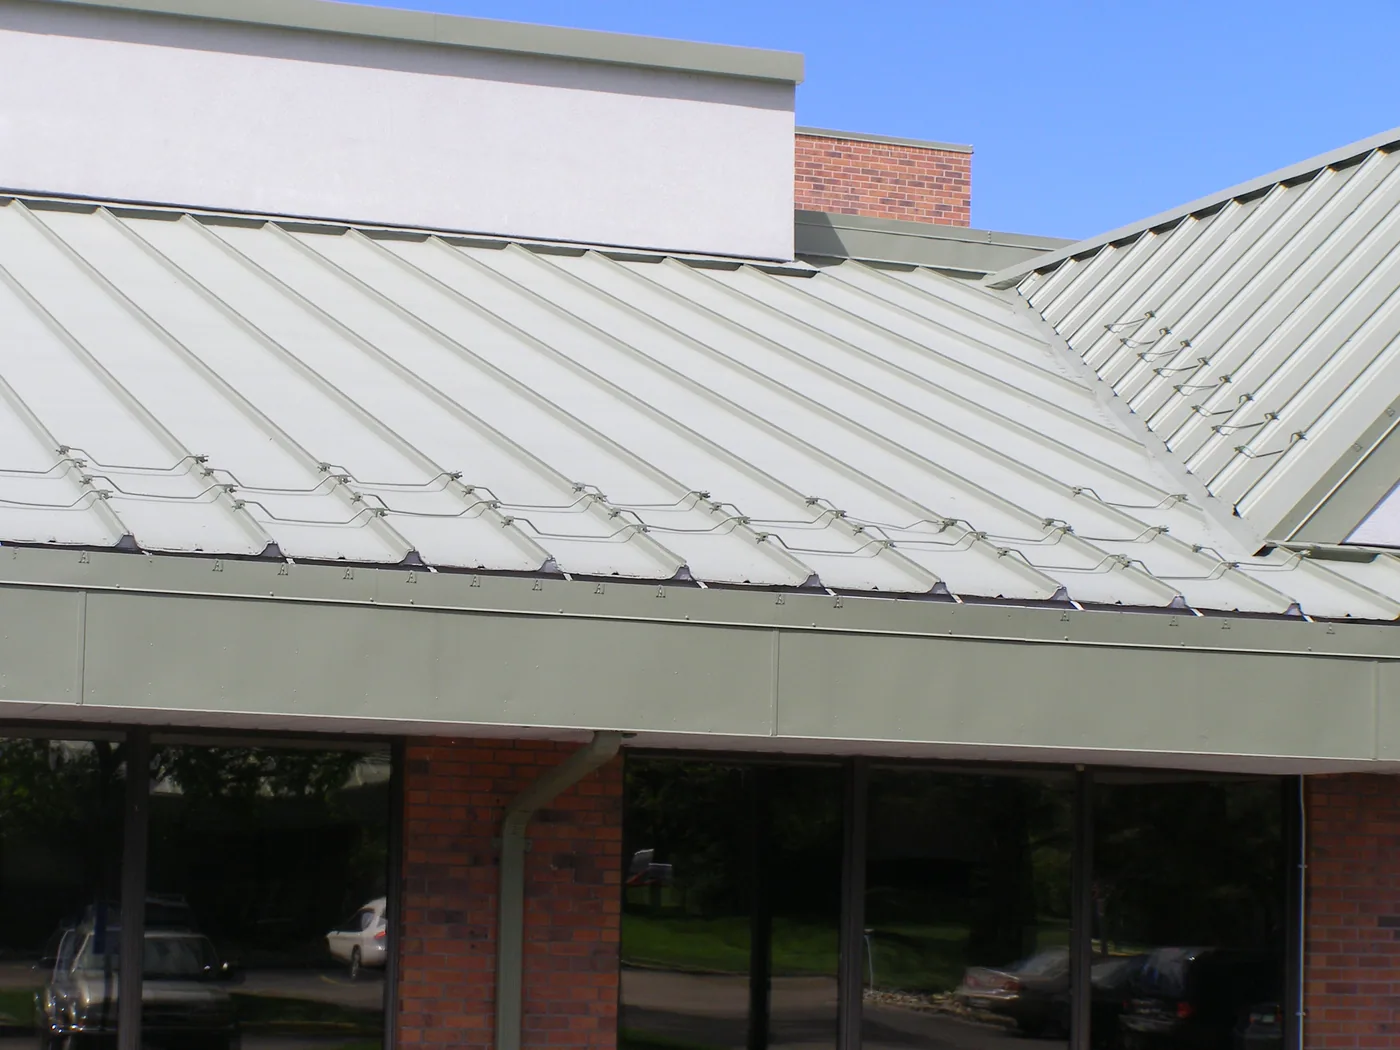
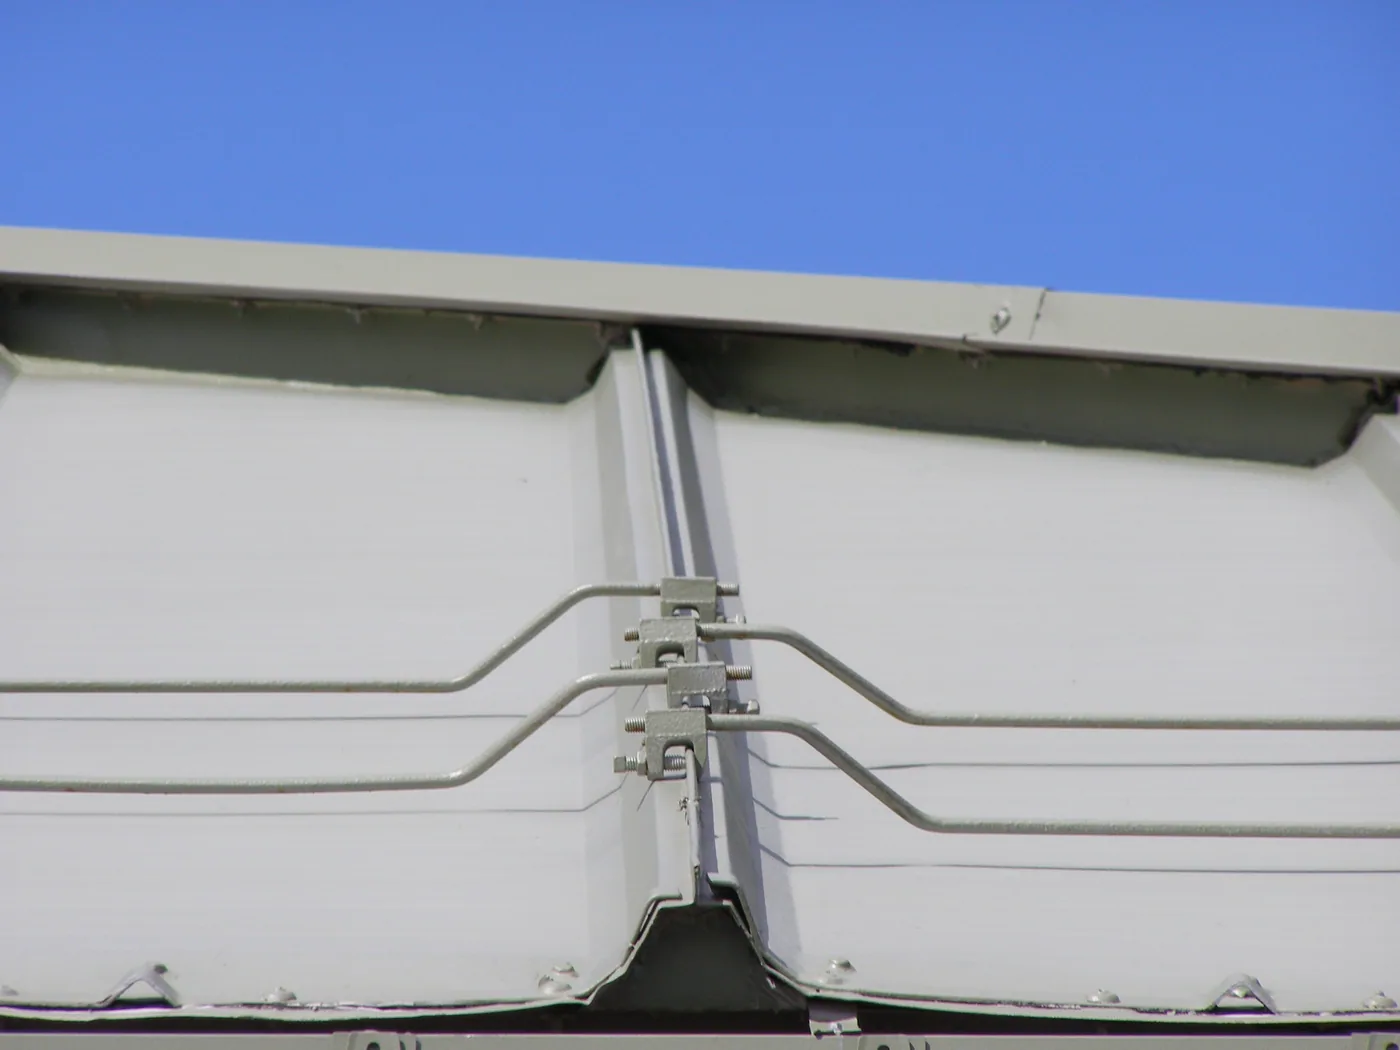
Modern bar and clamping systems have evolved since the primitive log “Fences” that were previously used. Bar systems have become another popular option due to the growth of the standing seam panel industry. A man by the name of Mr. Kuntz of Kuntz Construction in Wheat Ridge, Colorado developed a system for snow retention on standing seam metal roofing in 1980. This system was installed on an office plaza located in Inverness, Colorado just north of Denver. Developed specifically for the Butler MR-24 roof panel, this system utilized common bar joist clamps and a threaded rod, bent to match the profile of the Butler MR-24 panel. Mr. Kuntz had then successfully created the first non-penetrating rod system that retained snow and ice on a metal roof. This was 12 years prior to the first patented system.
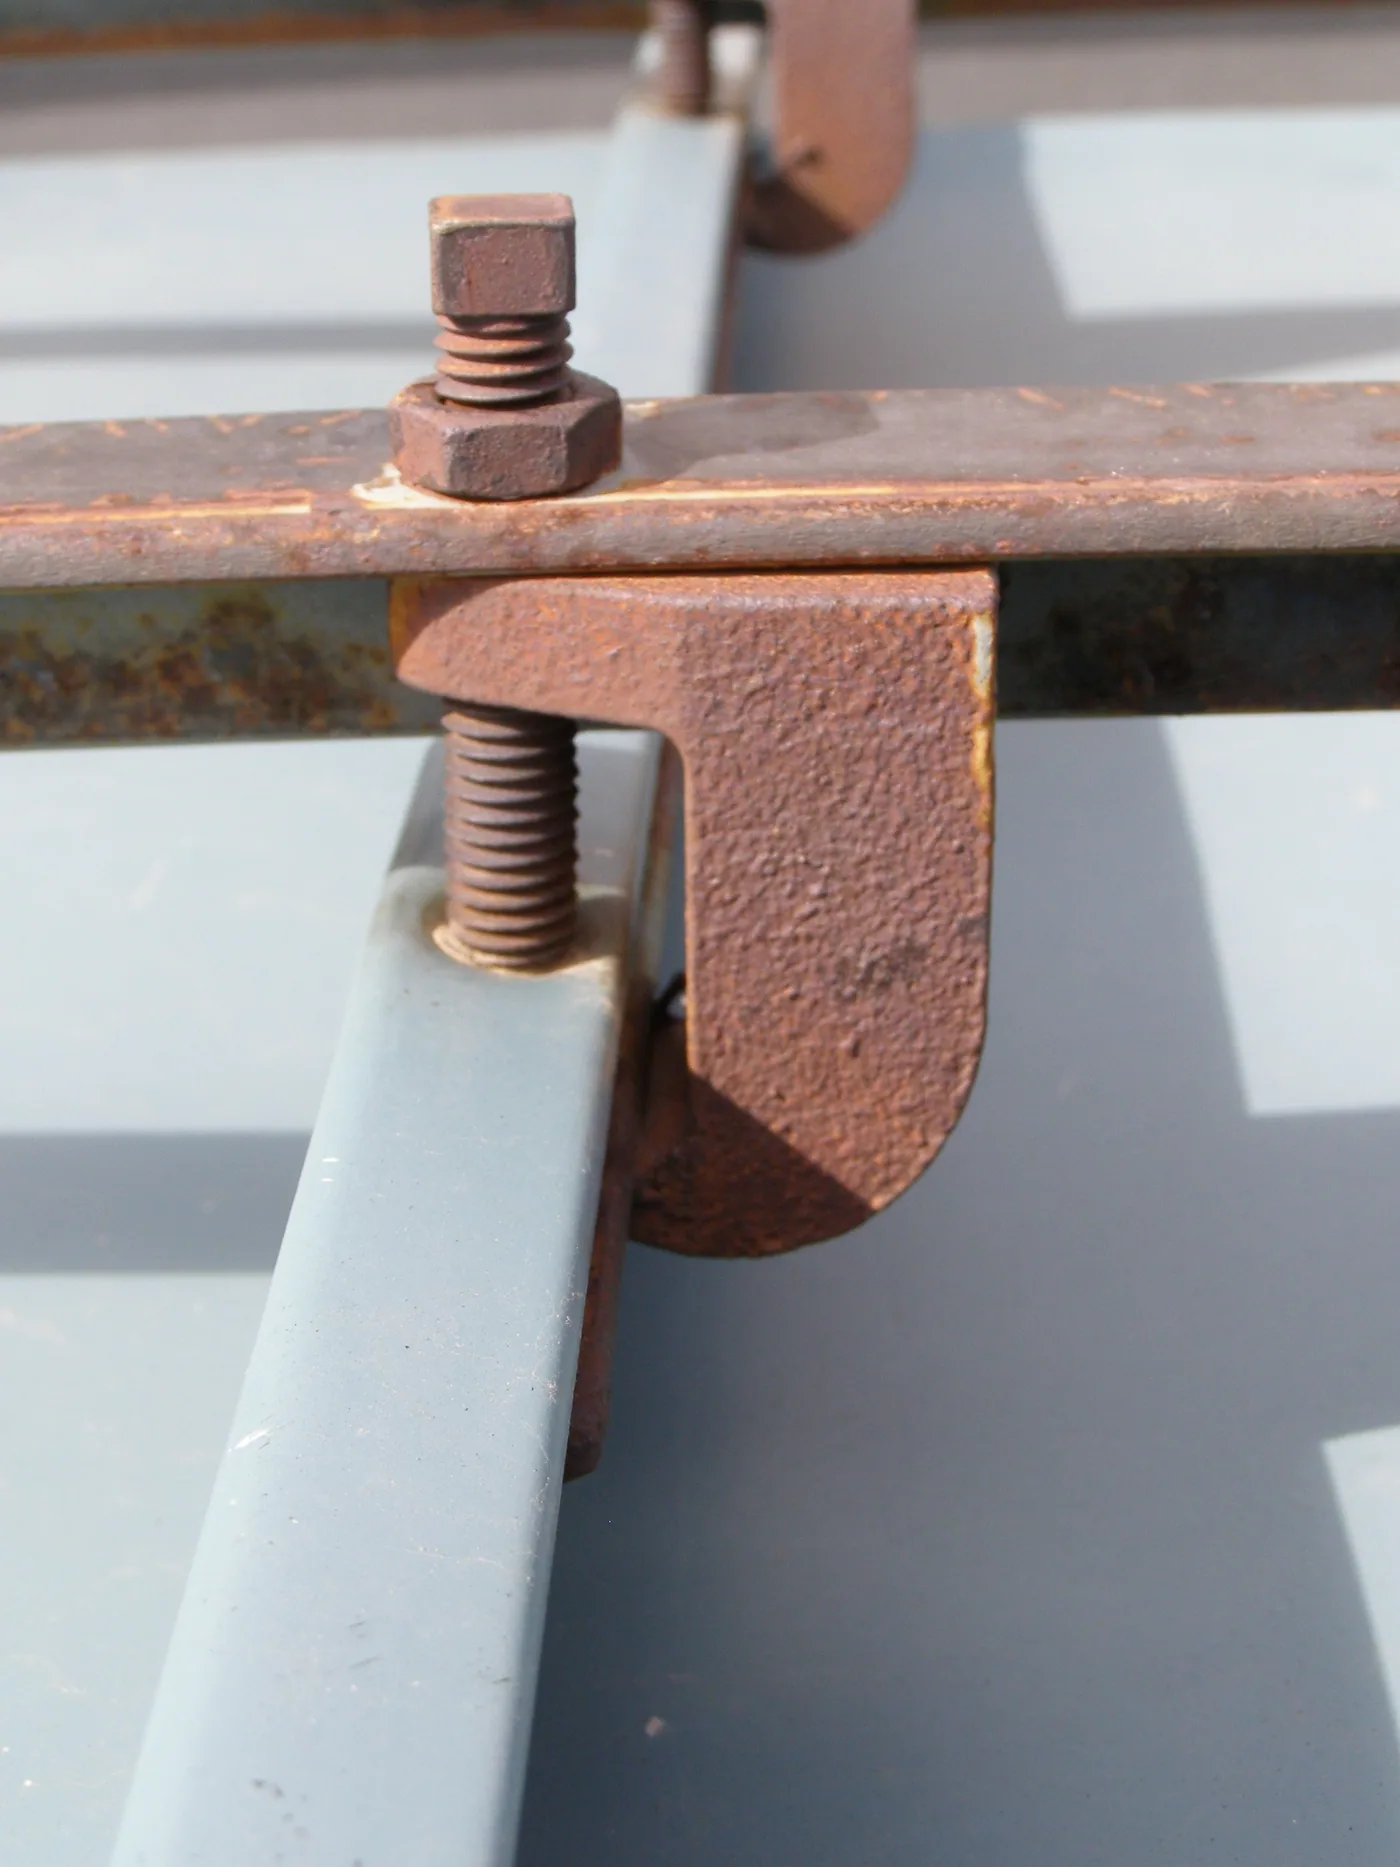
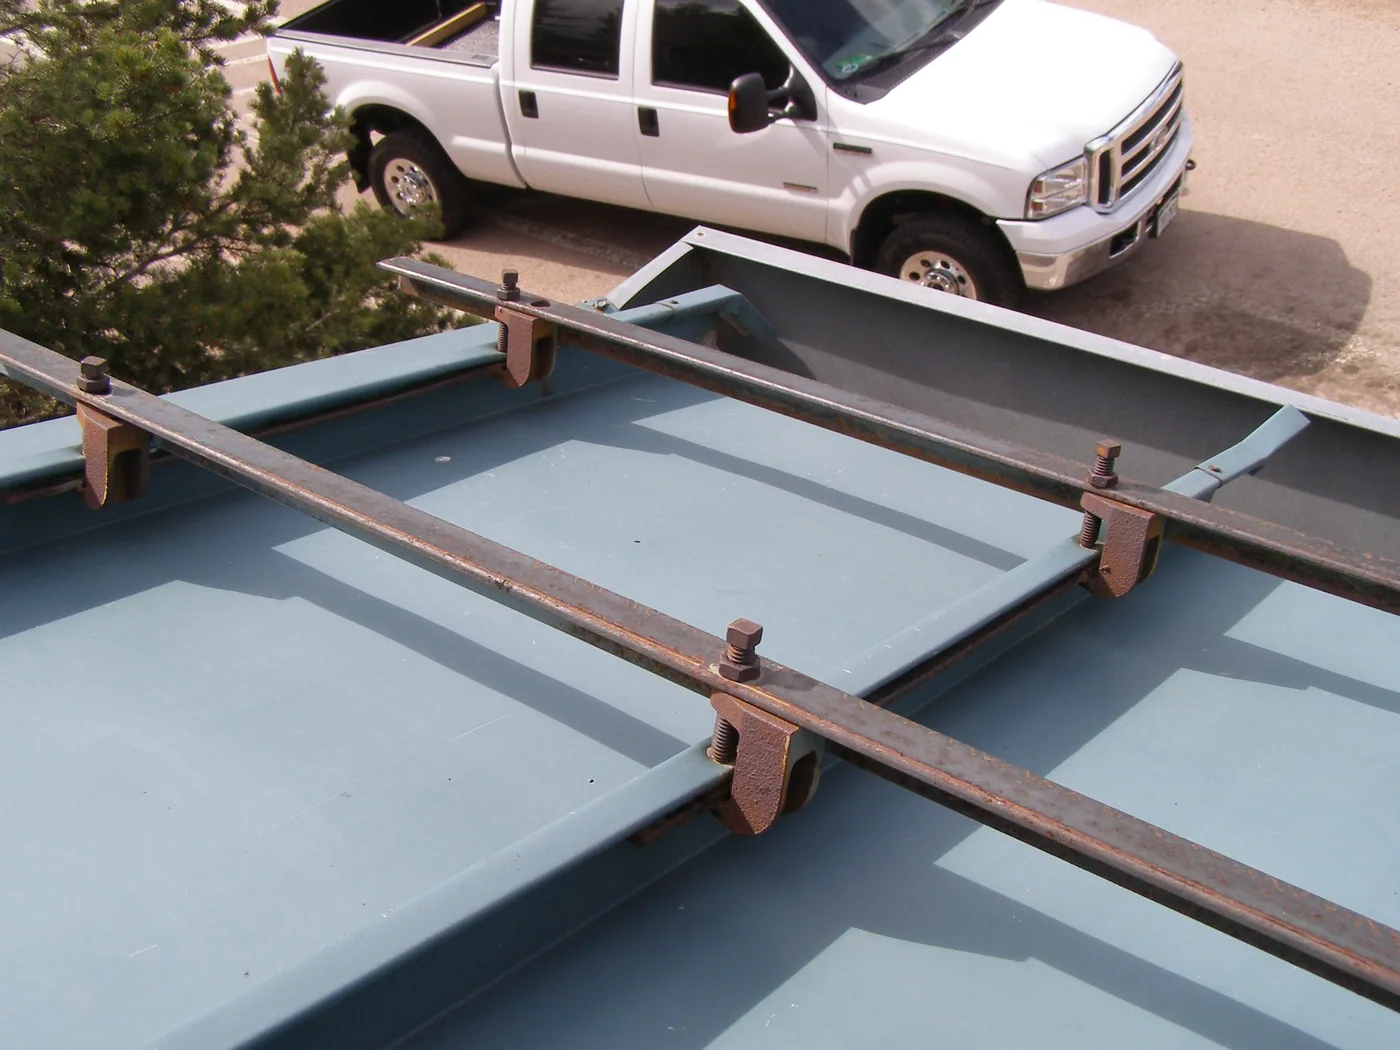
In 1987, a bar system using non-penetrating clamps was requested for the standing seam metal roof on the Chipeta Elementary School in Colorado Springs, CO. The architect called for snow retention to protect the school’s doorways. The roofing installer began a mission to create a bar-type snow retention system. Two bar joist clamps were welded together and a bar was mechanically attached to the tops of the clamps. Even 30+ years later, this system has yet to fail and the integrity of the painted roof surface remains intact. This was 5 years prior to the first bar patent application.
In 1990, a man by the name of Jim Huff, a metal roof installer, created his own take on a bar-style snow retention system. He was the first to design a bar system that could accept 2” Color Strips in the face for an easy color match to the roof panel. He modeled his design after the 2” name plates often used in offices. This extruded aluminum product then came to be known as the Sno-Horse. This was two years prior to the first patent application for this type of clamp and bar.
This system was installed in 1992 on the Toll Plaza at the Denver International Airport and is still in service today. The Sno-Horse product was publicly displayed at the 1993 MetalCon trade show in Dallas, TX. Many samples were on display and handed out at the AEP Span booth. Since this pioneering concept hit the market, there have been some imitations and improvements made.
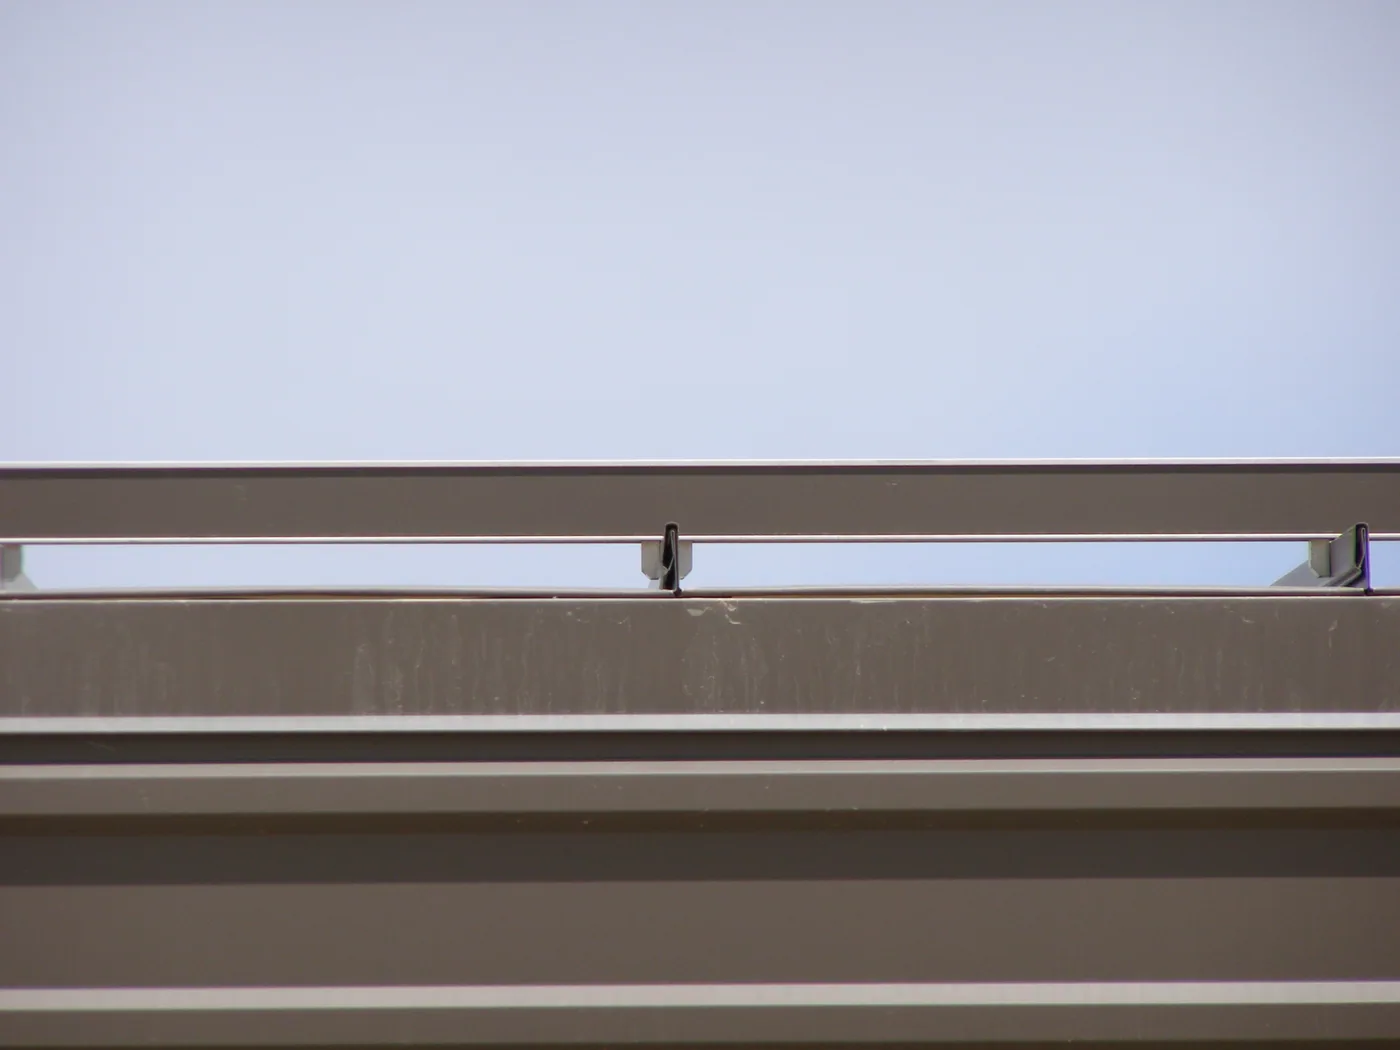
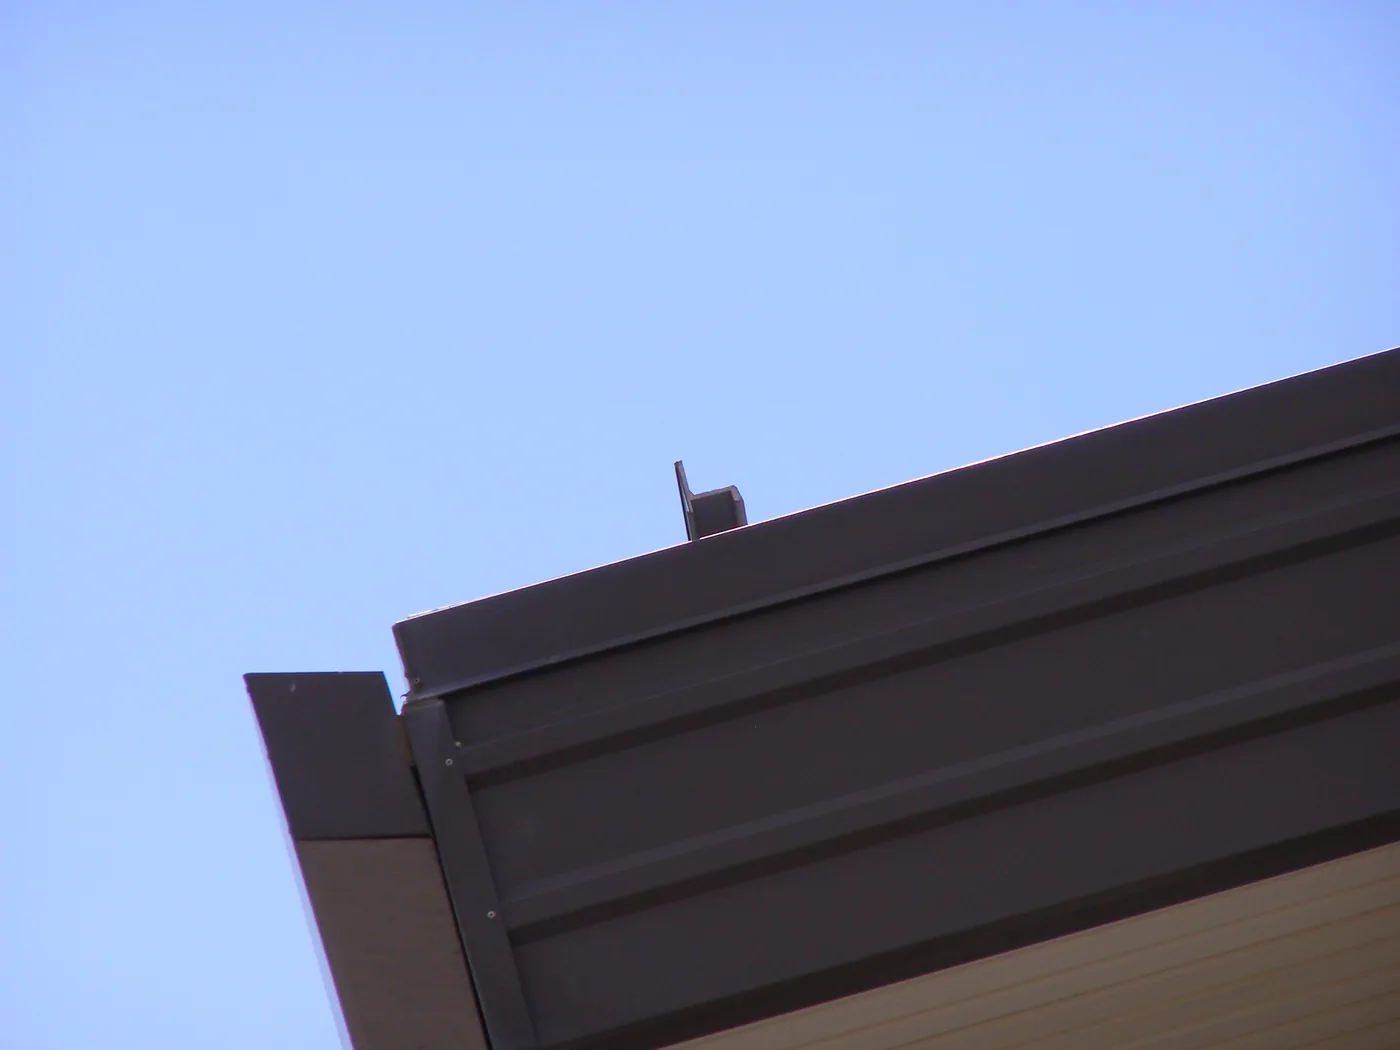
These pictures show the SnoHorse system installed in 1992 at Denver International Airport and is still in service today.
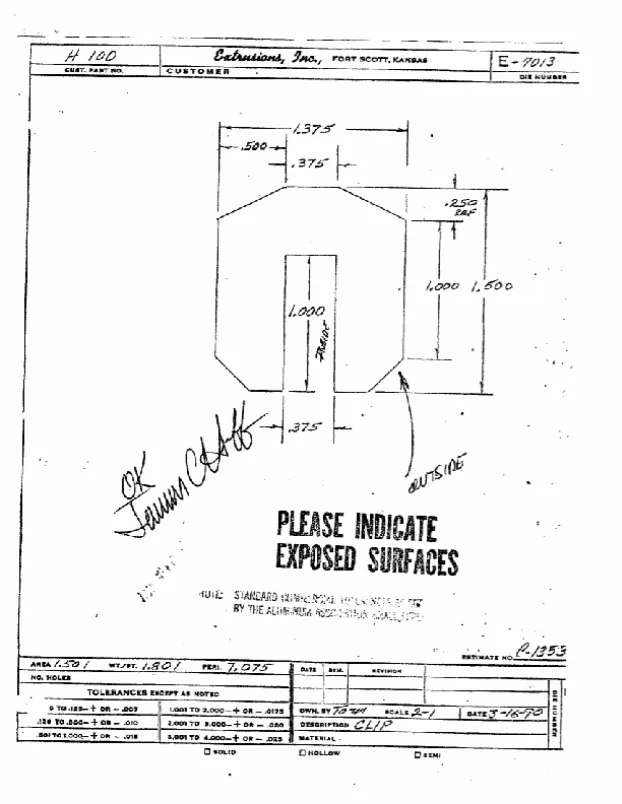
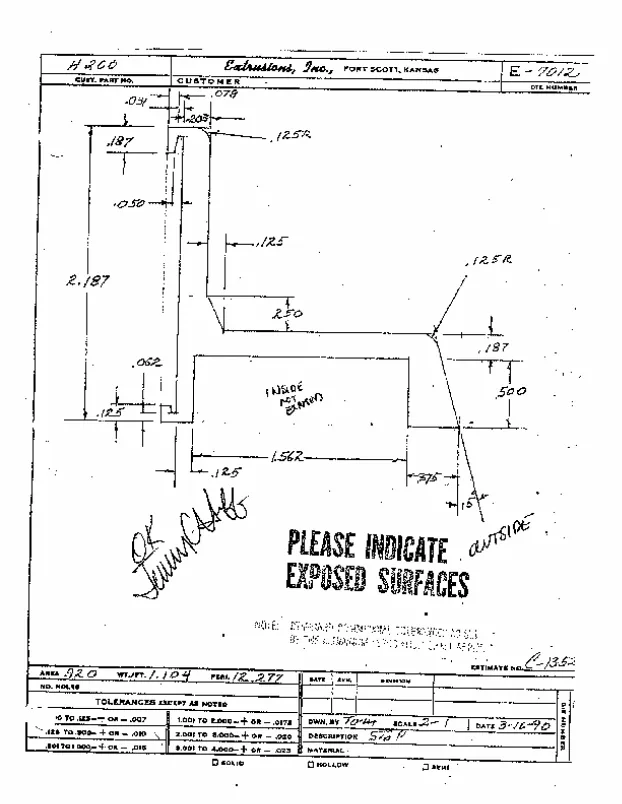
These extrusion drawings were dated March 16th, 1990, thereby preceding the earliest US patent applications of this style of clamp and bar by 2 years. It’s important to recognize these men that are the true innovators of the modern roof clamp technologies.
Meanwhile, another gentleman by the name of Donald Drew was creating his own system for retaining snow on metal roofs. What he developed featured a one-piece clamp that allowed for a bar to be dropped in during installation. This allowed the system to be used without pre-drilling or welding. This was the evolution that allowed this bar system easy and fast to install. This system came to be known as the SnoBar. Mr. Drew filed for a patent on this product on June 9, 1992.
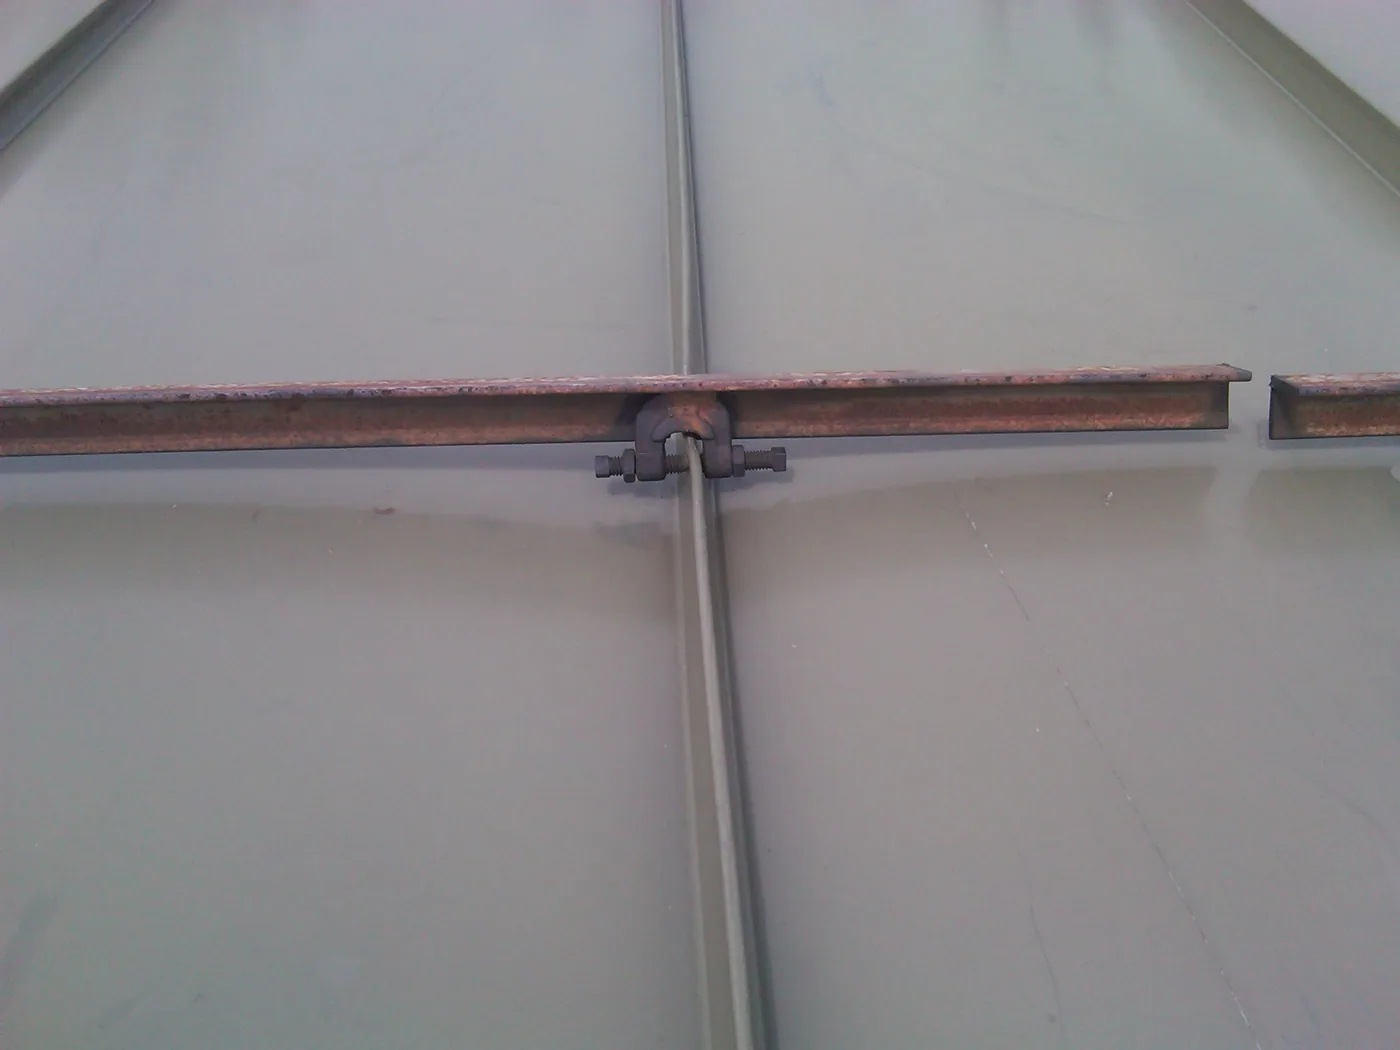
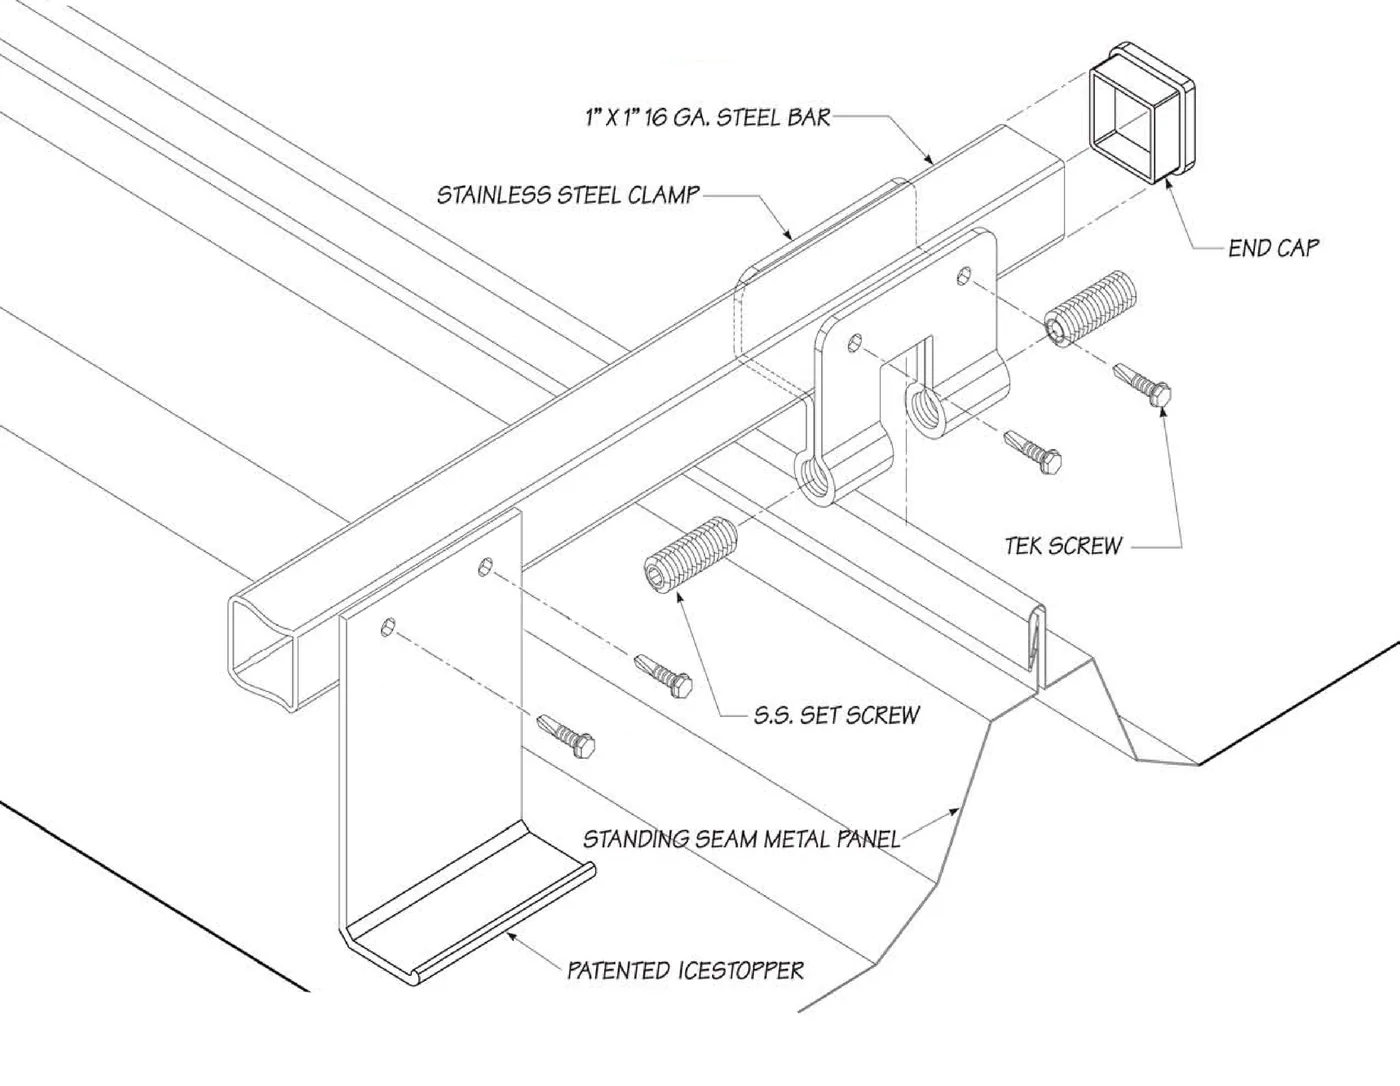
The greatest improvement to the roof clamp technology has been the shift towards more universal fit designs as opposed to the old style clamps that only fit certain seams. Another improvement is the use of course threaded set screws and all stainless steel clamps that top load for faster installations. Set screw technology has also improved so there is no longer a need to use high torque set screws that deform the seam. Cupped tip set screws can mount bar systems securely with only 90in./lbs. of torque, resulting in less seam distortion and a permanent attachment to the seam for the life of the roof.
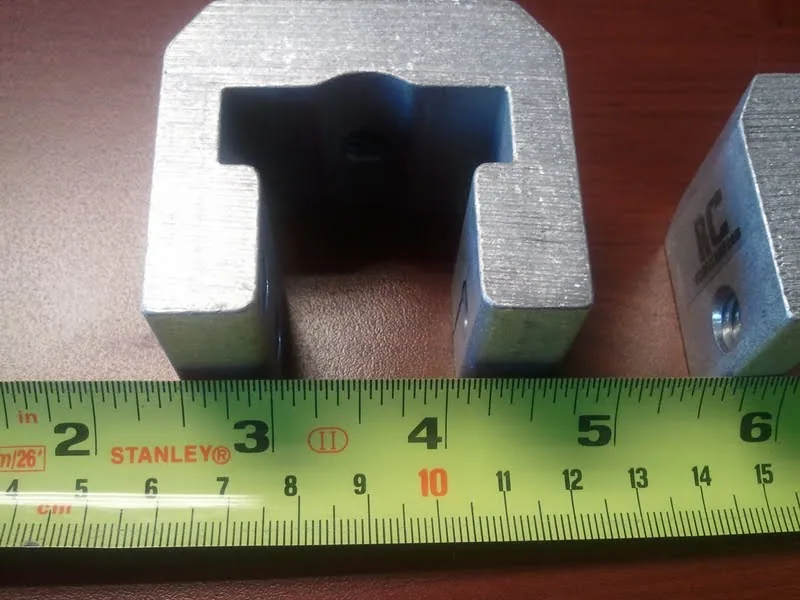
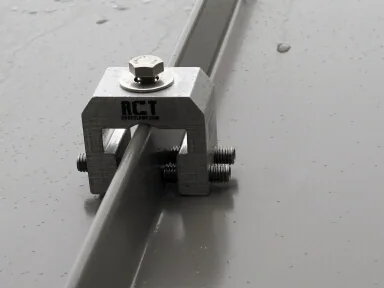
Bar systems with seam clamps are a year round snow retention attachment solution and are available in various strengths and materials. They can be attached with screws or non-penetrating seam clamps. Specialty mounting brackets are available for shingle, membrane and slate applications. The most effective method of holding snow and ice is with a flat faced bar, mounted perpendicular to the panels. Ice Stoppers should be mounted on the bar, in the center of the panel, to keep snow from sliding under the bar.
|
Bar system being utilized on a barrel roof. Multiple rows of bar effectively holds the snow and ice until it can safely melt. |
|
Mechanically fastened bar system holding about 2 feet of snow. |
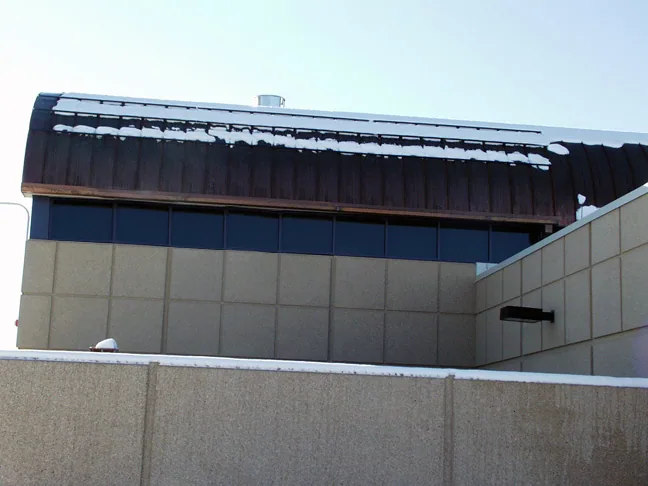
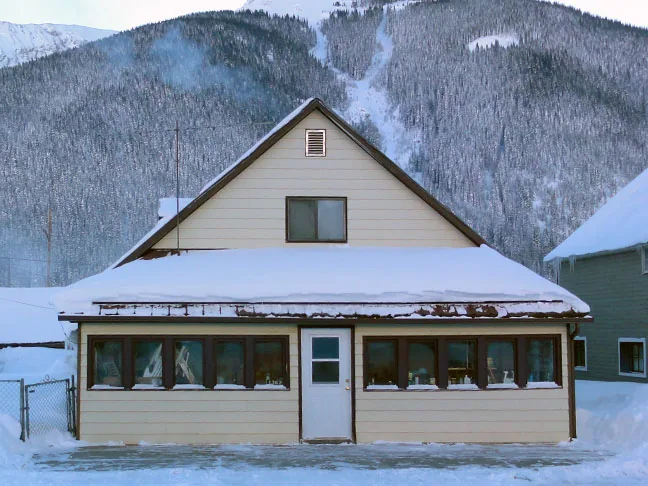
|
Here is an example of bar equipment protecting very expensive HVAC equipment on the landing below. |
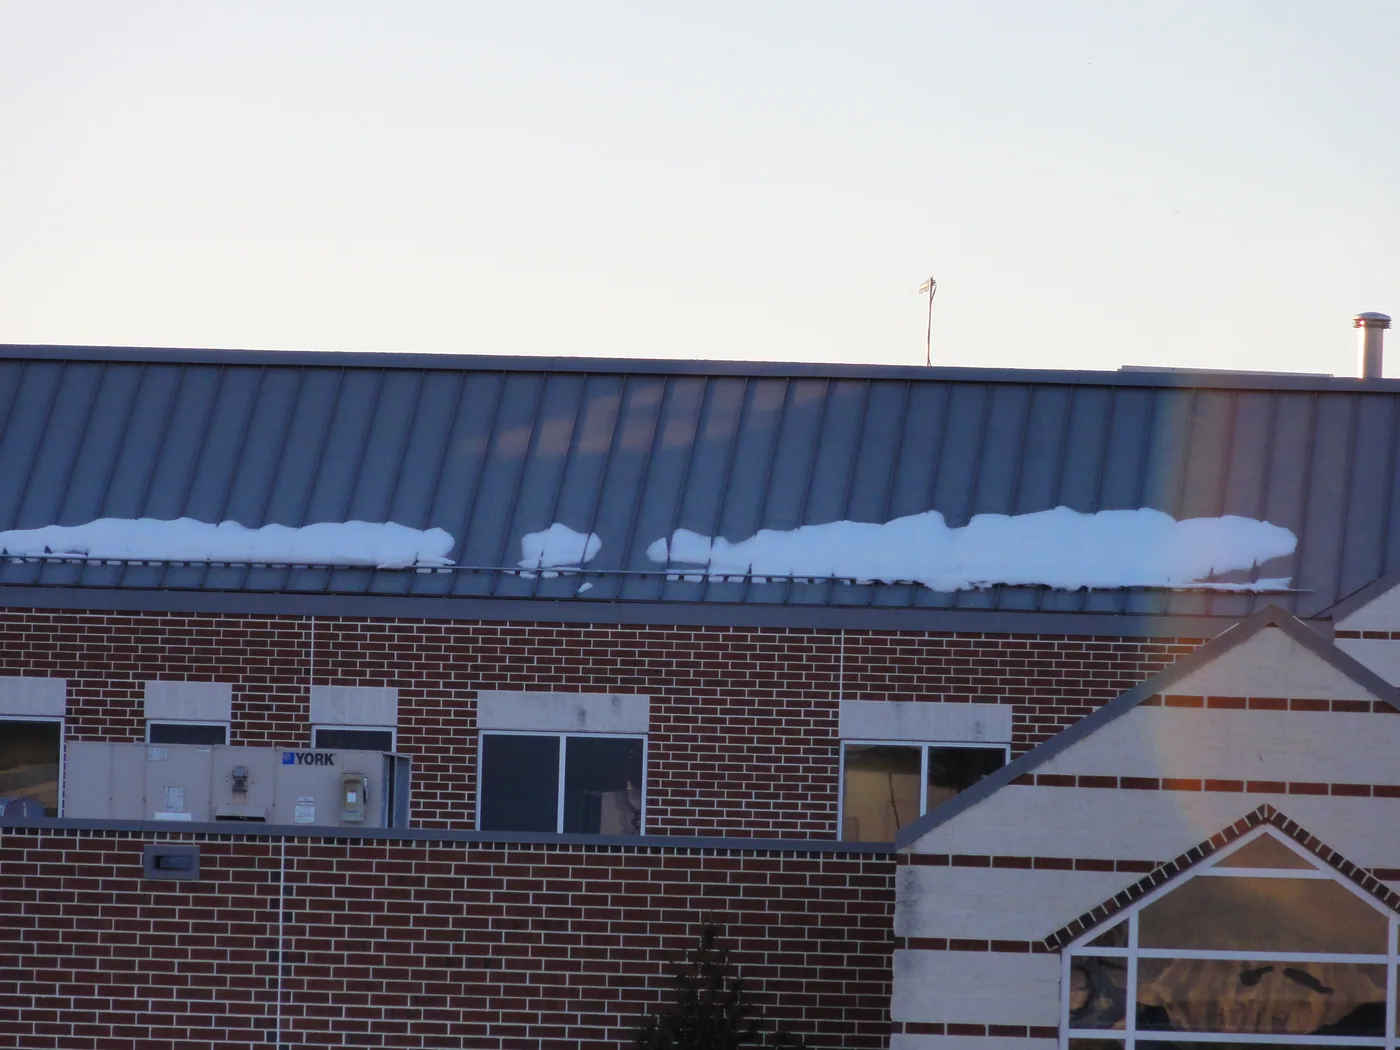
|
There are several styles of bar, some of them have multiple bars and high fences. Here is an example of how a simple single bar can effectively and safely hold back thousands of pounds of snow and ice. |
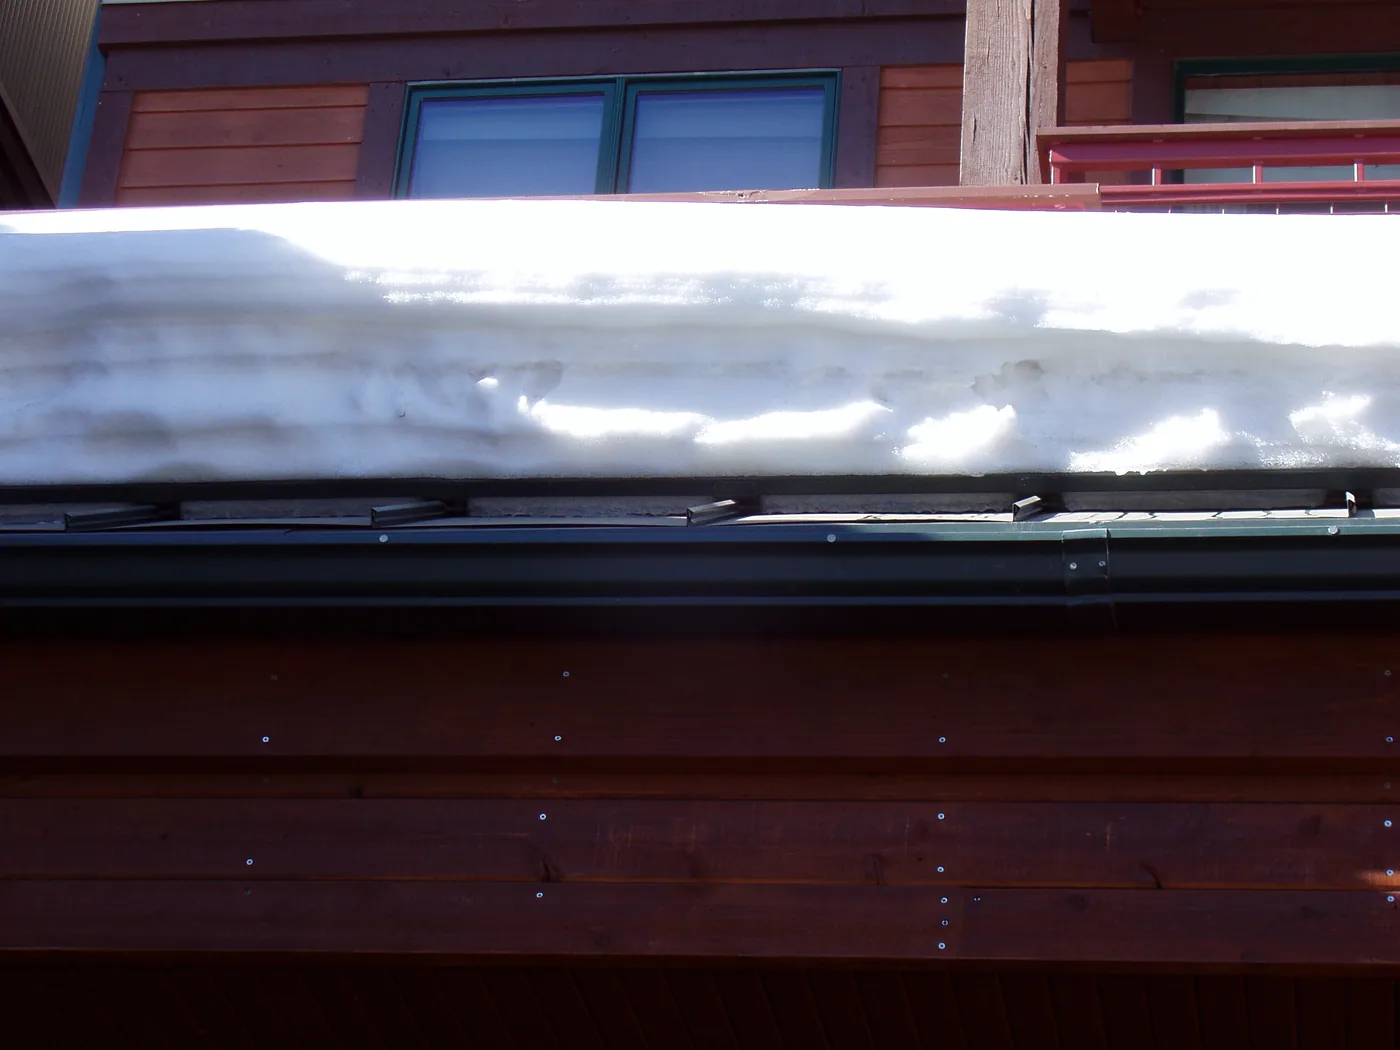
|
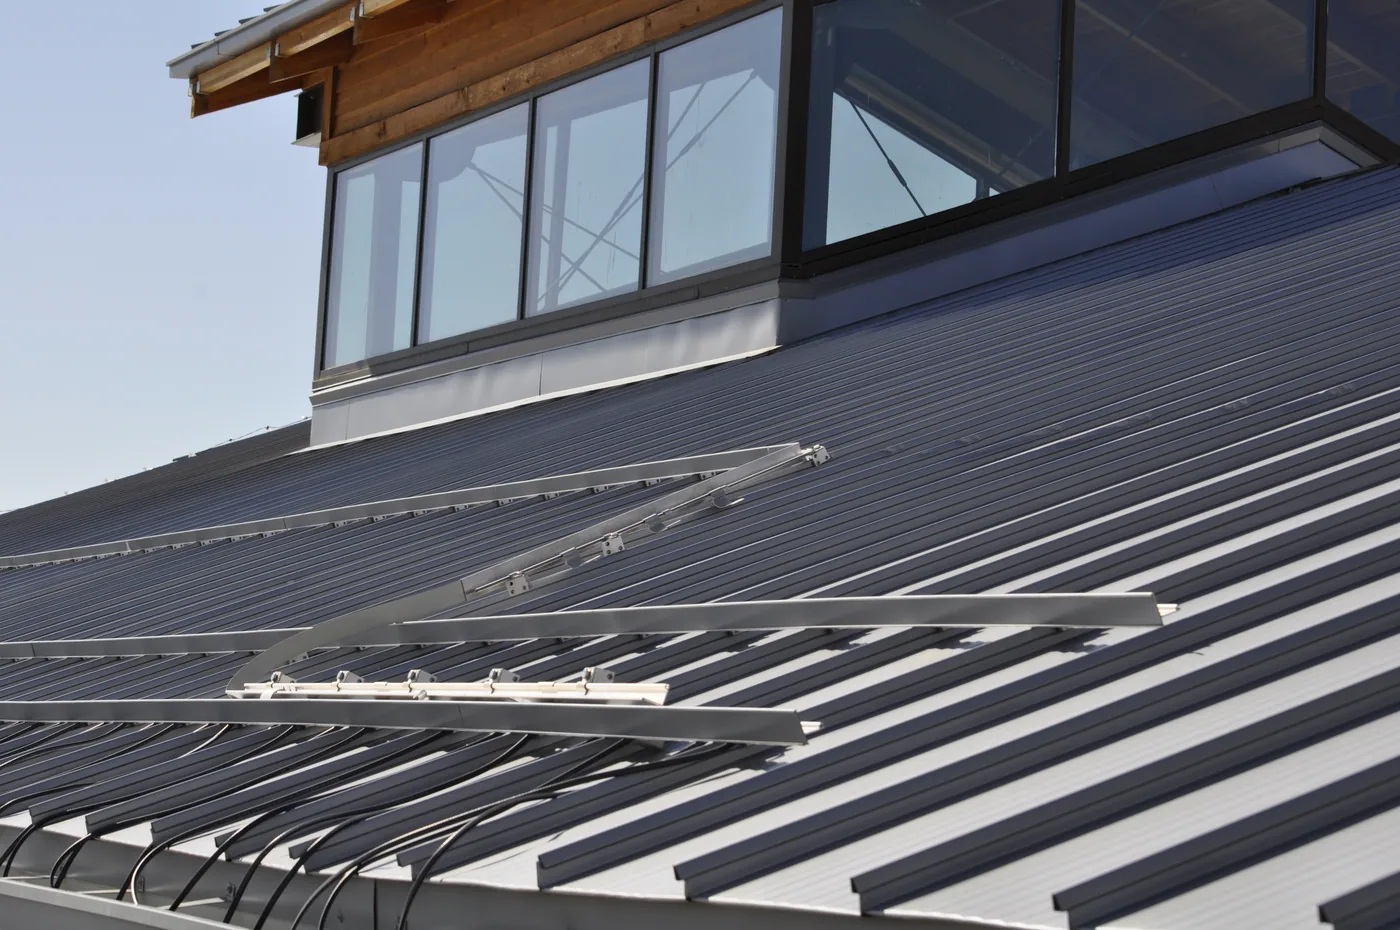
Here is an example of a bar system with a unique radius installation around the entry roof. |

Bar Finishes
You can find bar systems in mill finish or they can be custom powder coated to match the roof panels. There are also several manufacturers that make extruded aluminum bars that accept a 2” strip of metal in the face to match the roof panels. This works well with brand new roofs, but it is sometimes hard to match the color of a roof that has been faded in the sun for several years.
|
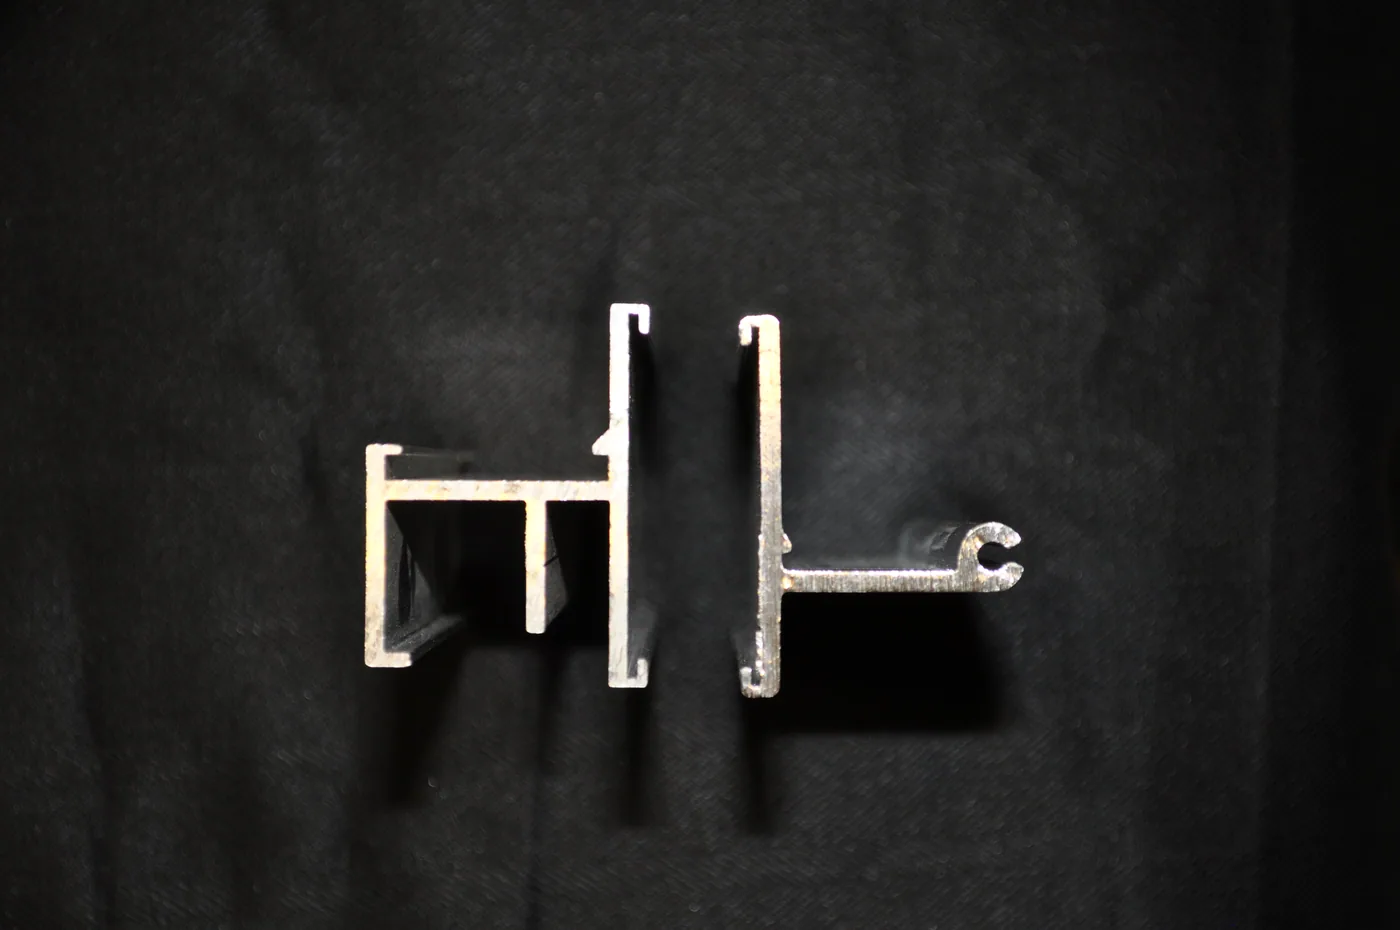
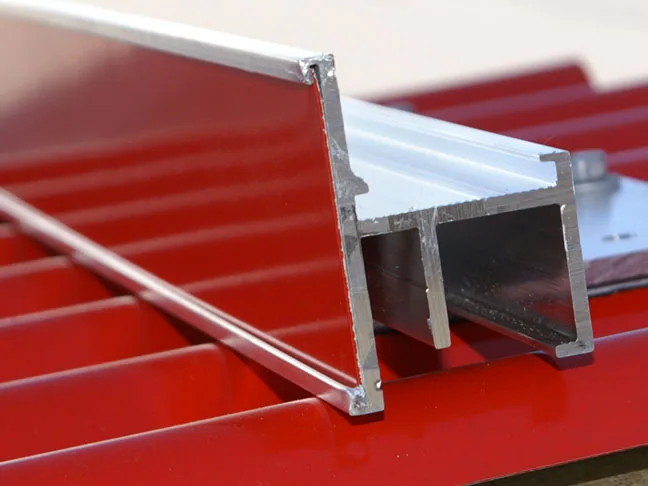
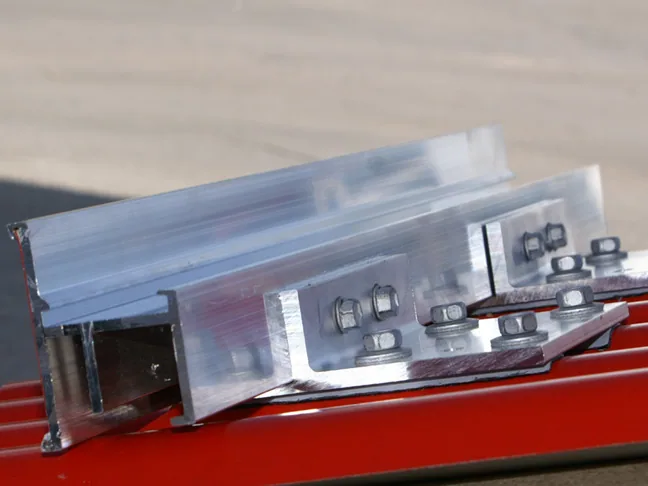
Here are two commercially available extruded aluminum bar samples, both accept Color Strips in the face but the heavier bar with the extra struts allows Ice Stoppers to mount perpendicular to the roof panels. The heavier bar has less deflection properties so it can span up to 42 inches. It is highly recommended to obtain samples from various bar manufacturers so the components can be examined up close. |
|
This is a picture of the extruded aluminum bar with a slide in 2 inch color strip. Notice the edges of the bar and mounting components are not color matched to the roof. |
|
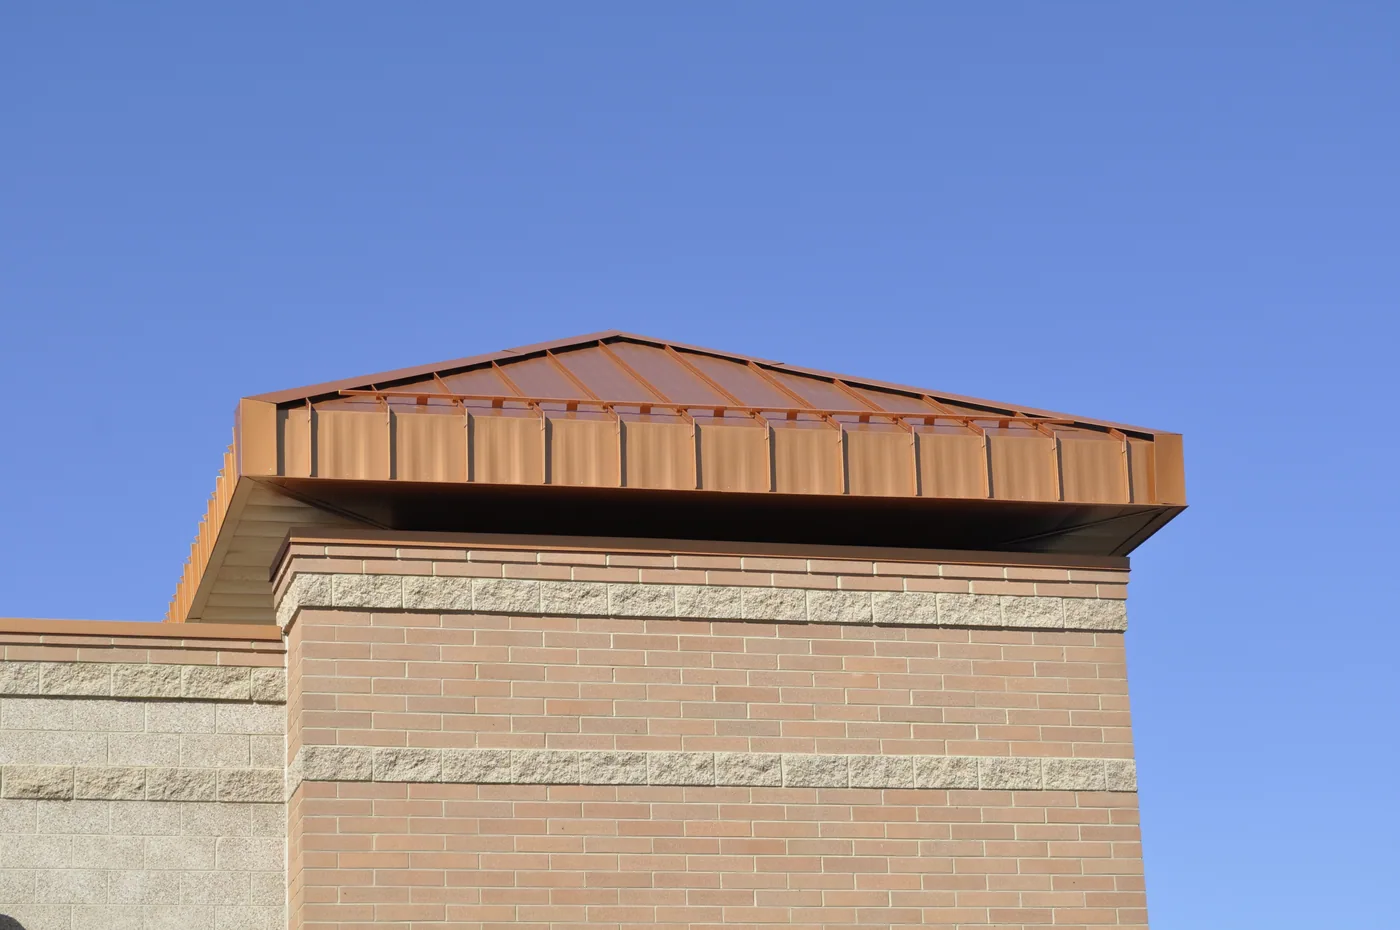
Here is a powder coated bar system with color matched Ice Stoppers. Powder coating provides a finished look since the components and Ice Stoppers also match. |
Ice Stoppers
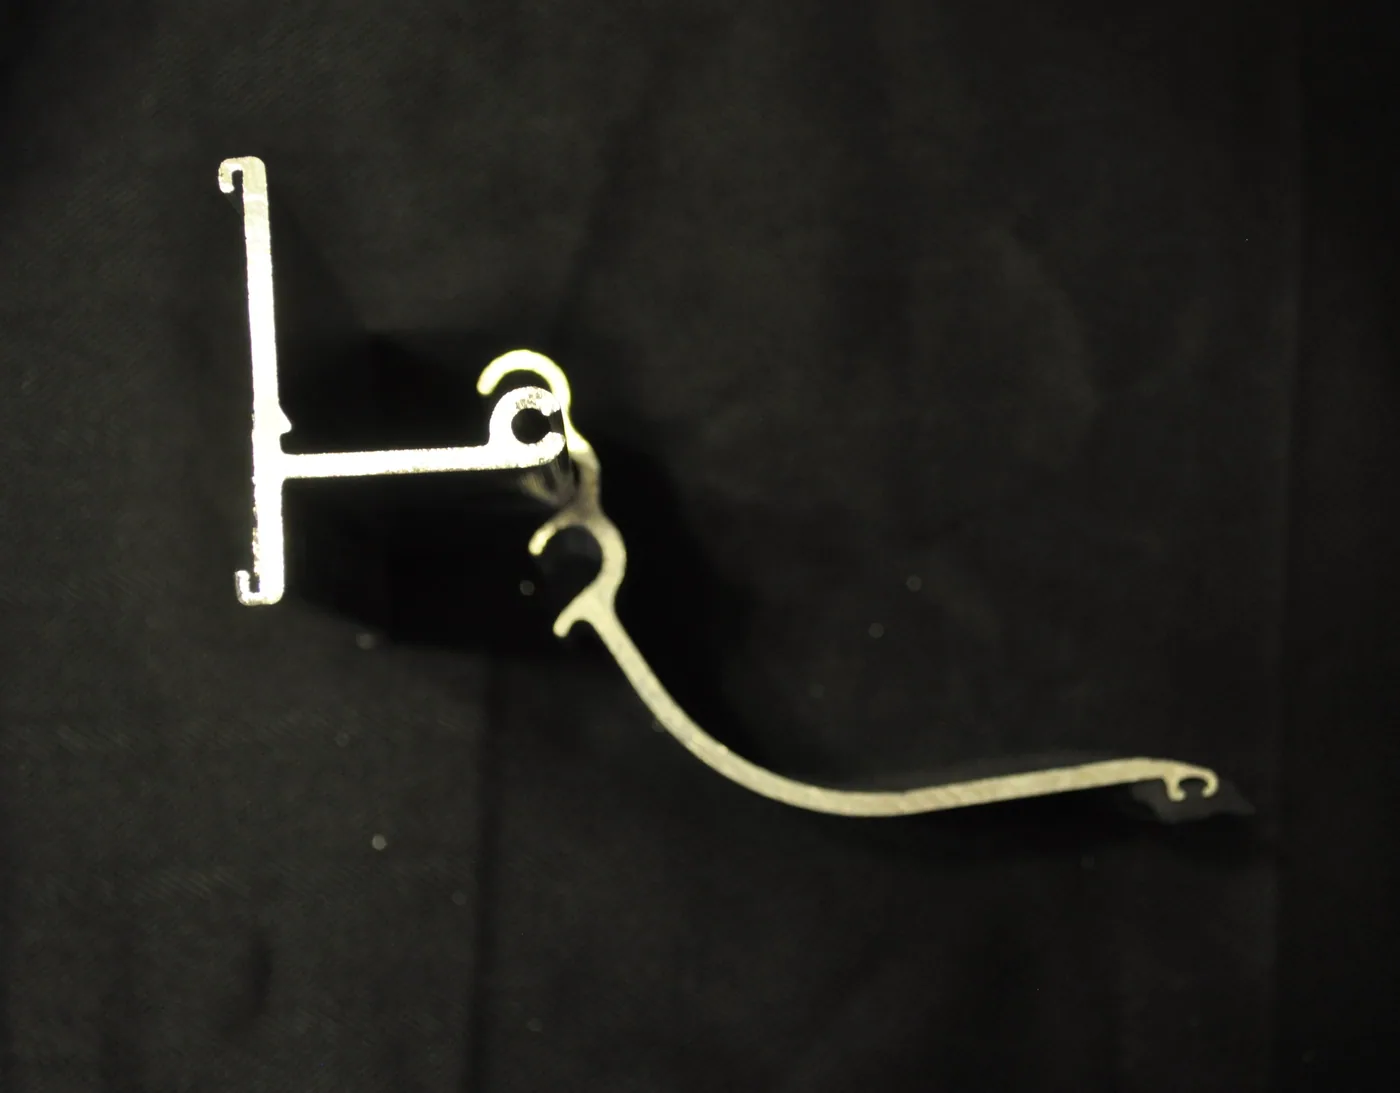
Bar systems must use some type of Ice Stopper between seams to protect the roof from snow and ice that can slide UNDER the bar. The most effective Ice Stoppers are mounted perpendicular to the roof panels to prevent snow and ice from ramping up and over the bar. They should be mechanically fastened to the bar itself with a foot to keep them from being flipped under or over the bar.
Perpendicular mounted Ice Stoppers are the ONLY product that can effectively hold the center of the panel down during high winds. This significantly increases the wind uplift performance and can eliminate the noise from rumbling roof panels. This patented style of perpendicular mounted Ice Stopper has been tested under the ASTM E-1592 guidelines to improve wind uplift performance up to 300% when designed for snow and wind protection.
|
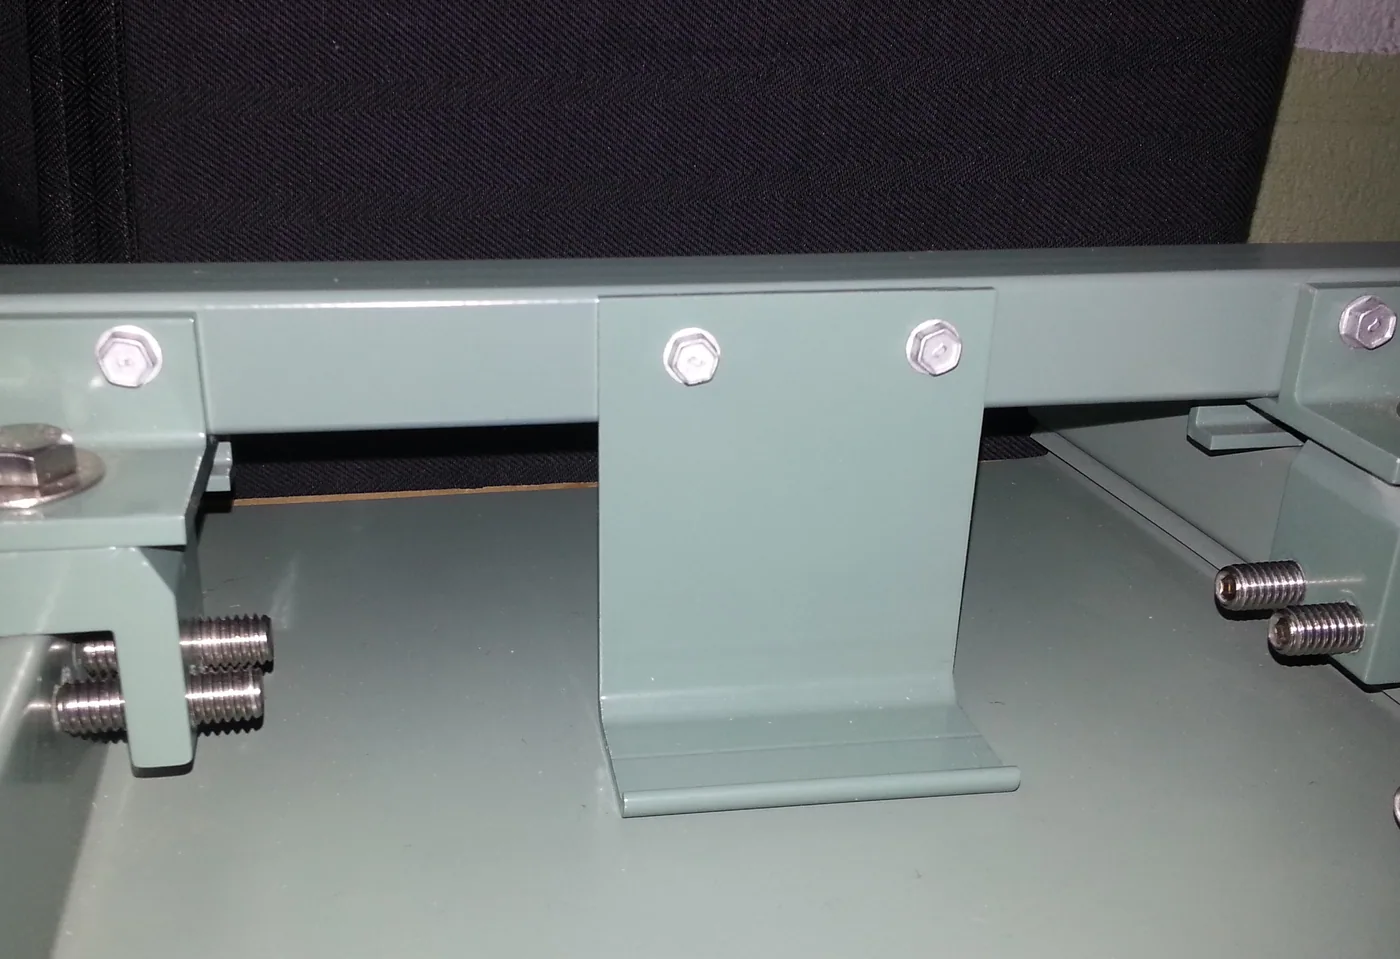
Here is a perpendicular mounted Ice Stopper. This view is from the upslope side of the bar. It is very simple in it’s design but performs several functions. It protects the roof from snow and ice sliding UNDER or ramping OVER the bar. It can also significantly increase wind uplift performance. The mechanically mounted foot design prevents the panel from lifting or rattling during extreme winds. |
|
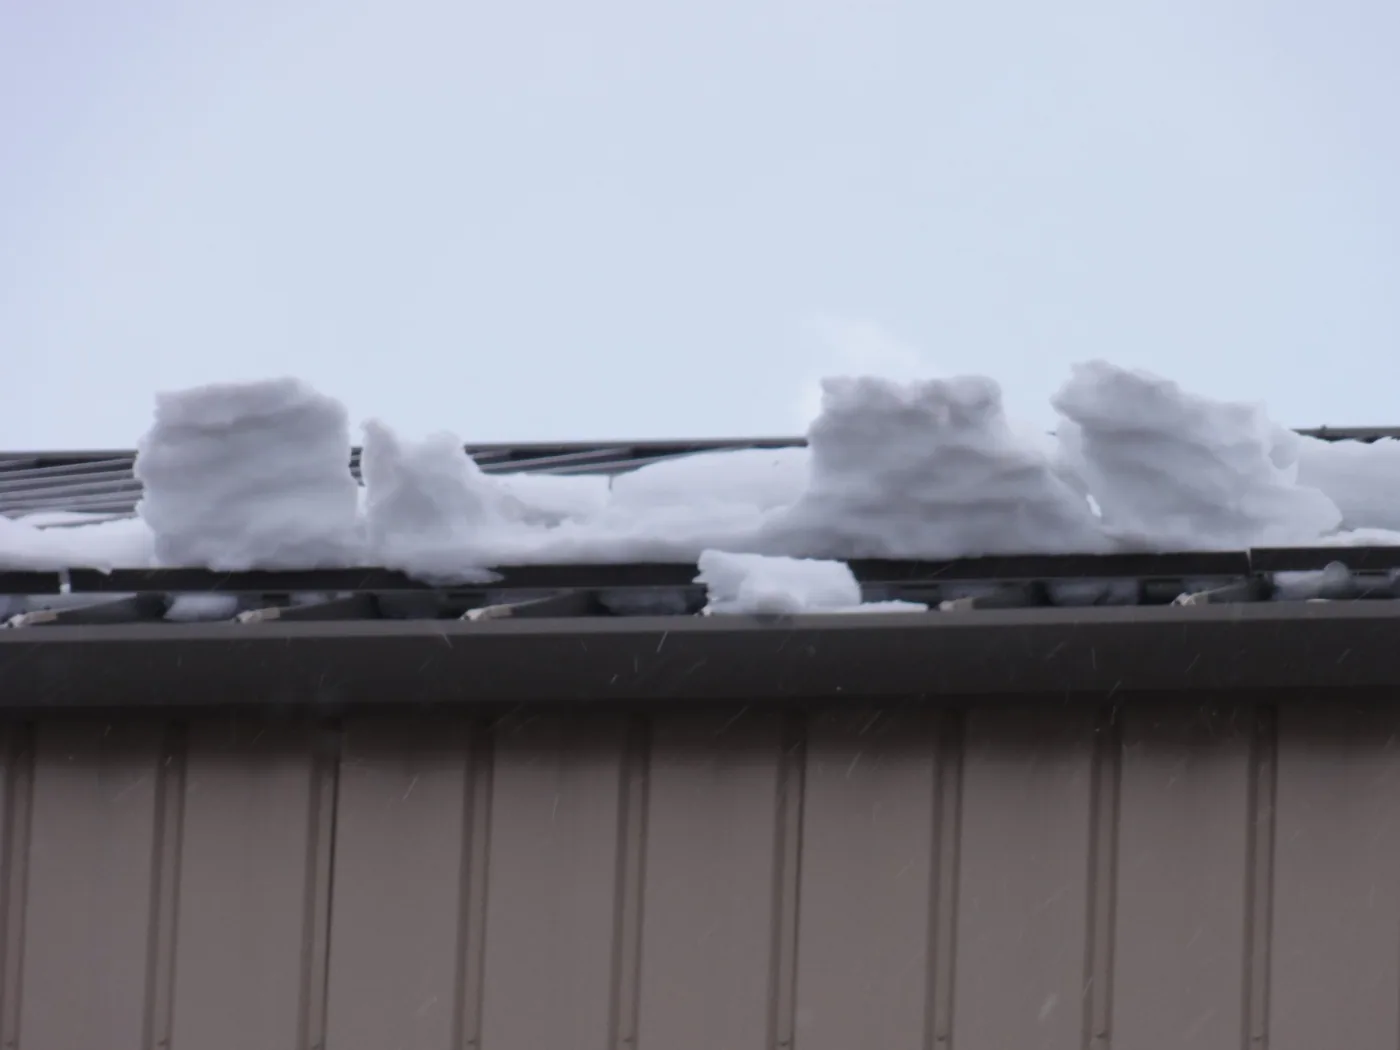
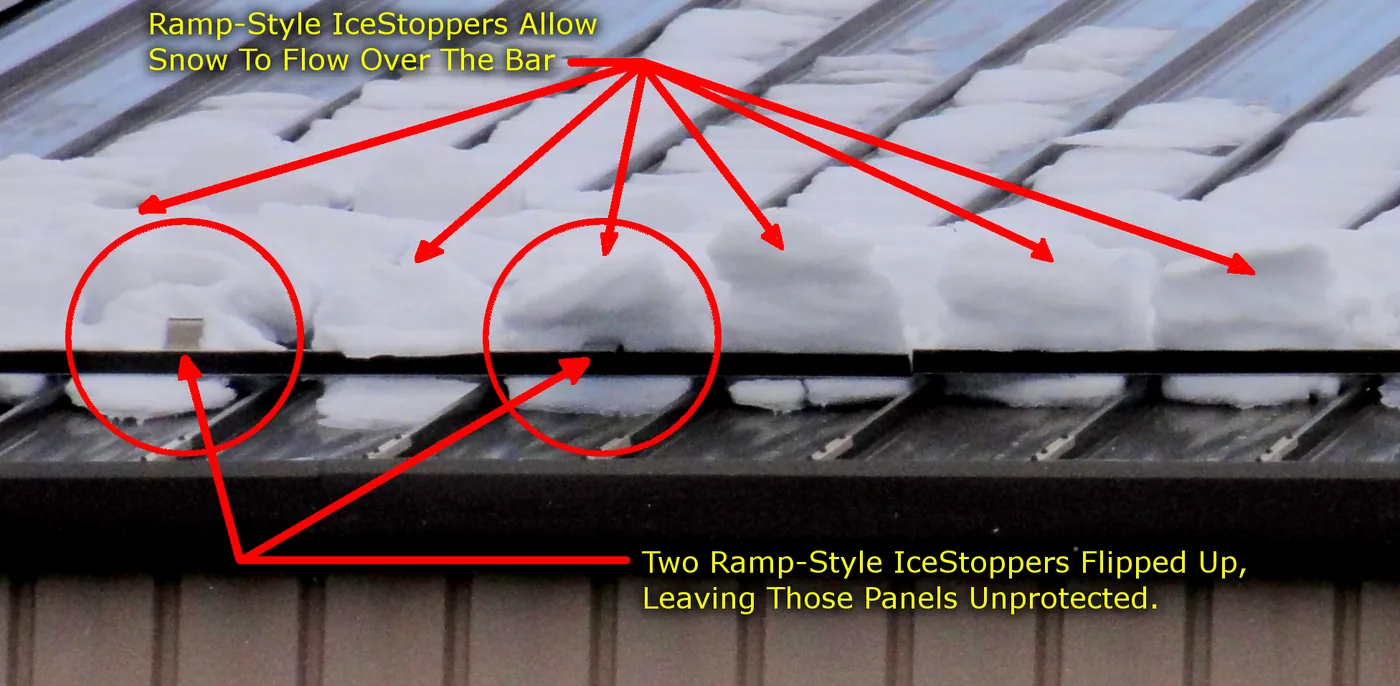
A non-mechanically attached Ice Stopper, as shown above, can blow or flip up and over the bar leaving the panel unprotected. This style of Ice Stopper also does not provide any wind uplift performance and can slide off center after installation. This leaves the center of the panel unprotected. The best option is a mechanically fastened, perpendicular Ice Stopper with a foot that adds wind uplift performance. |
|
Here is an example of a non-mechanically attached Ice Stopper. As you can see, the design allows snow and ice to ramp up and over the bar. This is the "Wrong Way" to hold snow and ice on a roof. |
|
Here is an another example of a bar system with non-mechanically attached Ice Stoppers. Notice that the snow is ramping up and over the bar instead of being held until it can safely melt. |
|
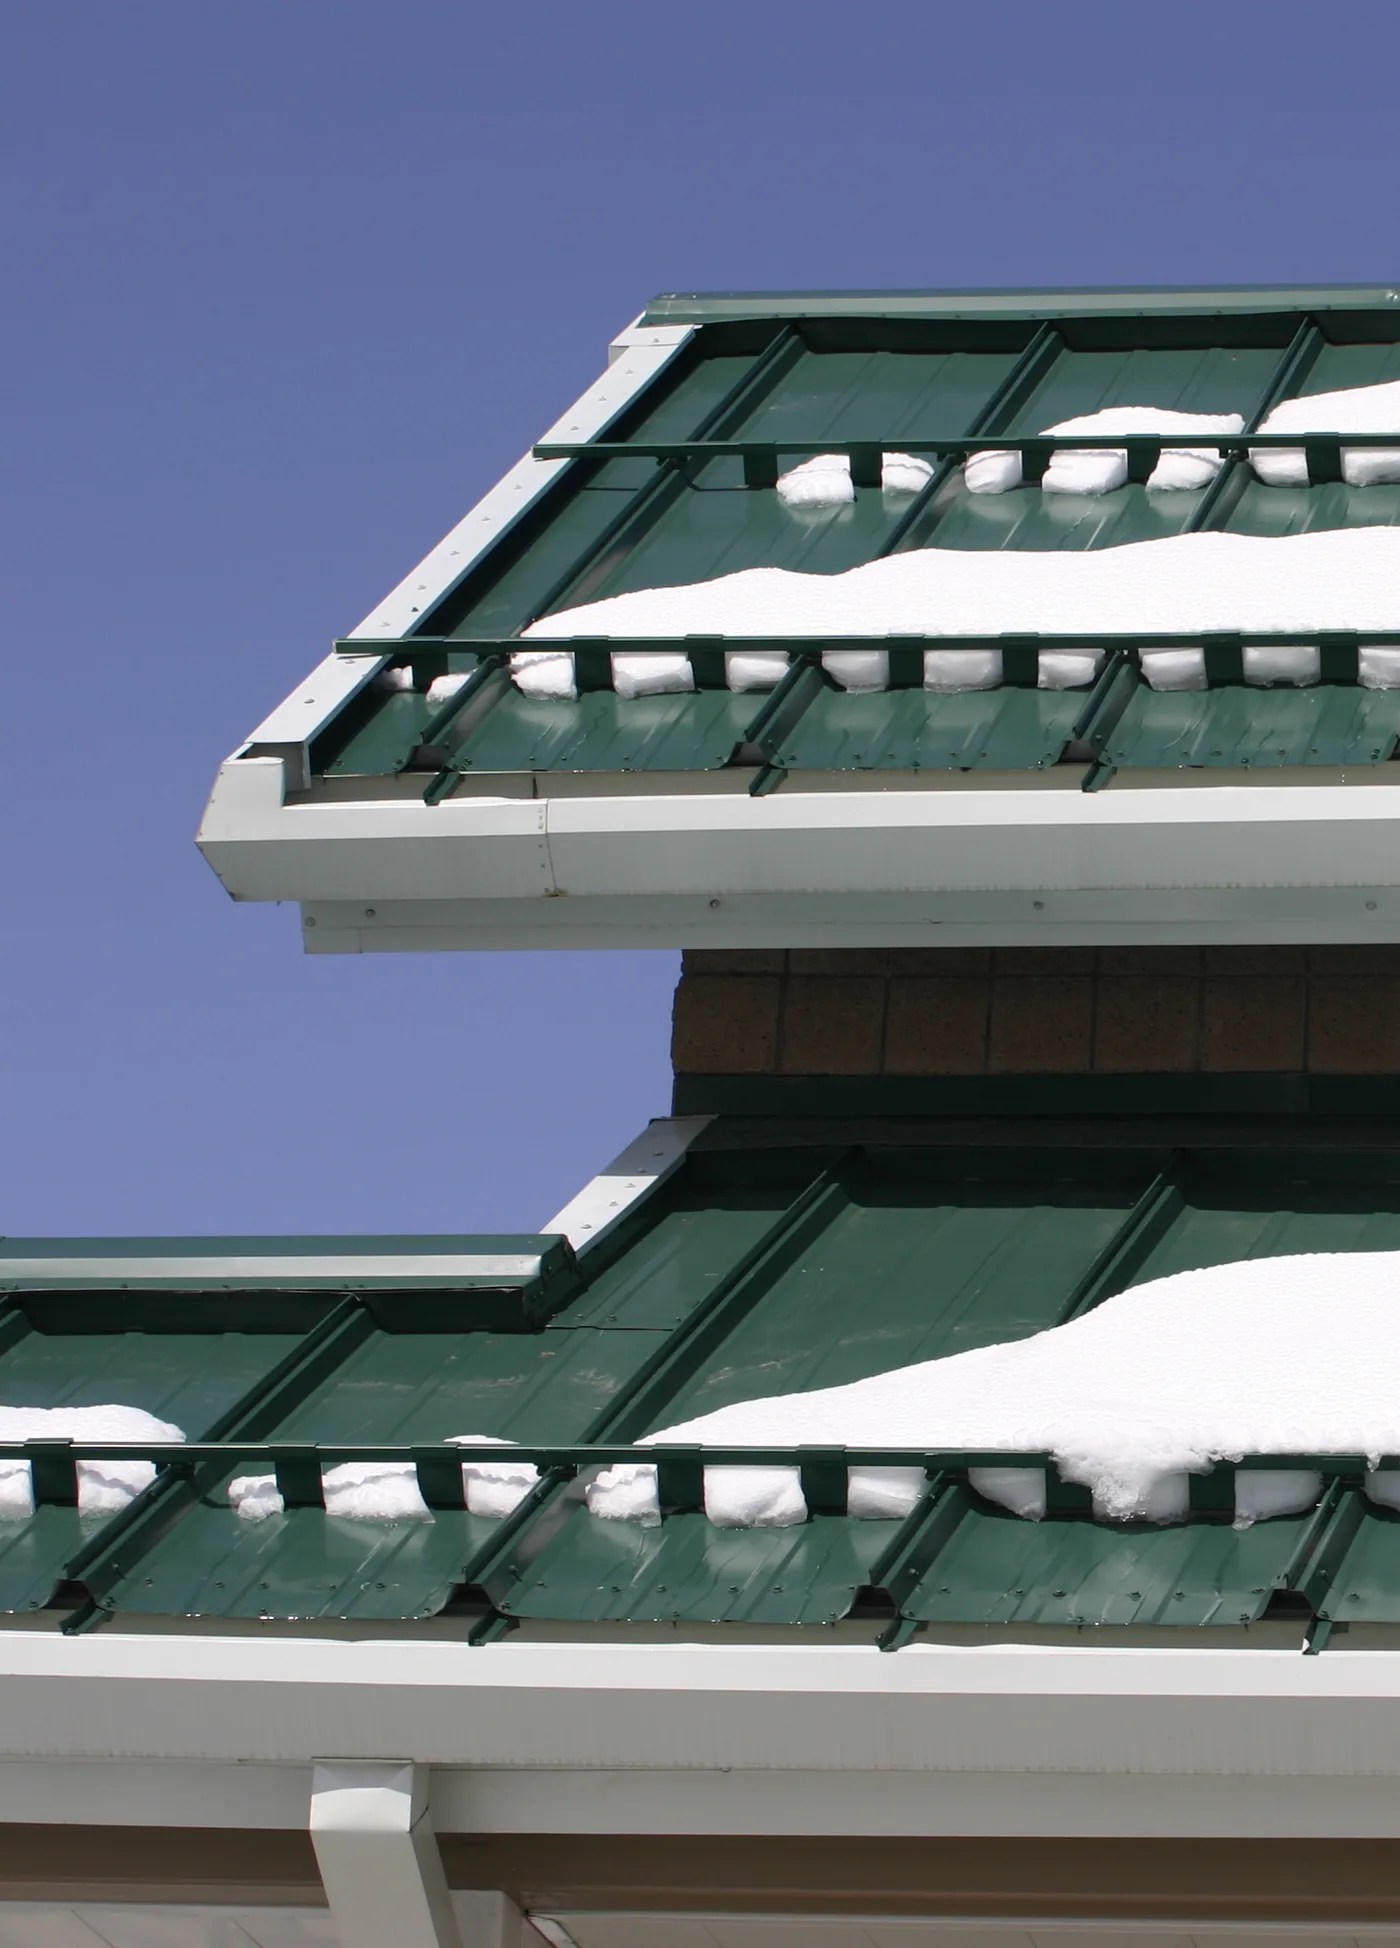
Excellent example of a well designed bar system using 2 perpendicular Ice Stoppers per panel for maximum hold time of snow and ice. |
|
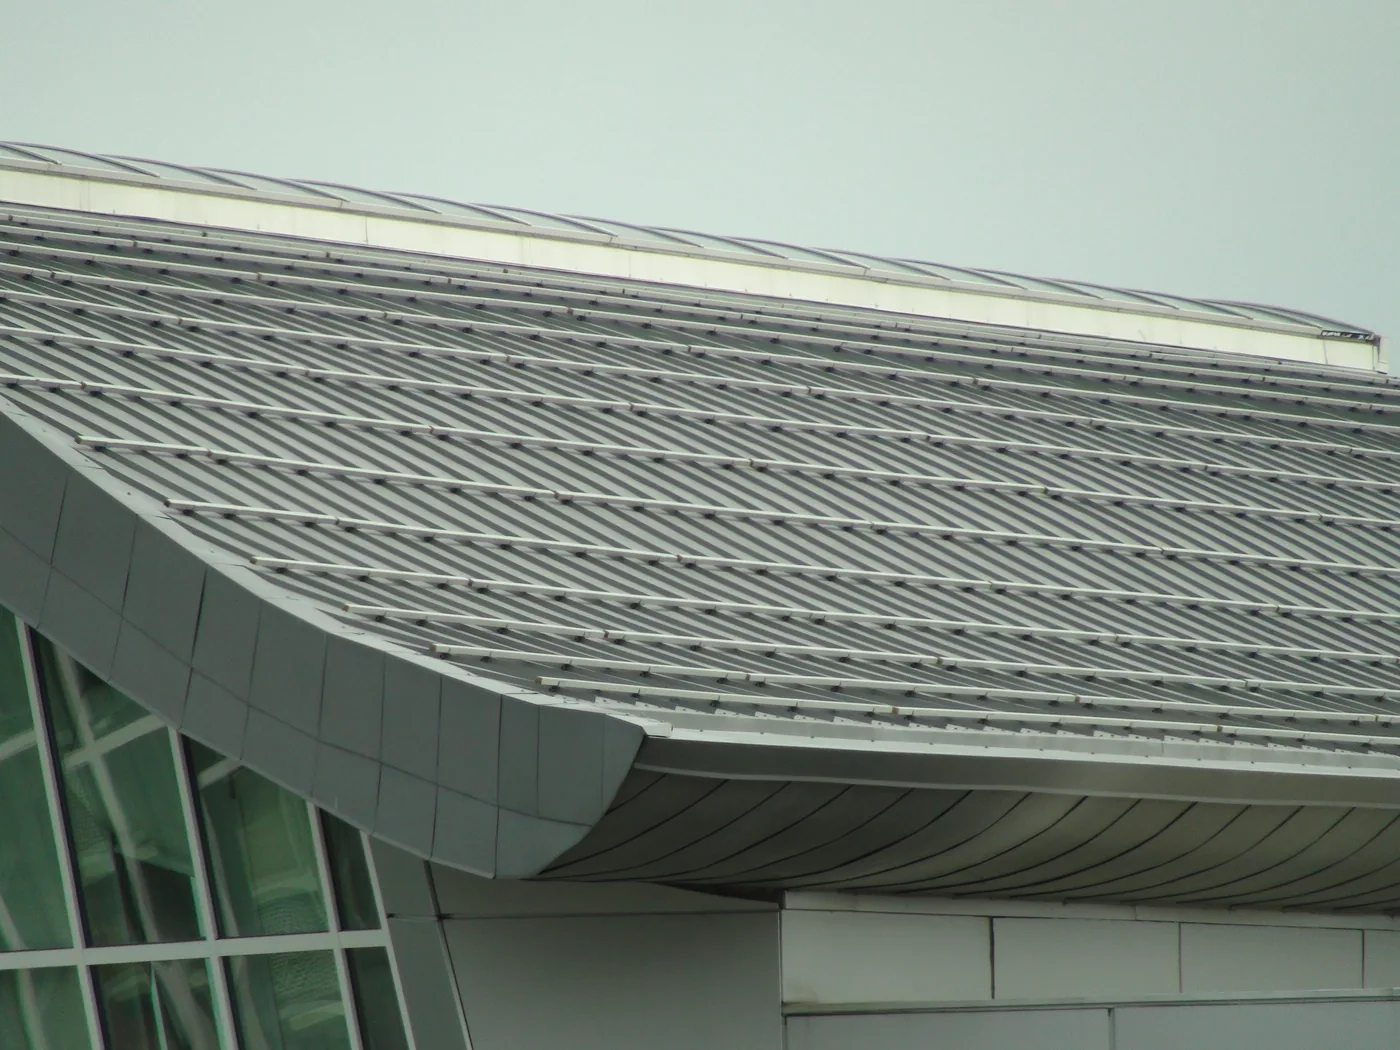
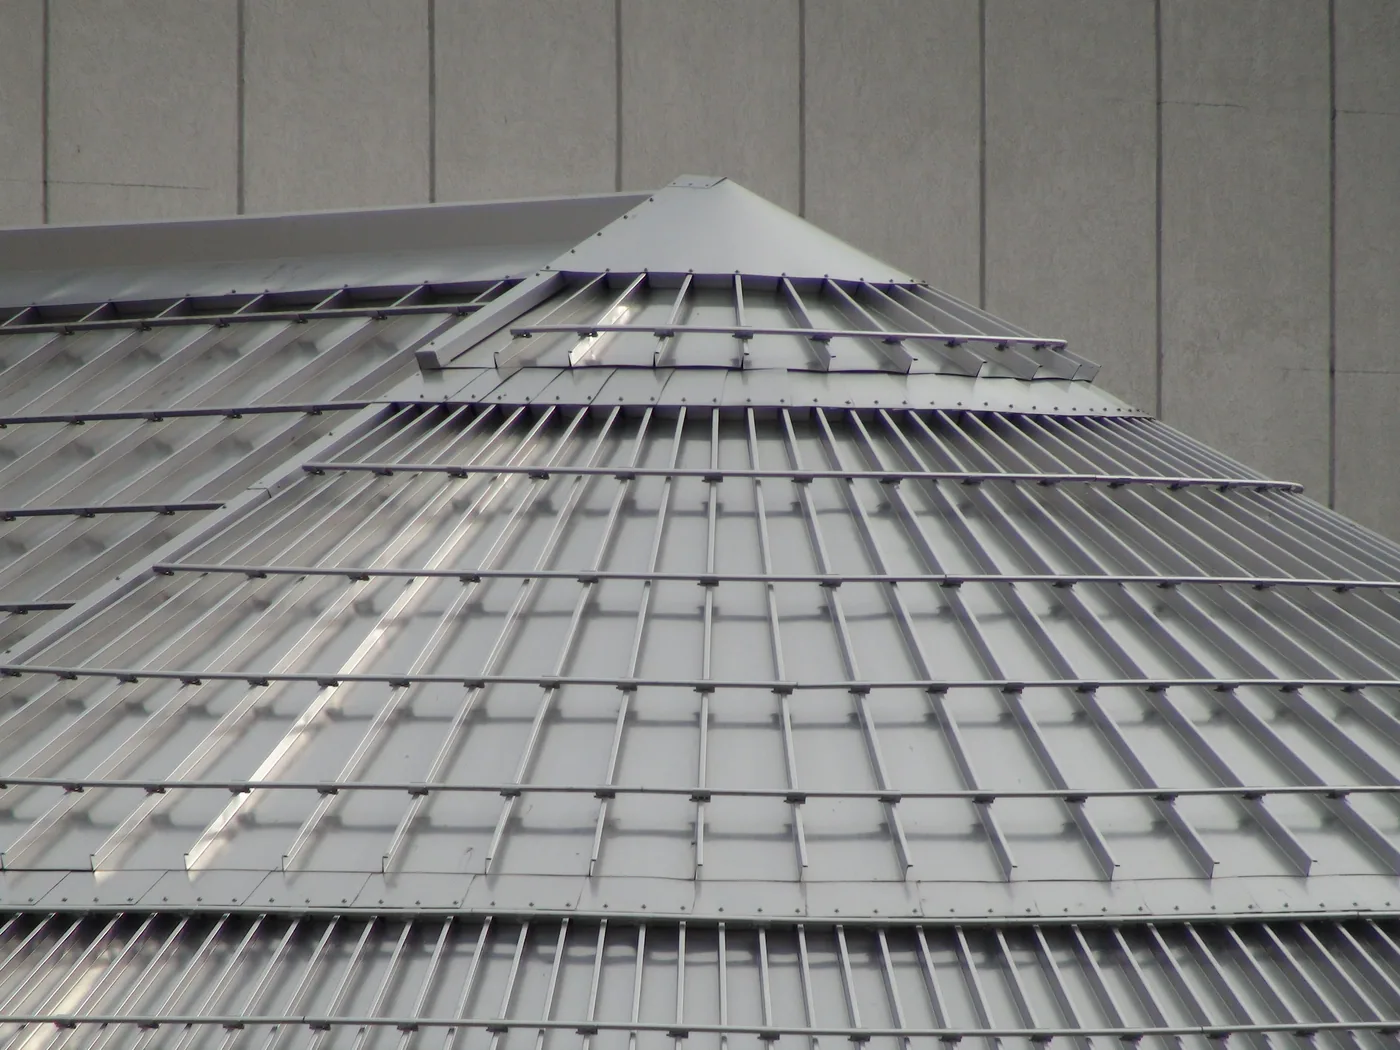
Design professionals often choose to use bar for aestetics as well as for snow retention. Featured here is the Alaska Center for the Performing Arts in Anchorage. This bar system has a unique architectural look while providing maximum protection against falling snow and ice. Several round roof areas of this project also used a radius bar design for a distinctive look. This project was featured in Metal Construction News in Jan 2011 and can be found online. |
|
Excellent example of a professionally designed bar system on a huge metal roof. Three evenly spaced rows on the main roof hold the snow and ice until it can safely melt away. Trying to catch this much snow down at the eave would be very detrimental to the roof panels and cause unbalanced loading on the roof surface.
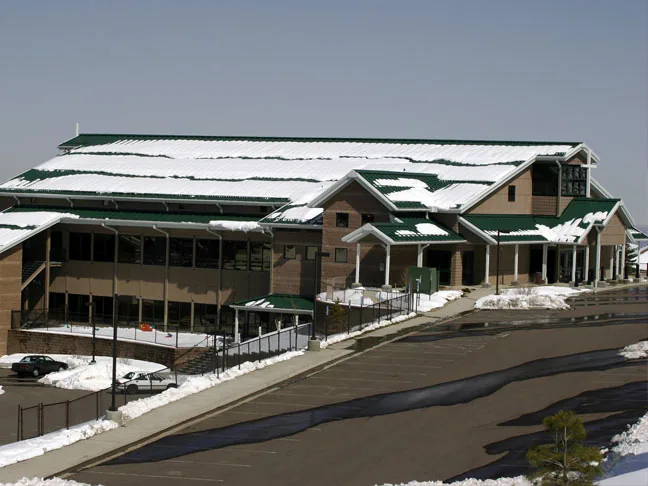
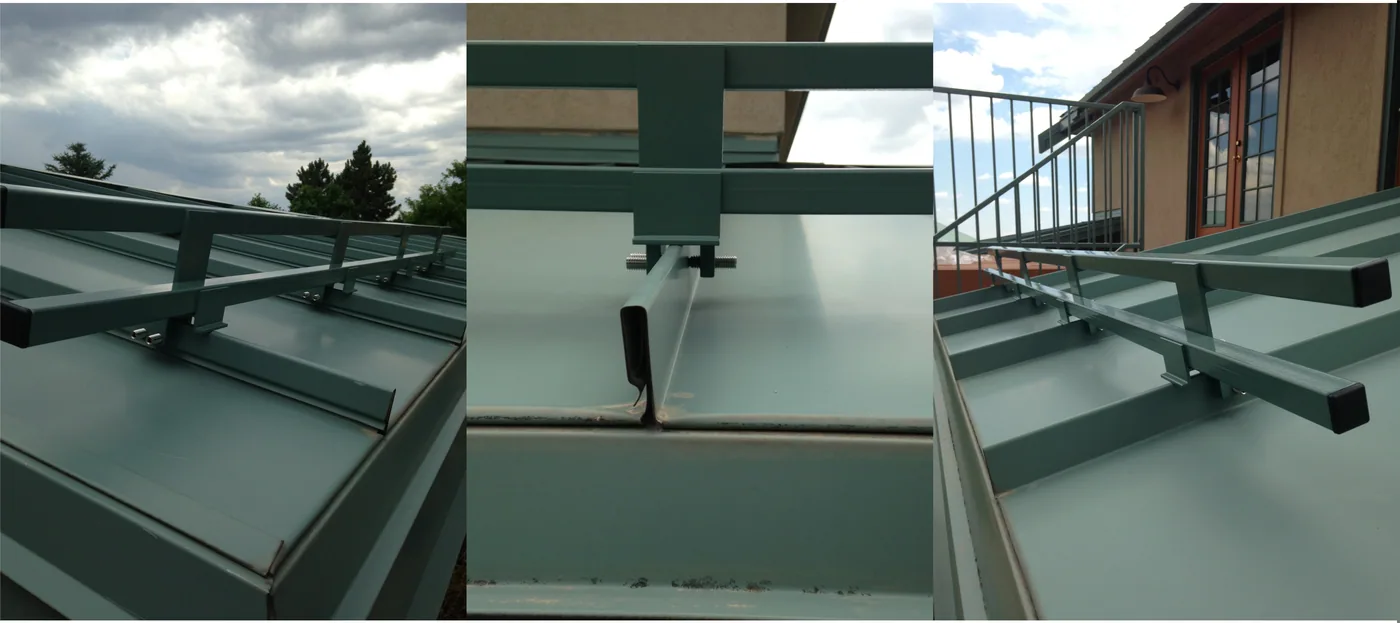
Here is an example of a 2bar system often specified by architects. It is important to use flat faced bar and clamps at every seam for this type of design. |
Bar Attachment Options
Depending on the project, a bar system can be installed with either non-penetrating seam clamps for standing seam roofs or with mounting brackets for exposed fastener roofs, shingles, membranes or tile roofs.
|
Top loading bracket for exposed fastener roofs, the screws must be fastened into a steel purlin or structural wood. This bracket is powder coated along with the bar. |
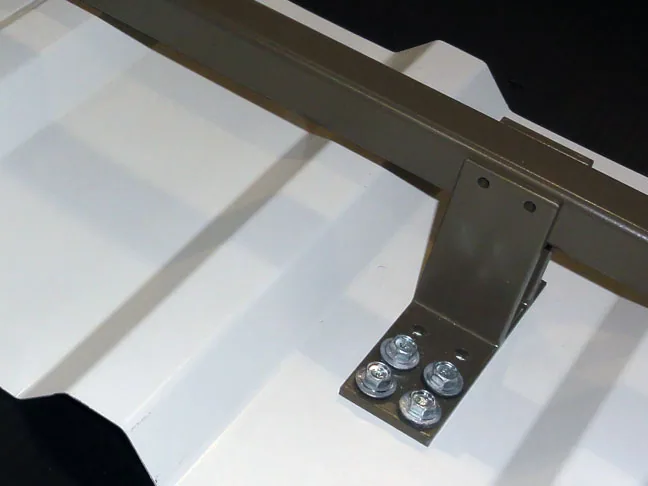
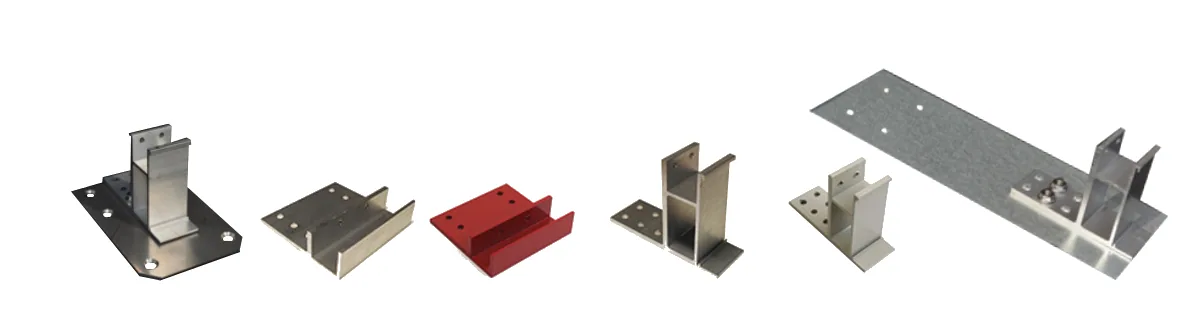
Here are several brackets for mounting bar systems to a variety of roofing materials. Membrane/TPO, round corrugated, exposed fastener, shingle, and tile roofs can now utilize this attachment method.
|
Here is a mill finished system using Color Strips and brackets. Notice the bar and mounting brackets are mill finish. An advantage of using the screw down brackets on this roof is that they also perform as Ice Stoppers. |
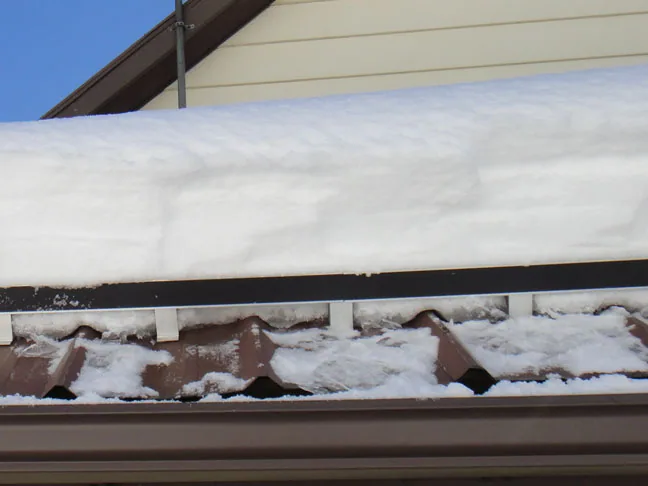
|
Excellent example of a bracket mounted bar system with Color Strips holding about 2 feet of snow. |
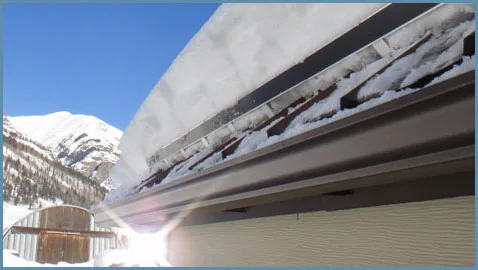
|
Specialty bracket for mechanically mounting a bar system to a round corrugated roof panel. |
|
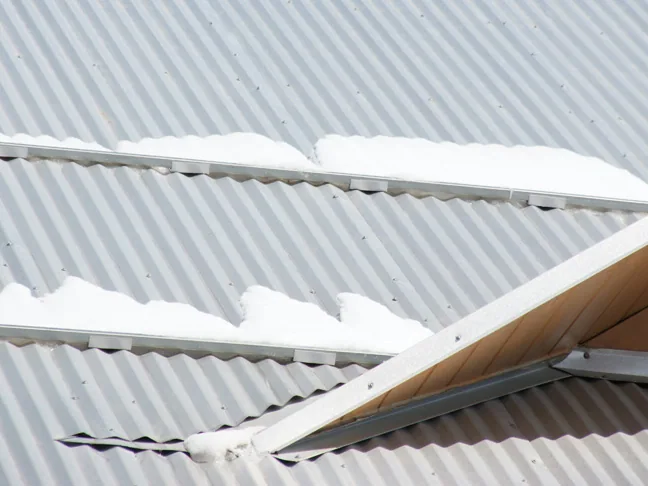
Roof utilizing a specialty corrugated roof bracket for mechanically mounting a bar system to a round corrugated panel. |
Seam Mounted Clamps
Most bar systems on standing seam roofs are installed using non-penetrating seam clamps. There are several styles available, the most popular are made of stainless steel or aluminum. The fastest system to install is one that uses a top-loading clamp that allows the bar to simply drop into the clamp without having to feed the bar thru the clamps. This eliminates scratches on the bar’s finish and keeps the installation cost down.
|
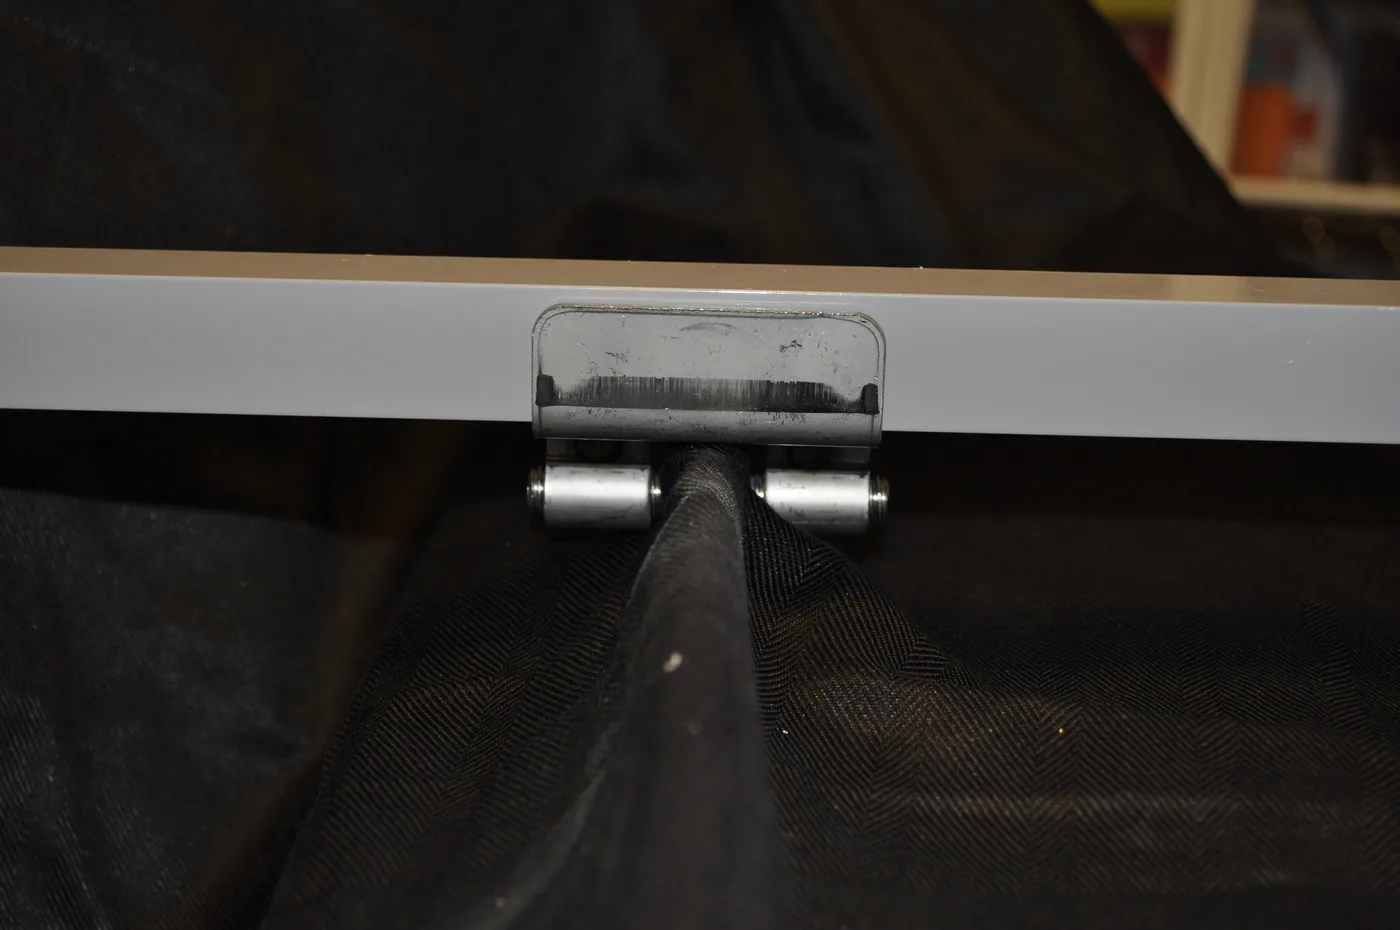
Here is an example of a popular stainless steel clamp that allows the bar to simply drop into the clamp, the bar is then attached with 2 Tek screws on the upslope side. This is the fastest install method and protects the bar’s painted finish from scratching. |
Clamp materials can vary from diecast zinc zamak, to aluminum, to the preferred stainless steel. The most popular clamps use multiple set screws for direct attachment to the seams as opposed to just using a 2-piece clamp that squeezes the seam at a single point. Many clamps are stronger than the seams they are mounted on so proper layout and clamp loading distribution is of utmost importance. Improper use of clamps can cause severe panel damage and system failure. Always consult the bar system manufacturer for a project specific layout before specifying a bar system.
|
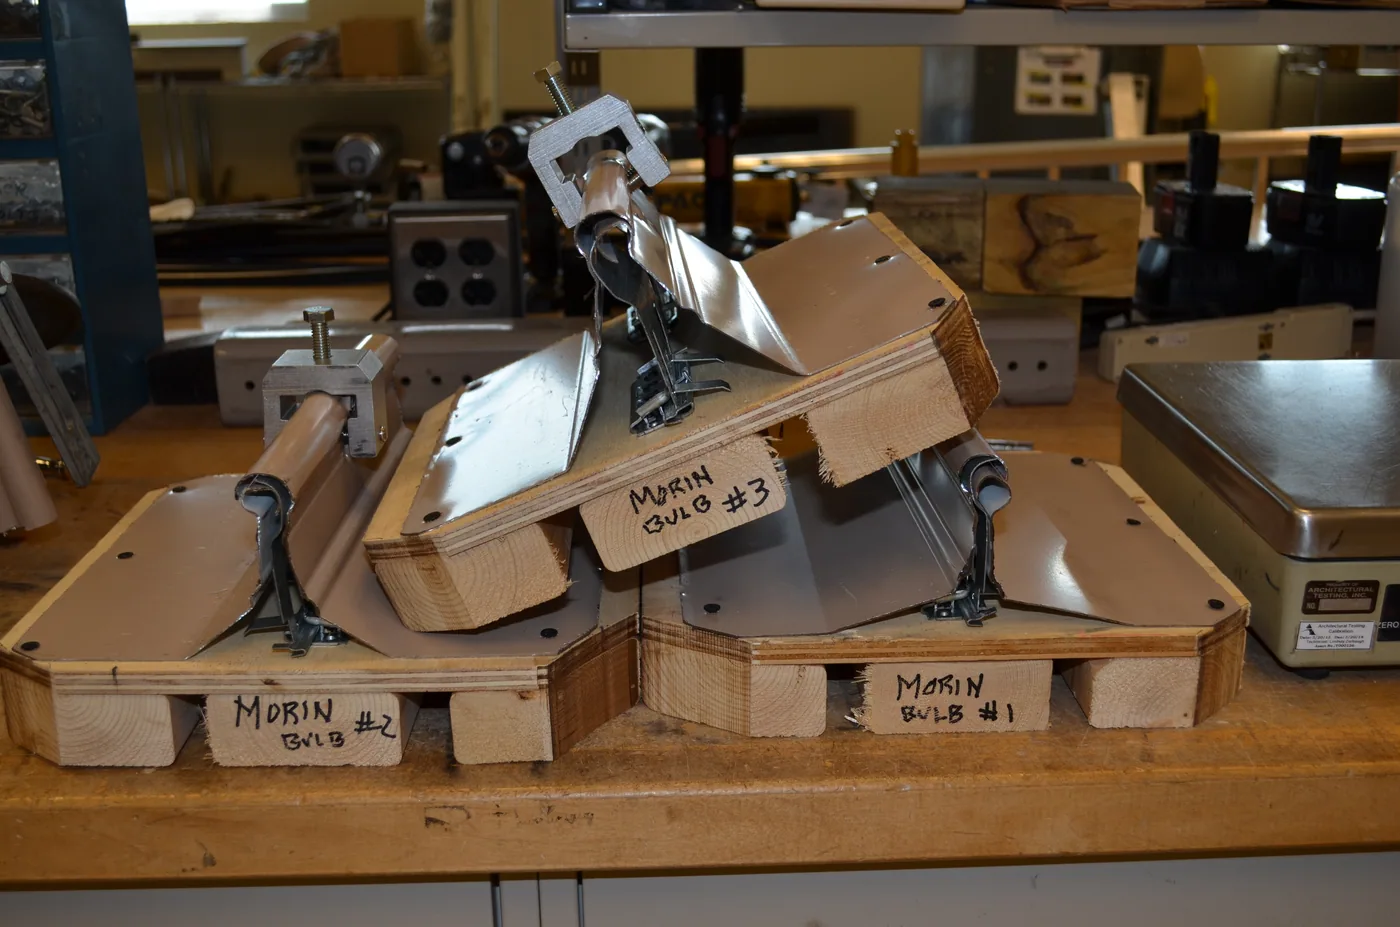
Stack of test panels during clamp testing on a bulb seam. Extensive ATI tests show that the seams are the weakest link and were always the point of failure. |
Some clamps are designed to fit specific panels and some are designed for universal fit on multiple seams without panel feeding. From an installation standpoint, the easiest to install are the universal style 1-piece clamps that have a wider throat opening so they can drop over the various seams without having to be assembled or panel fed up from the bottom of the seam. Most roof clamps must be used on at least 24 gauge panels to avoid damaging the seams. Here is some basic design considerations for choosing the correct clamp-on bar system.
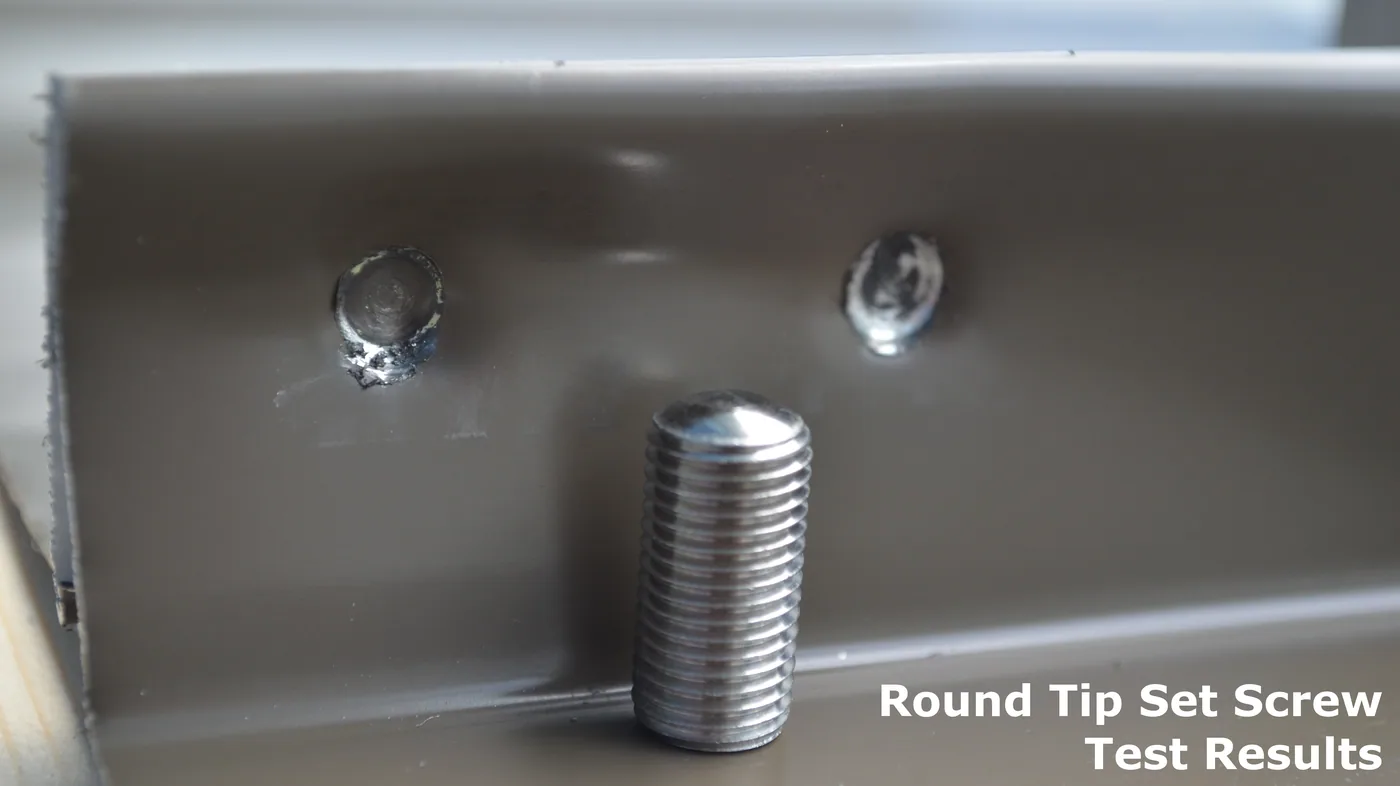
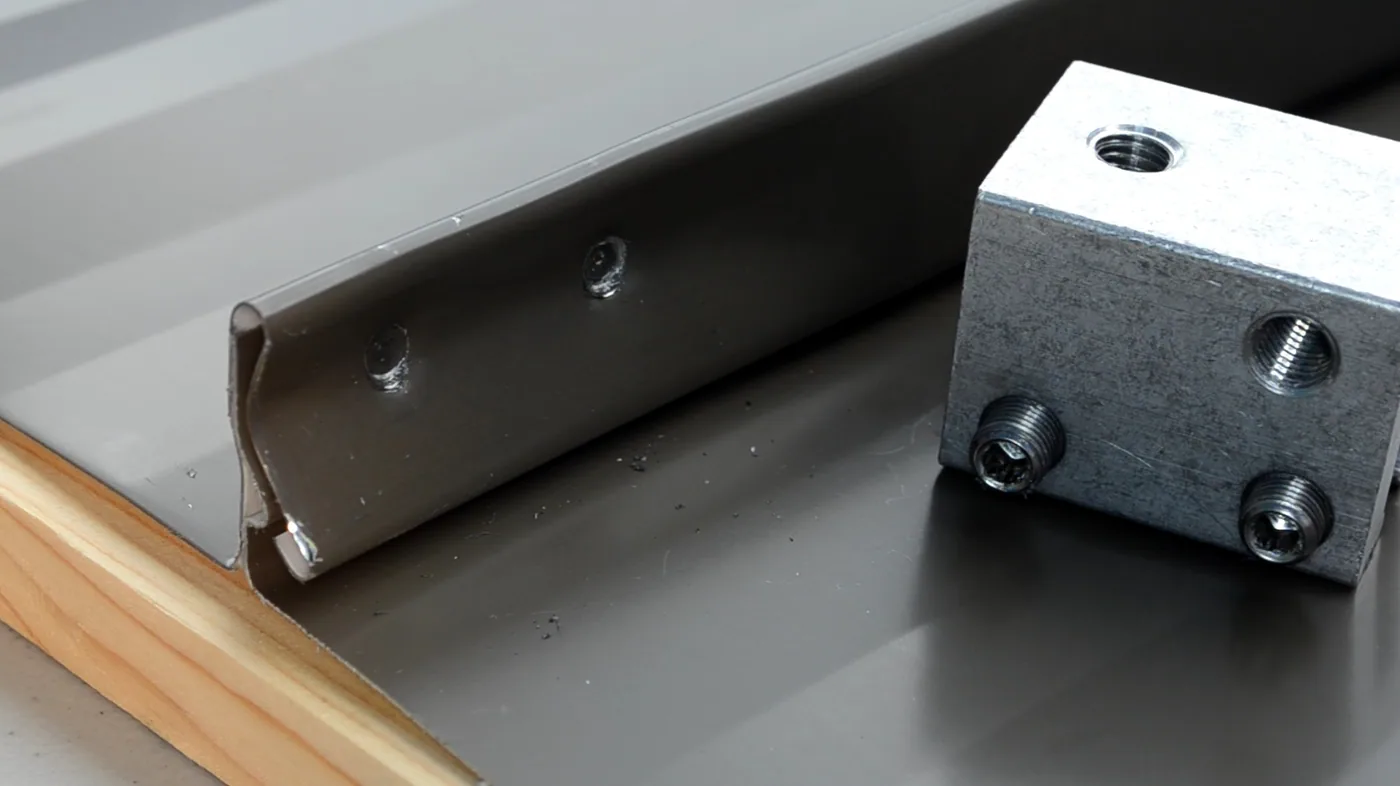
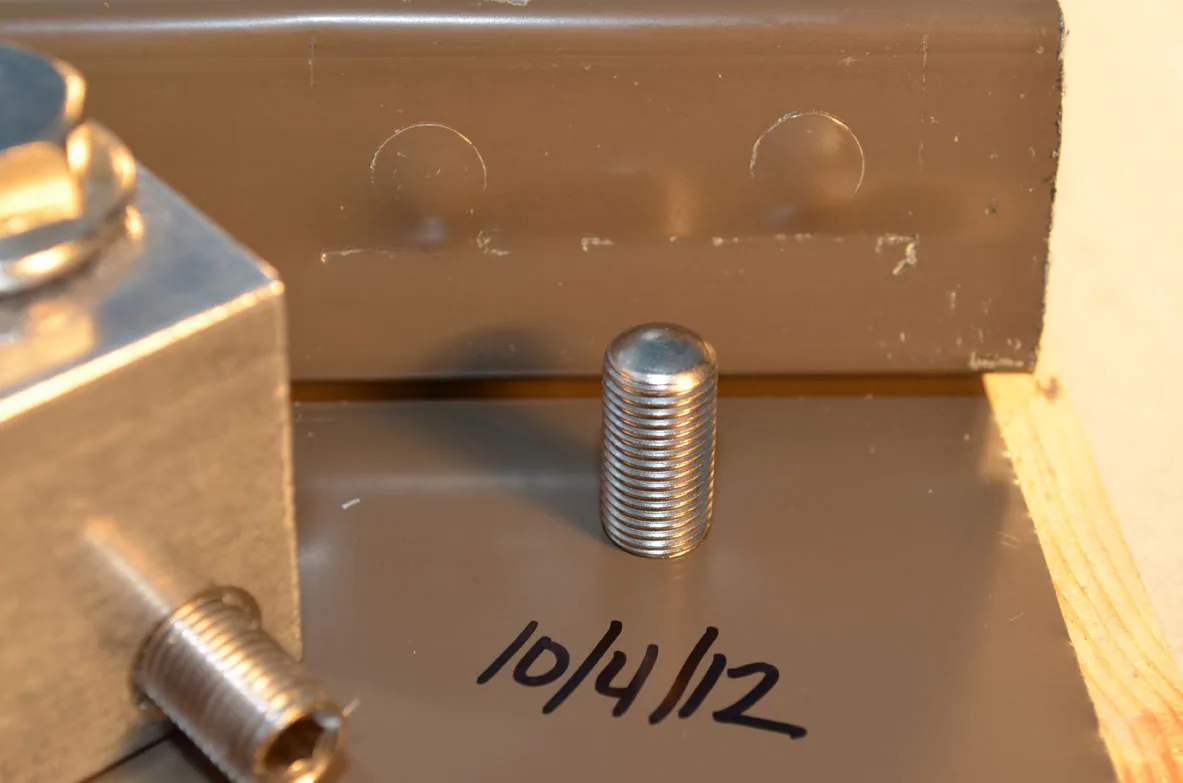
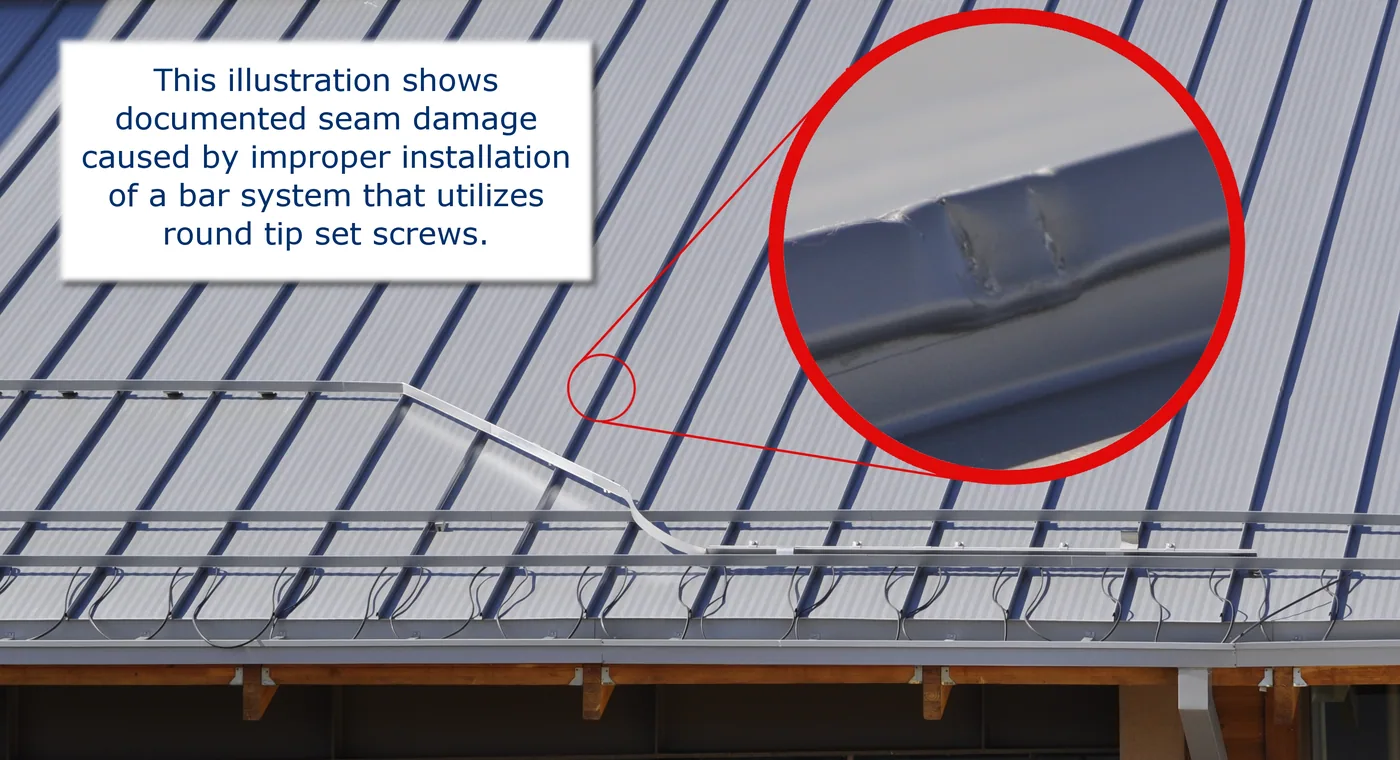
Cupped tip set screws only require 90in./lbs. of torque for a lifetime attachment. Round tip set screws can require up to 180in./lbs. of torque to keep the clamp from sliding down/off the seams. High torque can cause seam distortion and can penetrate and damage the seam.
Testing has proven that fine threaded set screws used in aluminum clamps often lock up preventing them from being re-torqued or removed. This can even happen when properly applied to the factory recommended torque settings. This is due to the aluminum shavings of the clamp being caught in the fine threads of the set screw because of the high torque setting required. Only coarse threaded, low torque set screws are recommended for use in aluminum clamps.
Choose a one-piece clamp that does not require the bar to be fed thru the clamp during installation, it can scratch the finish of the bar and take longer to install.
|
The image above is a 2-piece clamp made of die cast Zinc Zamak that requires the bar to be fed through the clamps and relies on compression in order to stay in place on the seam. Notice that the aluminum bar is turned 45 degrees. A bar mounted at this angle will not hold snow and ice as long as a flat faced bar mounted perpendicular to the panels. |
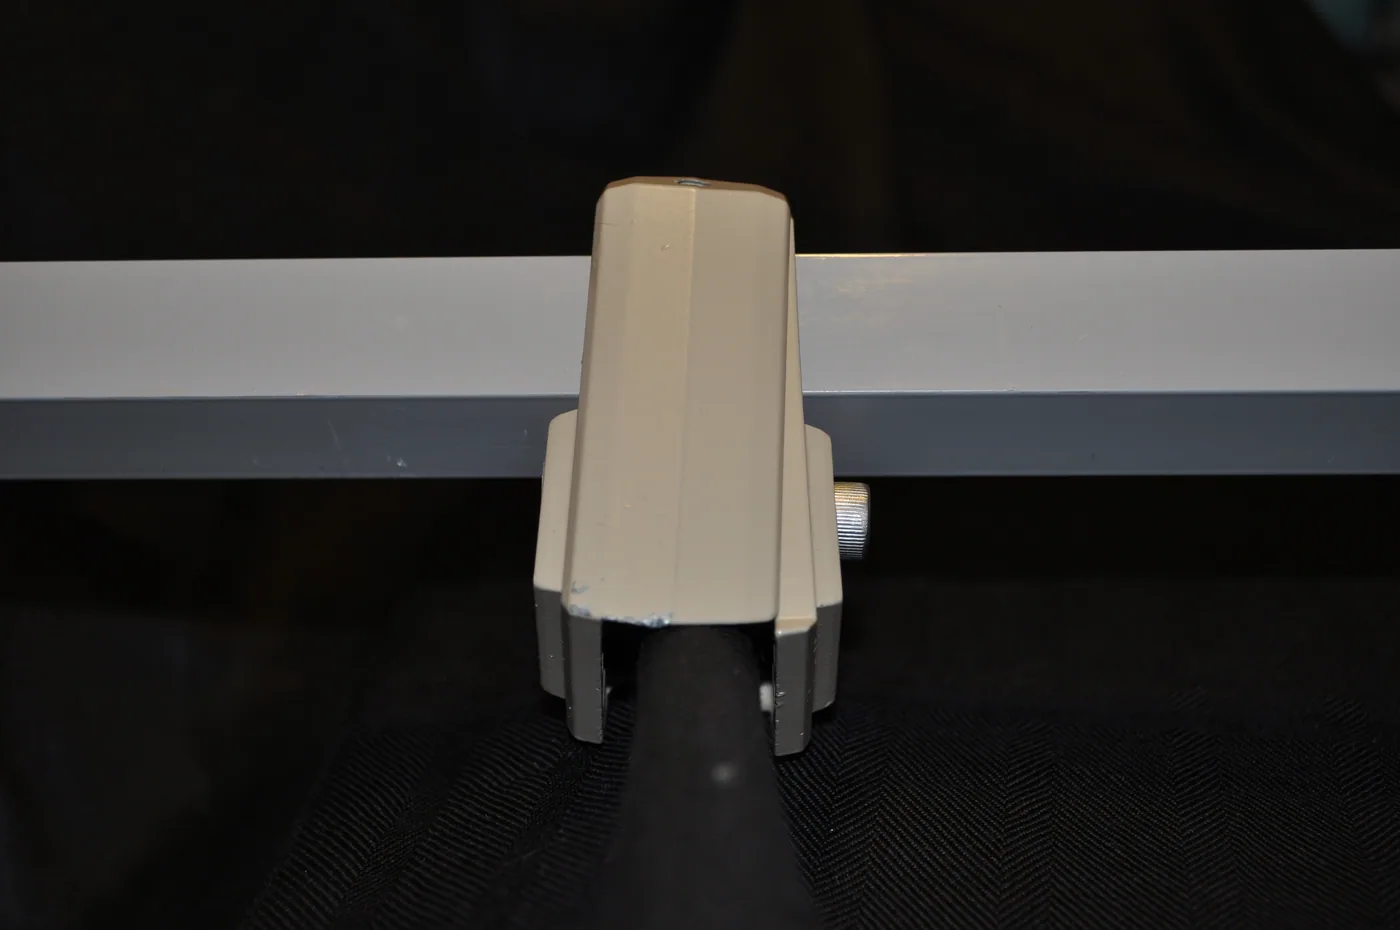
Warranties vary on bar systems, be sure to analyze the restrictions. Many companies do not warranty the performance of the system, only the parts. Some companies advertise lifetime warranties but they charge thousands of dollars in extra fees to add a performance warranty. There are “lifetime warranties” that actually expire in 30 years. According to the Metal Roofing Alliance, the life cycle of a metal roof is 50+ years! Always specify systems that include a full lifetime warranty for parts and performance. This ultimately protects the client, the roof components, and the pedestrians below for the life of the roof.
Set Screws
Round Tip vs. Cupped Tip
There is a lot of controversy regarding metal roof clamp set screws and how they attach to standing seam metal roofs. Primarily fine threaded round tip set screws vs. course threaded cupped tip set screws.
|
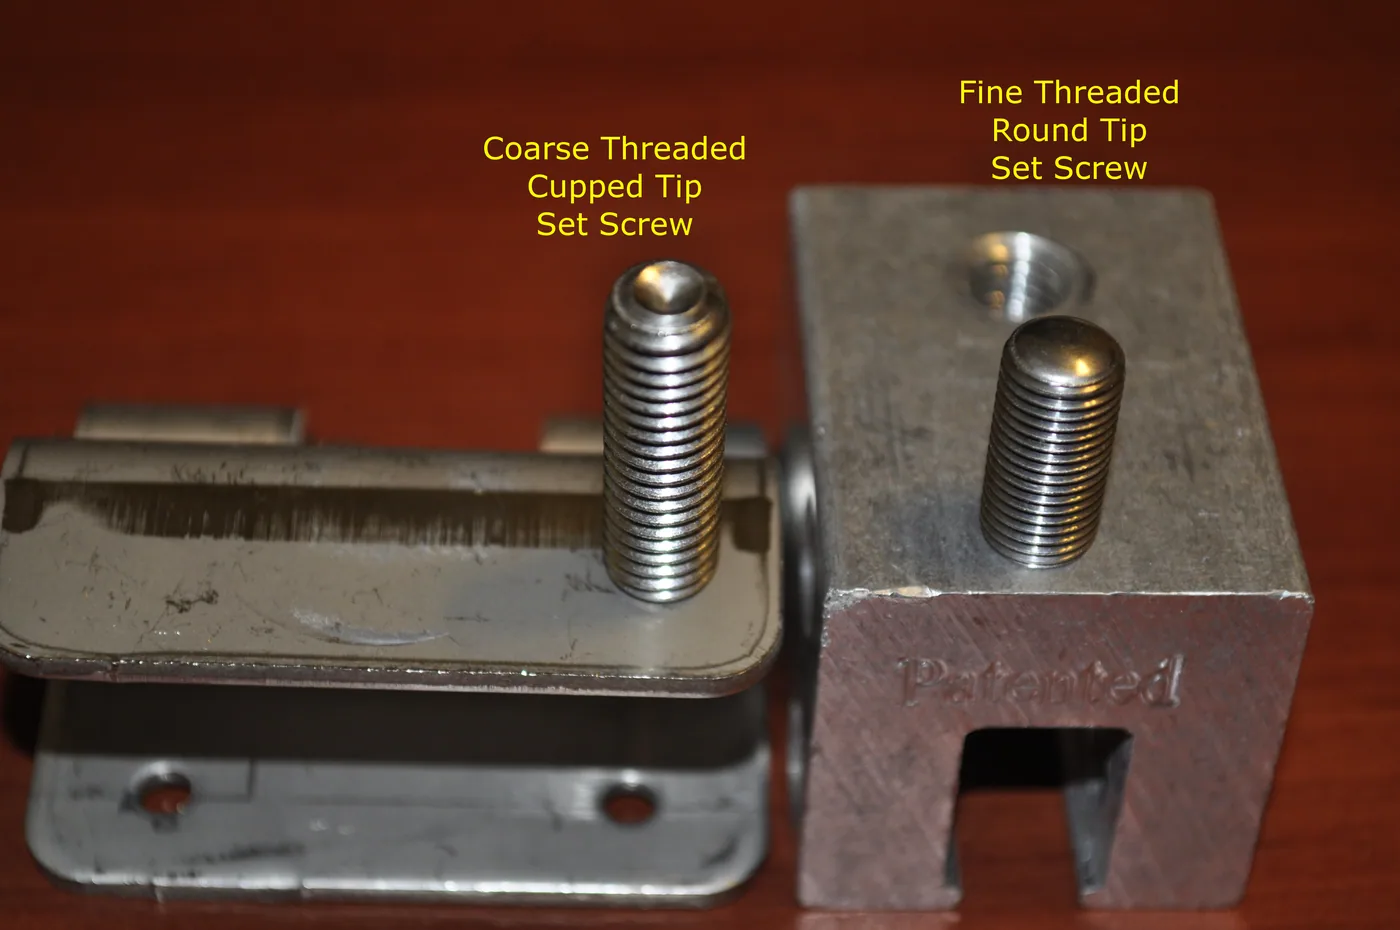
There has been a lot of claims made by manufacturers about which is the best screw to attach clamps to standing seam panels. The bottom line is simple, all clamps and all set screws can damage the seams and panel finish if used improperly. There are no special patented set screws that don’t scratch or chip the paint despite some very self-serving marketing efforts.
Clamps with cupped tip set screws and round tip set screws actually attach to the seams in very different ways. The cupped tip screws create a positive anchor point when properly torqued to 90in./lbs. while round tip set screws rely on high torque and panel compression/deformation to stay in place. In order for the clamps that utilize round point set screws to stay in place under load, they must be torqued to 130-150in./lbs. or even as high as 160-180in./lbs. for 22ga. panels.
|
Cup tipped fasteners do not overly distort the seam, nor do they ever gouge, destroy the finish or cause premature corrosion when installed properly. This image illustrates a properly installed stainless steel clamp, utilizing cupped tip set screws, mounted near the end of a seam, to show that there is very little seam distortion at 90in./lbs. torque. |
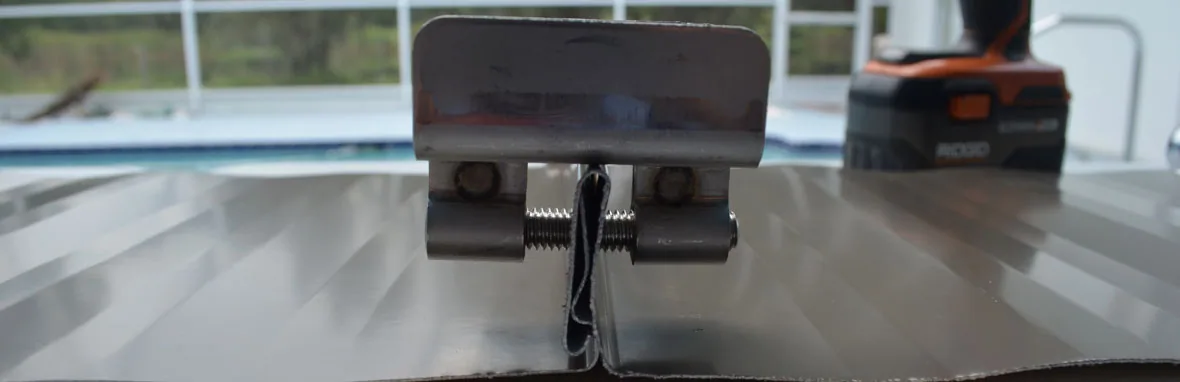
|
Here is an aluminum clamp using fine thread round point set screws where the factory recommeded torque setting is between 130in./lbs. and up to 180in./lbs. for heavier panels. This type of clamp was placed at the end of the seam to demonstrate the seam distortion that occurs when torqued to the recommended setting. |
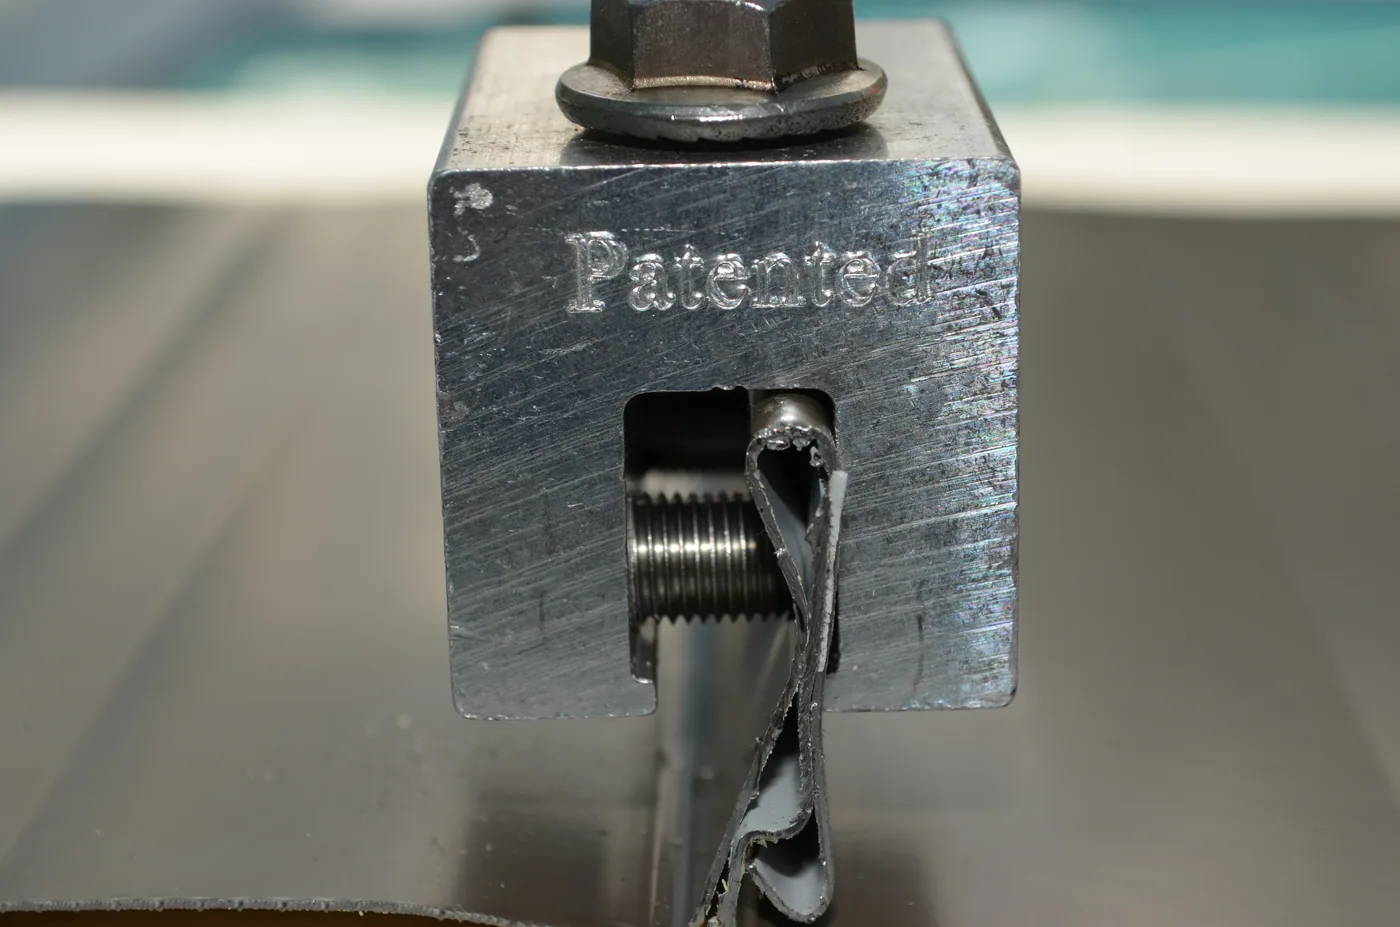
|
Parts that attach with clamping mechanisms should be carefully scrutinized. These tests show that a round point set screw, torqued to the factory recommended setting, can in fact scratch and deform the metal panel during installation. |
|
This picture shows the permanent seam deformation and paint scratches left behind from using high torque set screws. |
Bar Component Testing and Sustainability
In preparation for this course, ASTM B117 Accelerated Salt Spray Corrosion testing was conducted on several aluminum and galvanized steel bar samples with various finishes, along with clamps utilizing cupped tip and round tip set screws. According to the testing lab, the 1,006 hours of salt spray testing is extreme and probably beyond the natural life of a metal roof. This test was so severe that the paint was actually peeling off the panel surface.
Here are some of the findings:
|
All attachment point locations of the cupped tip set screws were free of corrosion and rust. This test showed that cupped tip set screws self seal at the attachment point and do not contribute to premature corrosion. |
|
This is an example of an aluminum clamp utilizing round tip set screws. This clamp could not be removed for seam inspection because the screws seized inside the clamp. |
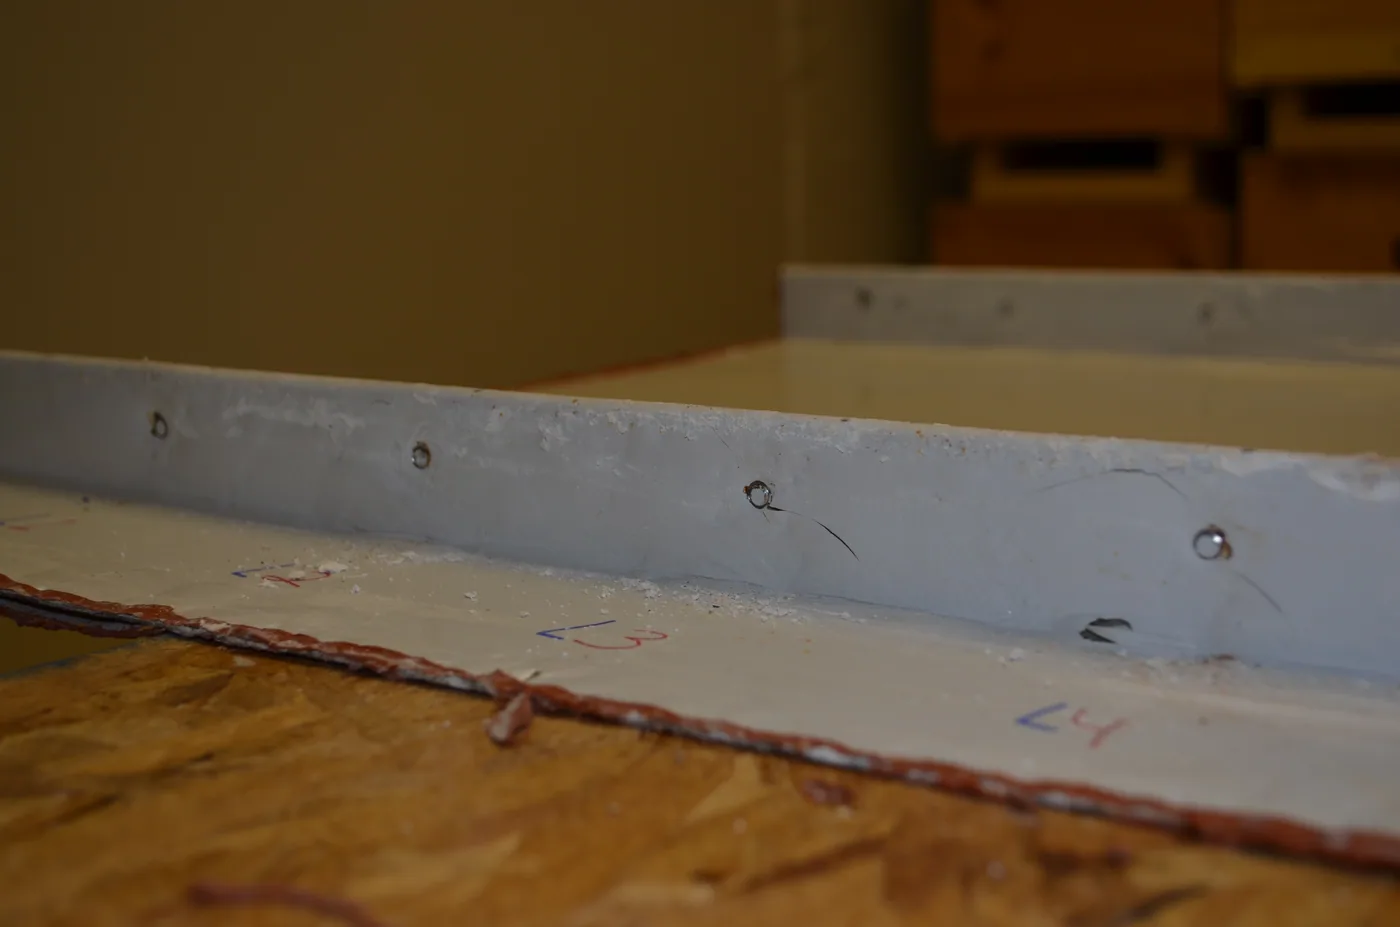
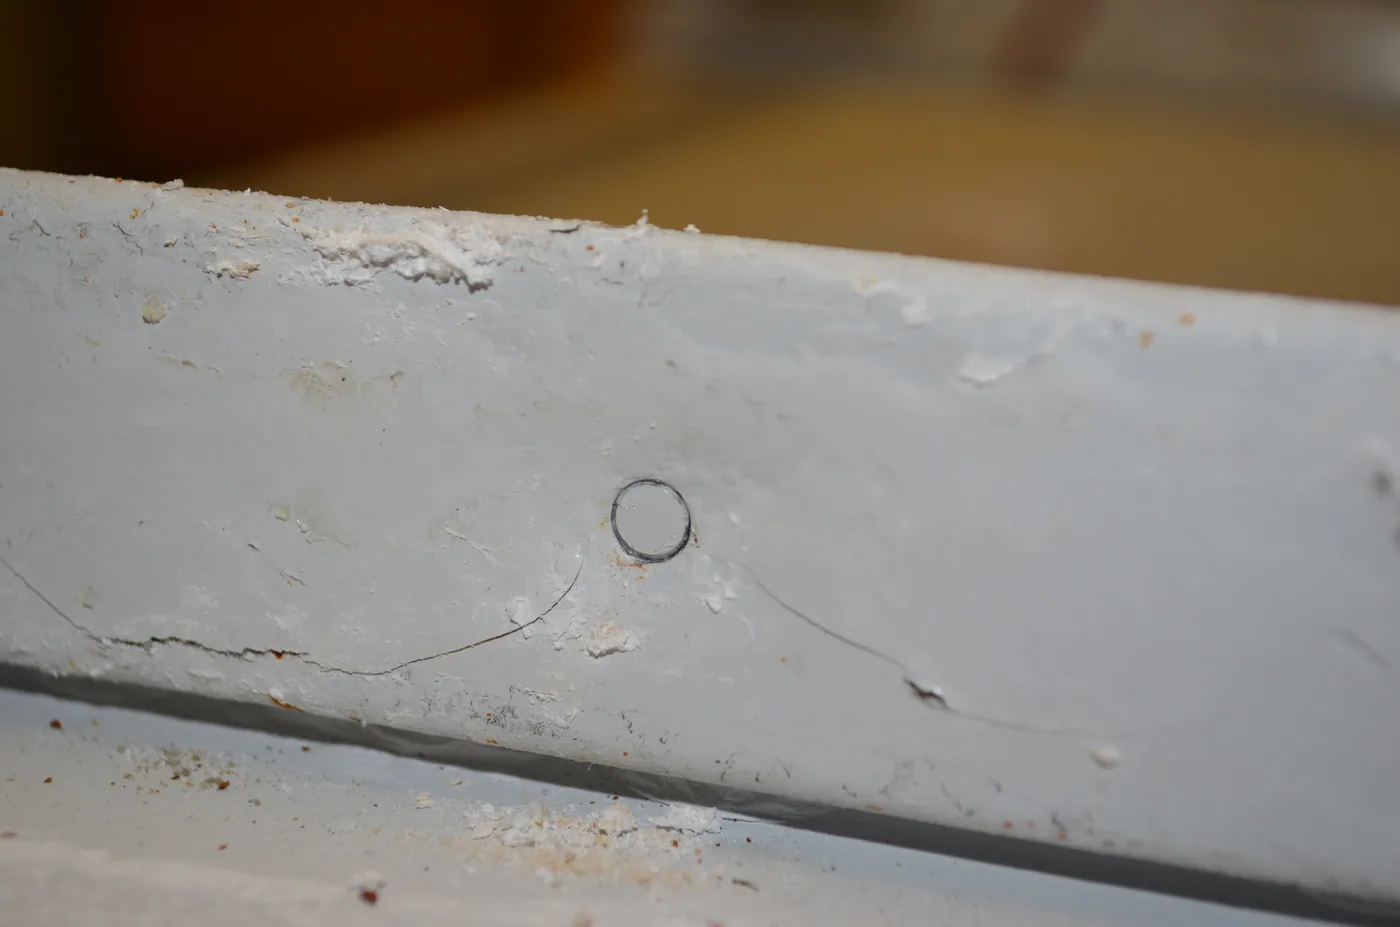
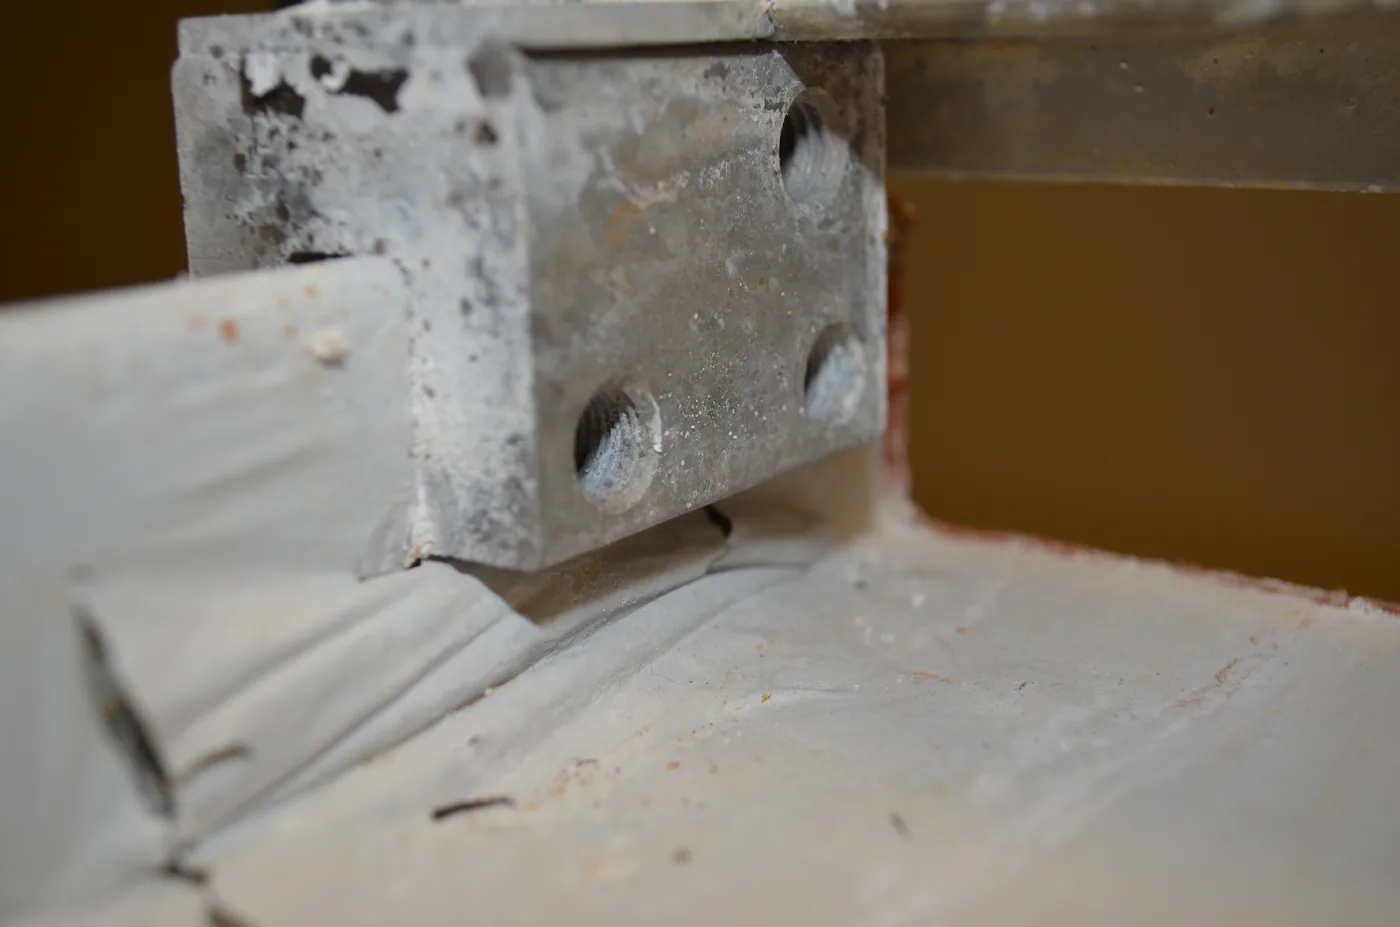
In preparation for this course, a site inspection was performed in July 2013 on a standing seam roof in PA. The bar system was installed in 1996 with cupped tip set screws and stainless steel clamps. The inspection was to determine if the panel had experienced any premature corrosion or other issues related to the clamp installation.
This pic was taken after removing the bar for inspection of the set screw attachment points. Low torque set screws protect the panel from deformation and stress cracks to the paint.
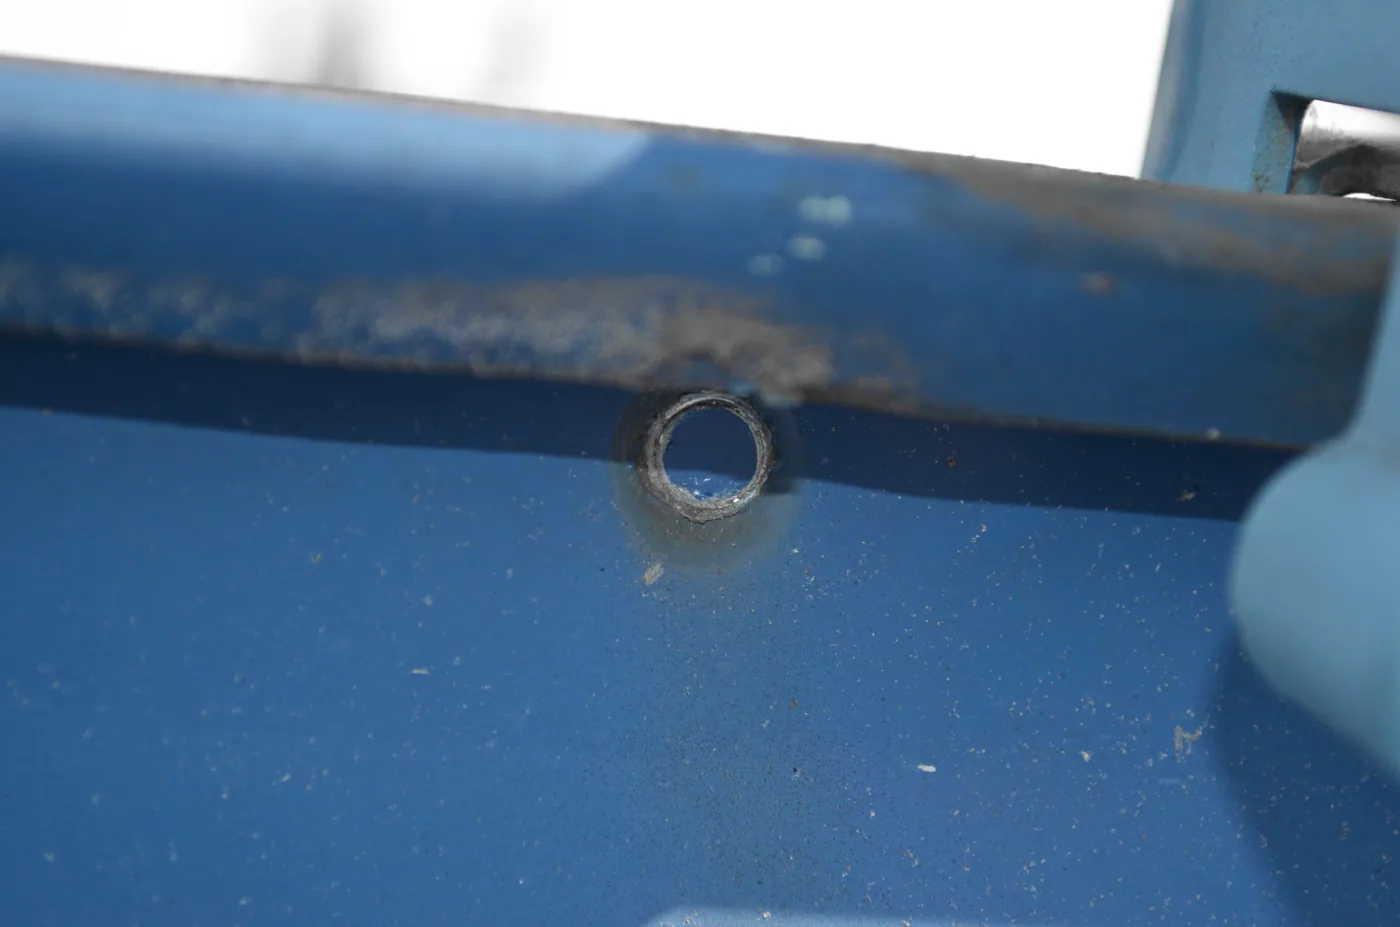
After 17 years of service on a roof in PA, this is the cupped tip set screw attachment point. The cupped tip set screw self seals the attachment point thereby protecting it from premature corrosion and rust. This system was inspected, reassembled, and is expected to outperform the metal roof system.
|
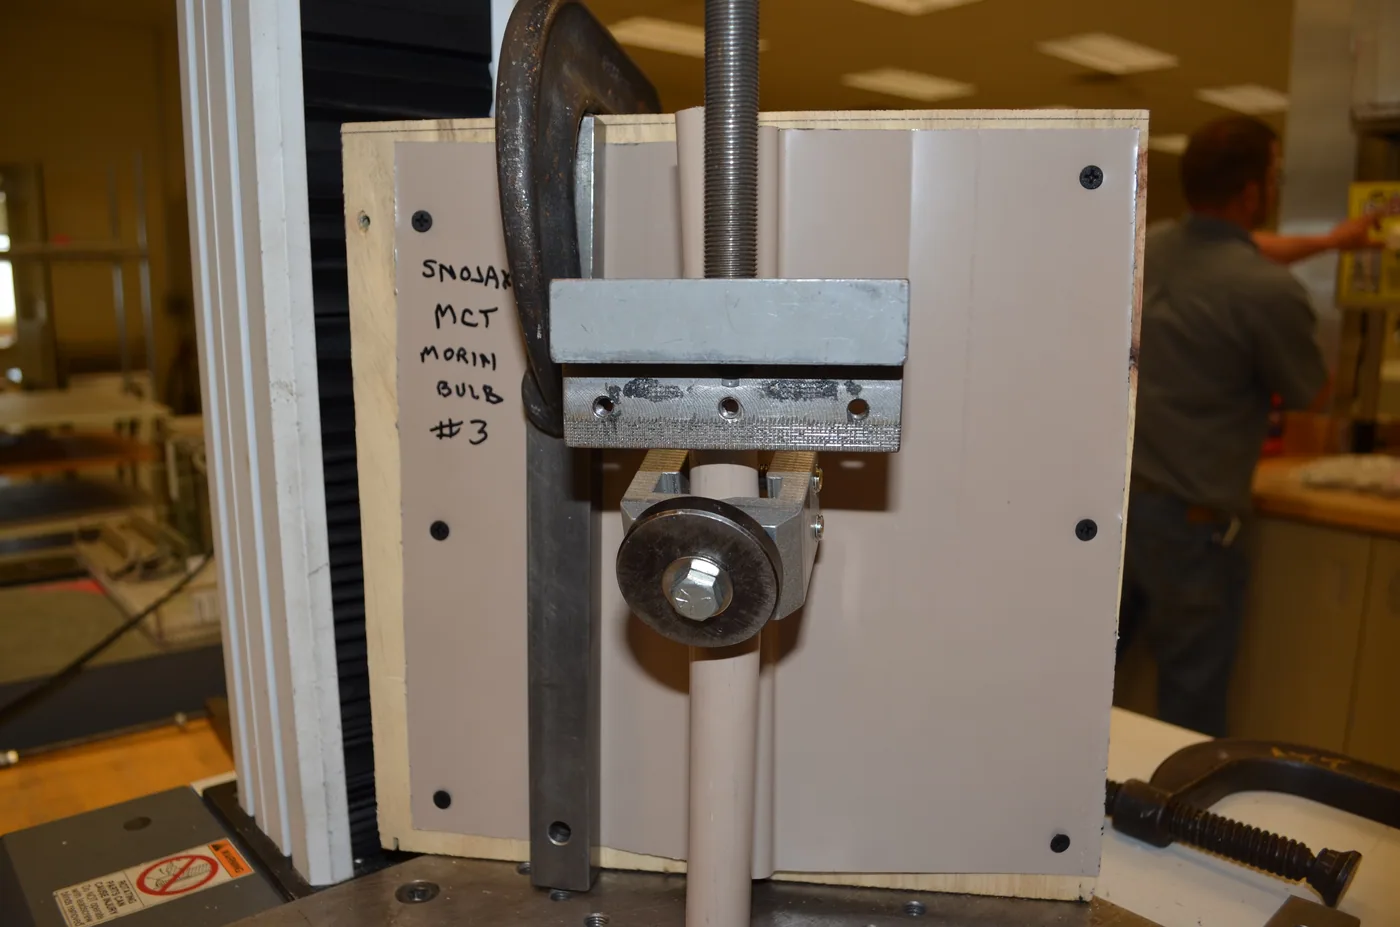
Professional clamp testing being performed at Architectural Testing, Inc. (ATI) |
|
Pull-off test being performed with a universal fit aluminum clamp using 3 stainless steel, cupped tip set screws on a Morin bulb seam. This clamp far exceeds the strength of this super strong panel joint. |
|
This test picture illustrates a few important facts: Roof clamps are exceptionally strong and will destroy seams if not properly used. A safety factor of 3 is highly recommended when designing anything to be mounted with seam clamps. The weakest part of a clamp system is always the seam. |
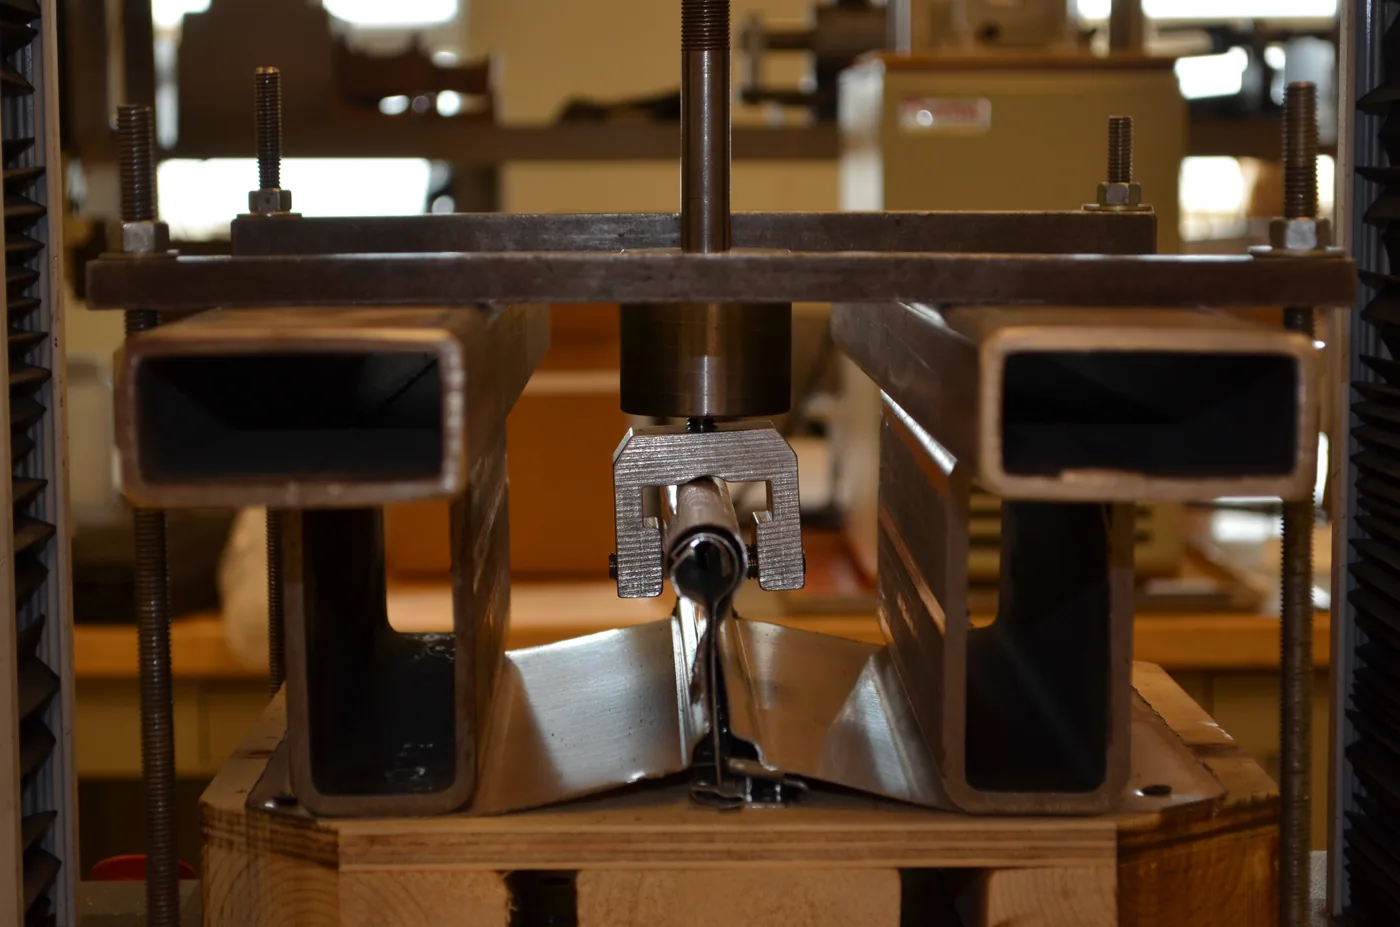
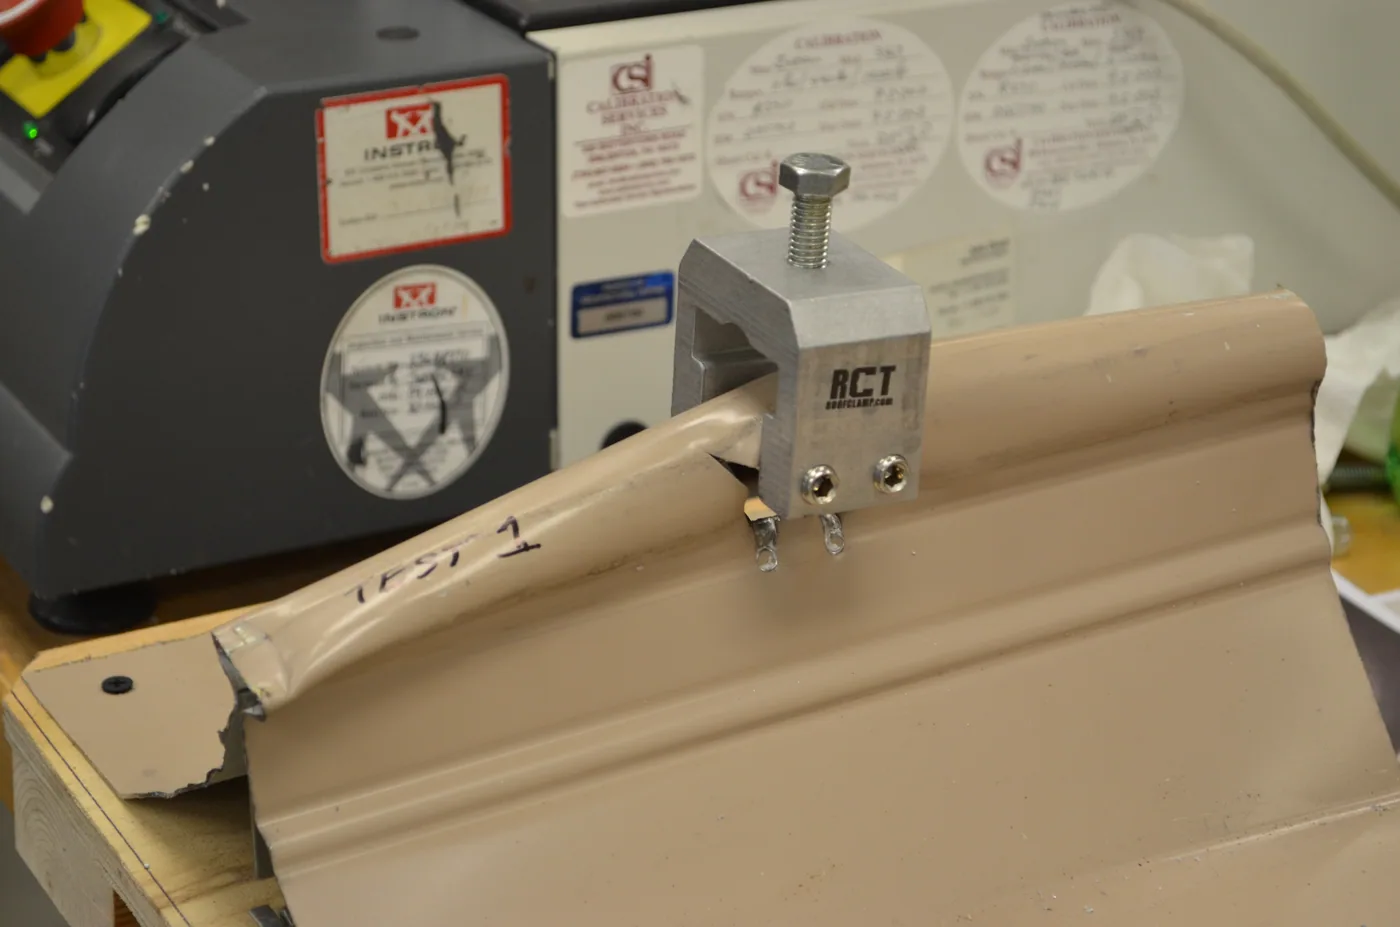
In summary, tests showed that course threaded, cupped tip set screws are far more efficient at staying in place on the seam by only requiring 90in./lbs. of torque. By design, round tip set screws are far less efficient at staying in place and therefore must be highly torqued from 130in./lbs. to 180in./lbs. depending on the gauge of the panel. High torque leads to panel deformation. The salt spray test also proves that neither type of screw causes premature paint corrosion at the attachment point and neither screw should void any paint or panel warranty since they both perform in a similar manner.
Common Mistakes to Avoid
Common Mistakes to Avoid
Avoid Improper Installation
This course identifies improper layout and installation as recurring causes of failure. Common problems include concentrating rows near the eave, isolated placement, incompatible attachment methods, insufficient structural fastening, and using products without published independent test data.
Snow retention systems are just that…they only work as a system. The sum of several simple parts makes a very effective solution to prevent property damage and personal injury. The strongest and best design is useless if improperly installed.
Guards should only be installed based on the manufacturer’s recommended layout. Layouts should be designed using the “Field” or “Fence” method. Avoid concentrating multiple rows down by the eave, they should be equally spaced up the roof slope. A safety factor of 3 or higher should normally be used for snow retention products. This will help protect the components and roof from possible damage.
All upper roof areas that dump on to lower roof areas also require designed snow retention. Snow drifting areas may require additional protection. Local knowledge of prevailing winds should be taken into consideration and discussed with the system designer.
Polycarbonate guards should be glued whenever possible to avoid additional holes in metal panels. Attachment locations should be cleaned with alcohol wipes prior to glue attachment for best results. Surebond SB-190 is the strongest adhesive method available today. Peel-n-Stick methods are an alternative method for colder weather installation and should only be used with pointed guards designed to break the snow and ice.
Screw mounted guards should always be screwed into at least 2” of solid wood or into steel purlins. The layout must be modified based on the purlin spacing. #14 non corrosive screws with neoprene washers and a high quality silicone sealant should also be used with this type of attachment. Avoid using mechanically fastened guards on floating standing seam roof systems. Use non-penetrating roof clamp bar systems or adhesive mounted pad style guard systems for this application.
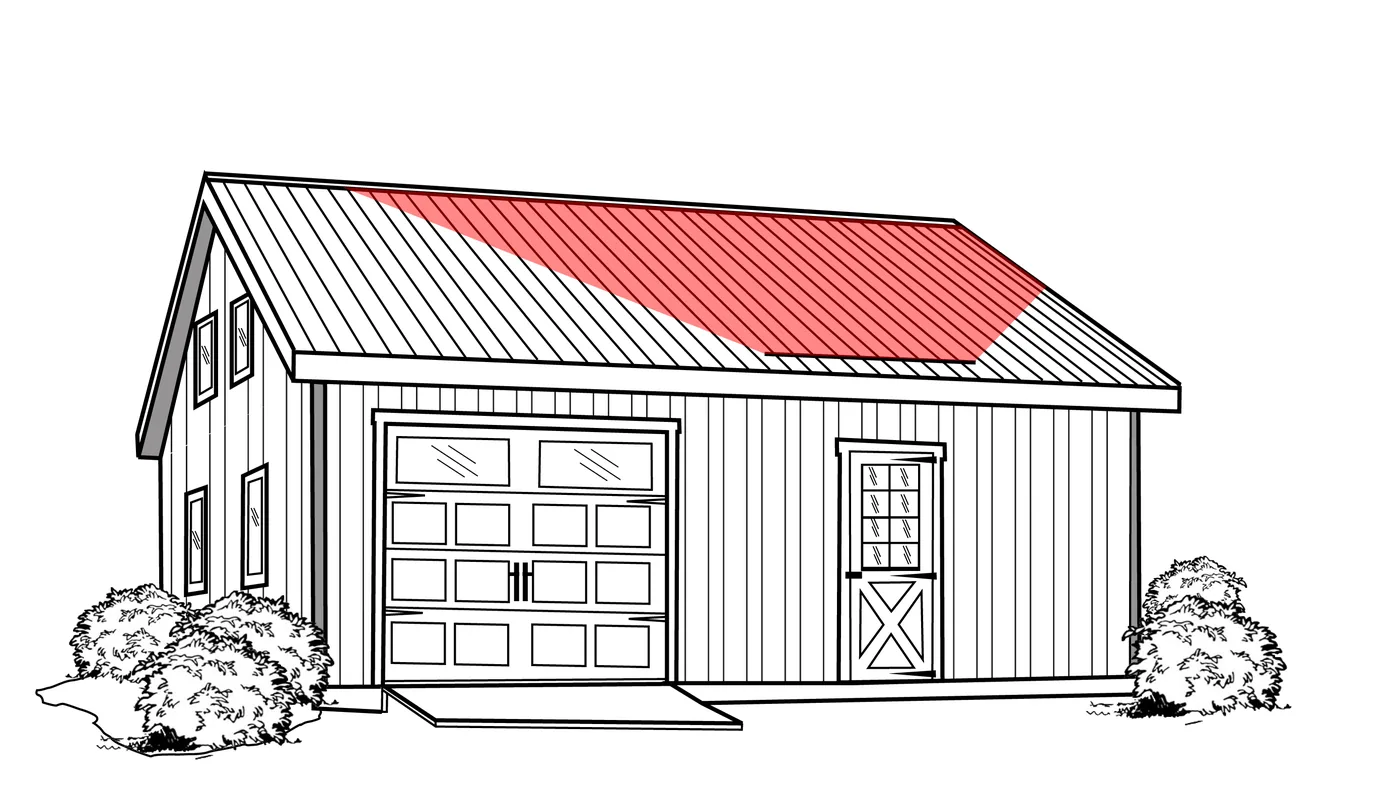
Avoid isolated placement of snow guards, they have a high failure rate. Any snow guard product installed in an isolated fashion must be able to hold the dynamic load of the area above, PLUS the areas out at a 45 degree angle, as in the illustration below.
|
This graphic shows an example of isolated placement of a short section of bar over a doorway. These types of installations have a high rate of failure due to dynamic overloading. The safest and most proven method to protect this building is to design a snow guard system to cover the entire roof area. |
Be sure the snow guard design is an appropriate match for the project panel. The guard should be able to fit in the center of the panel for maximum efficiency. For example: 9” R-panels normally have 2 minor ribs, therefore a guard with a 1.5” wide base will fit perfectly between the 2 minor ribs. For bar systems, be sure that the clamps specified is an appropriate fit for the panels being used.
Avoid snow guard products that do not have published independent test data. Working loads can not be determined for something that has not been lab tested. All equipment can fail, however engineered systems are far less likely to fail if properly designed and installed.
Some roofing companies fabricate angle bars in their shop to install with their roofing jobs. These are also untested and likely to fail causing severe panel damage as seen in the photos below. This entire roof had to be replaced with new panels due to the failure of the homemade bars.
|
This contractor-fabricated system was made of 1.5”aluminum angle on 9” r-panel. The bar was pre-drilled and roofing screws were used to mechanically fasten through the major ribs and down into the sub roofing. The roof has a 6/12 pitch and only one row was used on this 50psf ground snow load project. The system lasted 3 years before failure. |
|
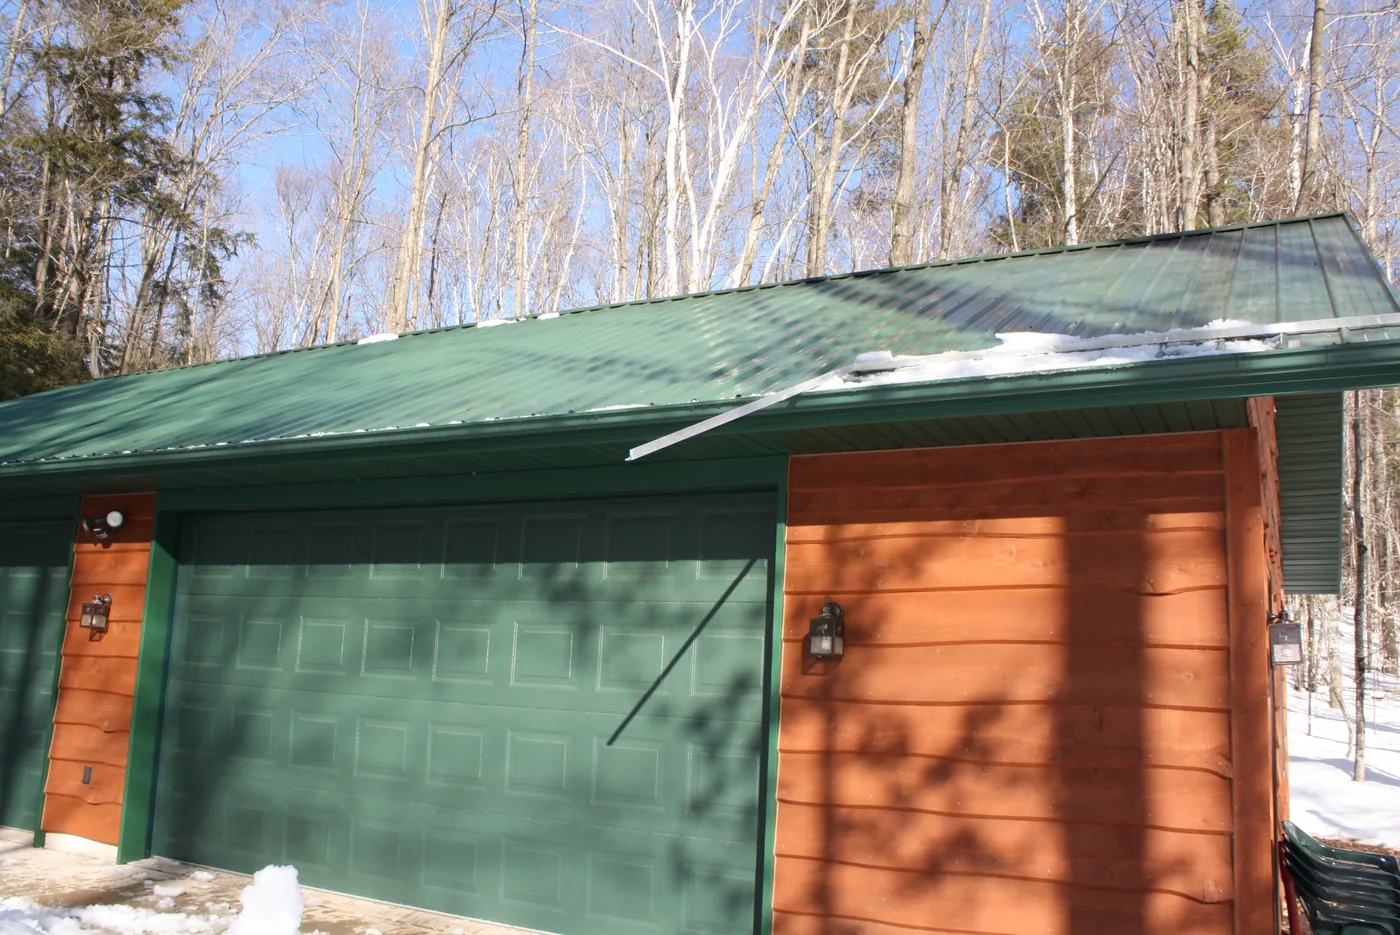
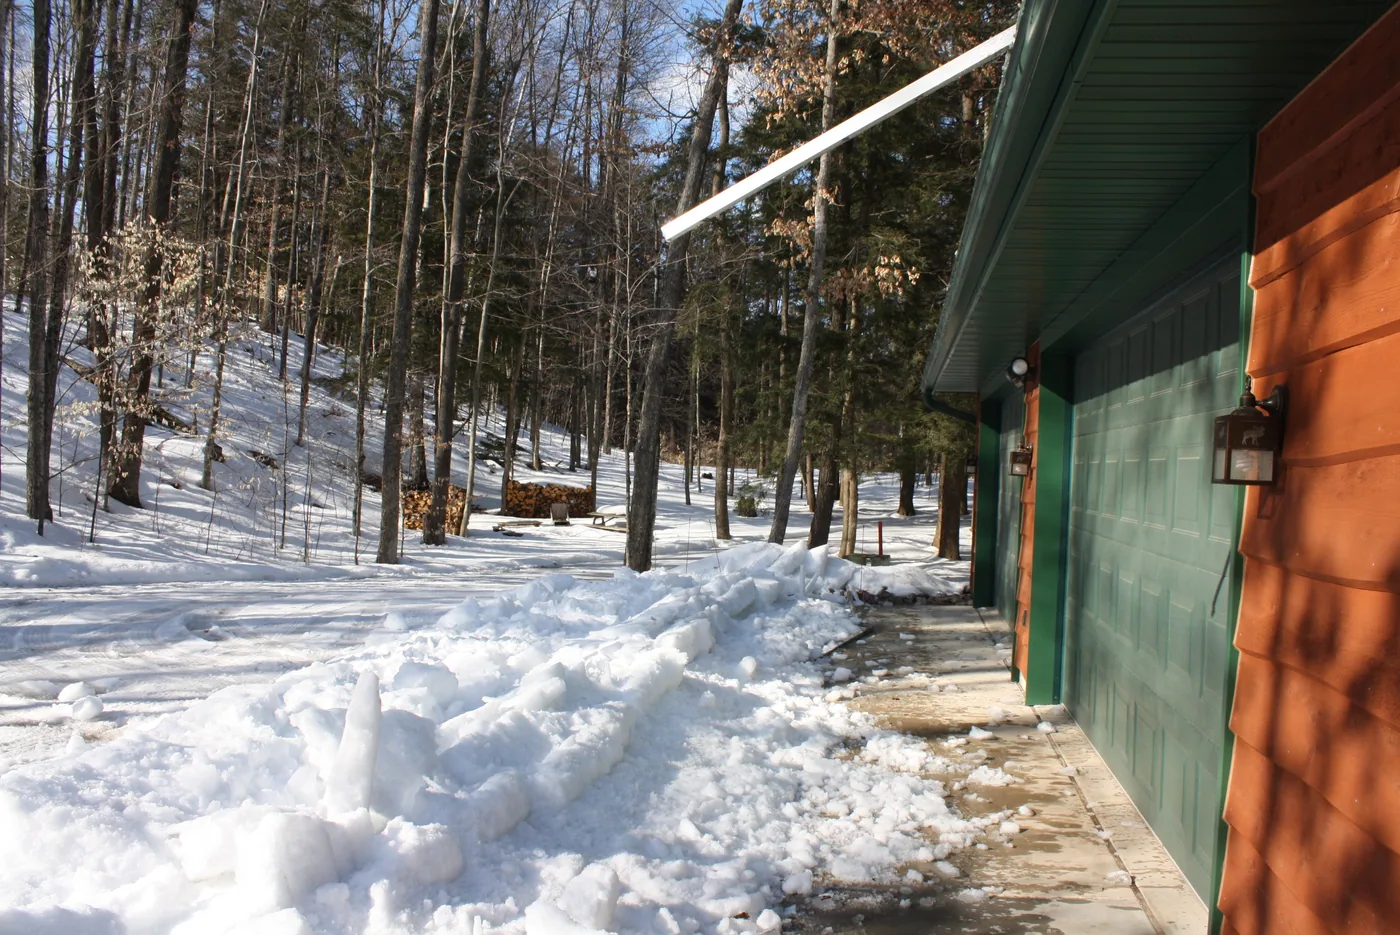
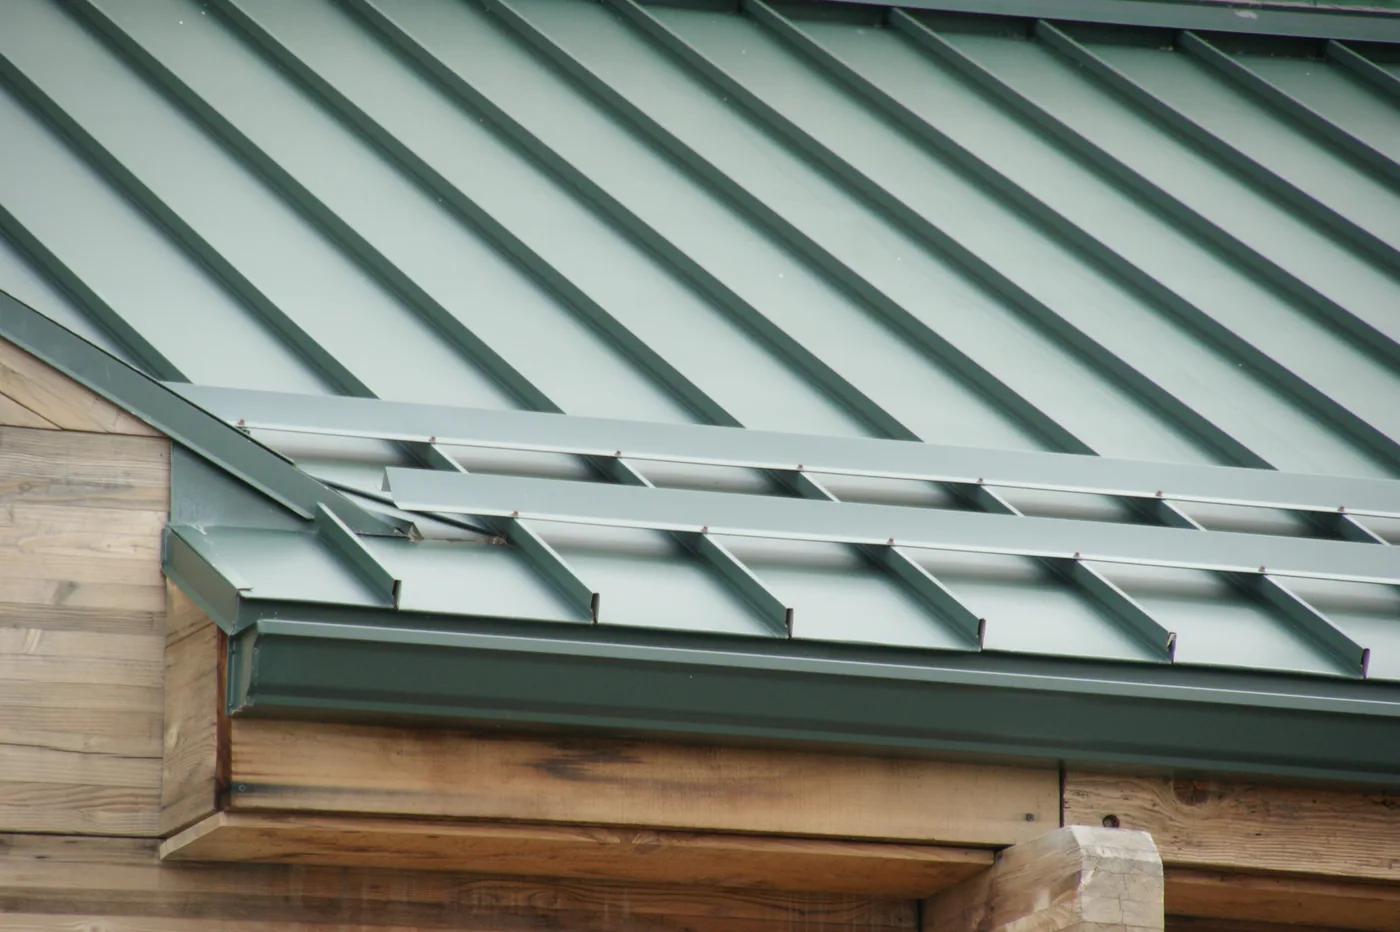
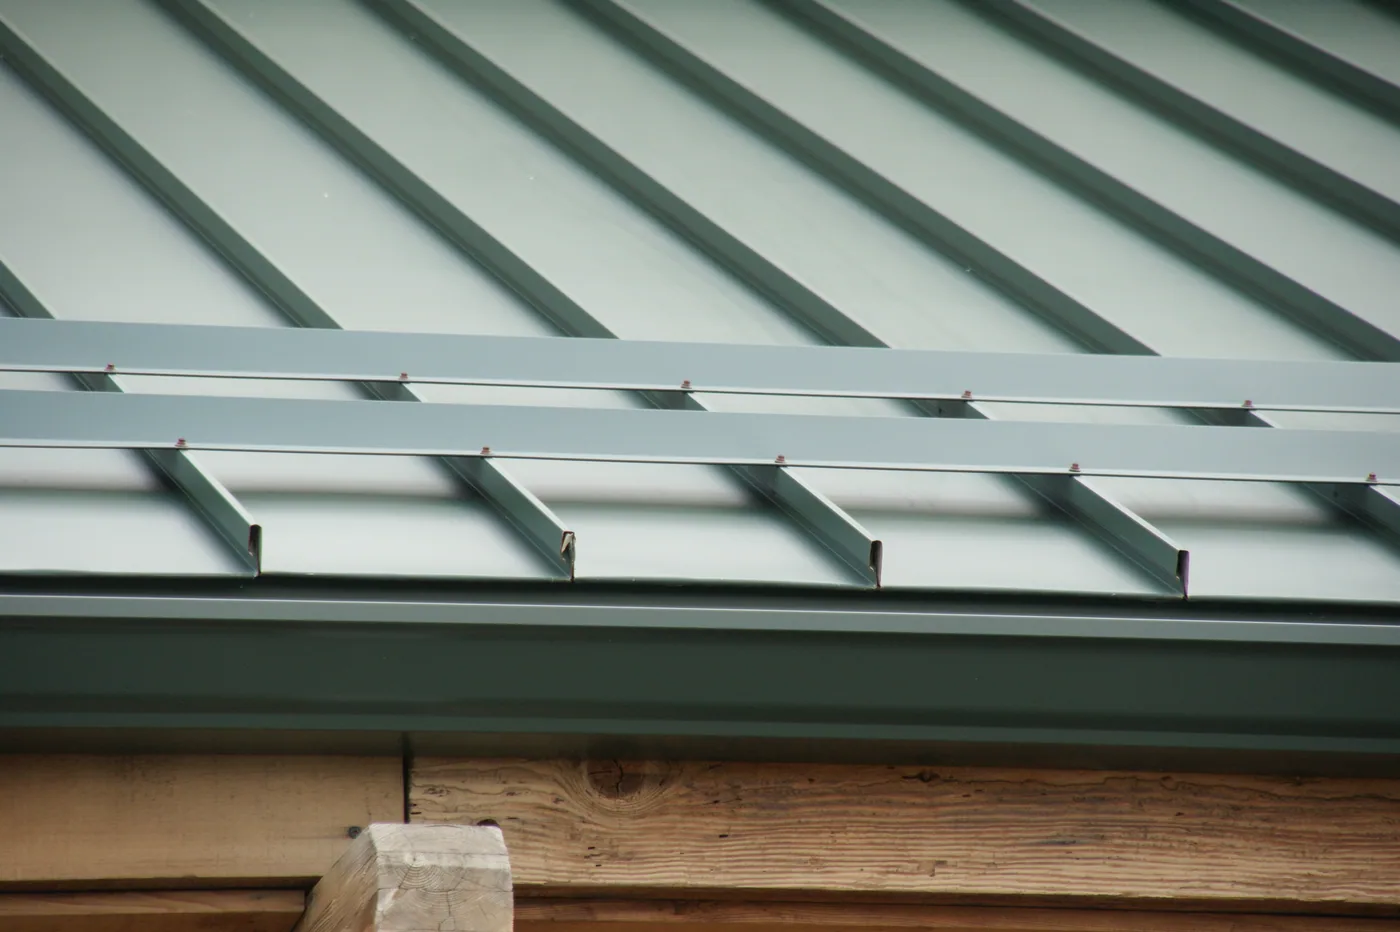
These two photos show an installer fabricated angle that has been screwed through the watertight seam. This compromises the water tightness of the roof and can possibly void the roof warranty. A bar system with non-penetrating clamps should have been used and the rows should be evenly spaced up the panels.
|
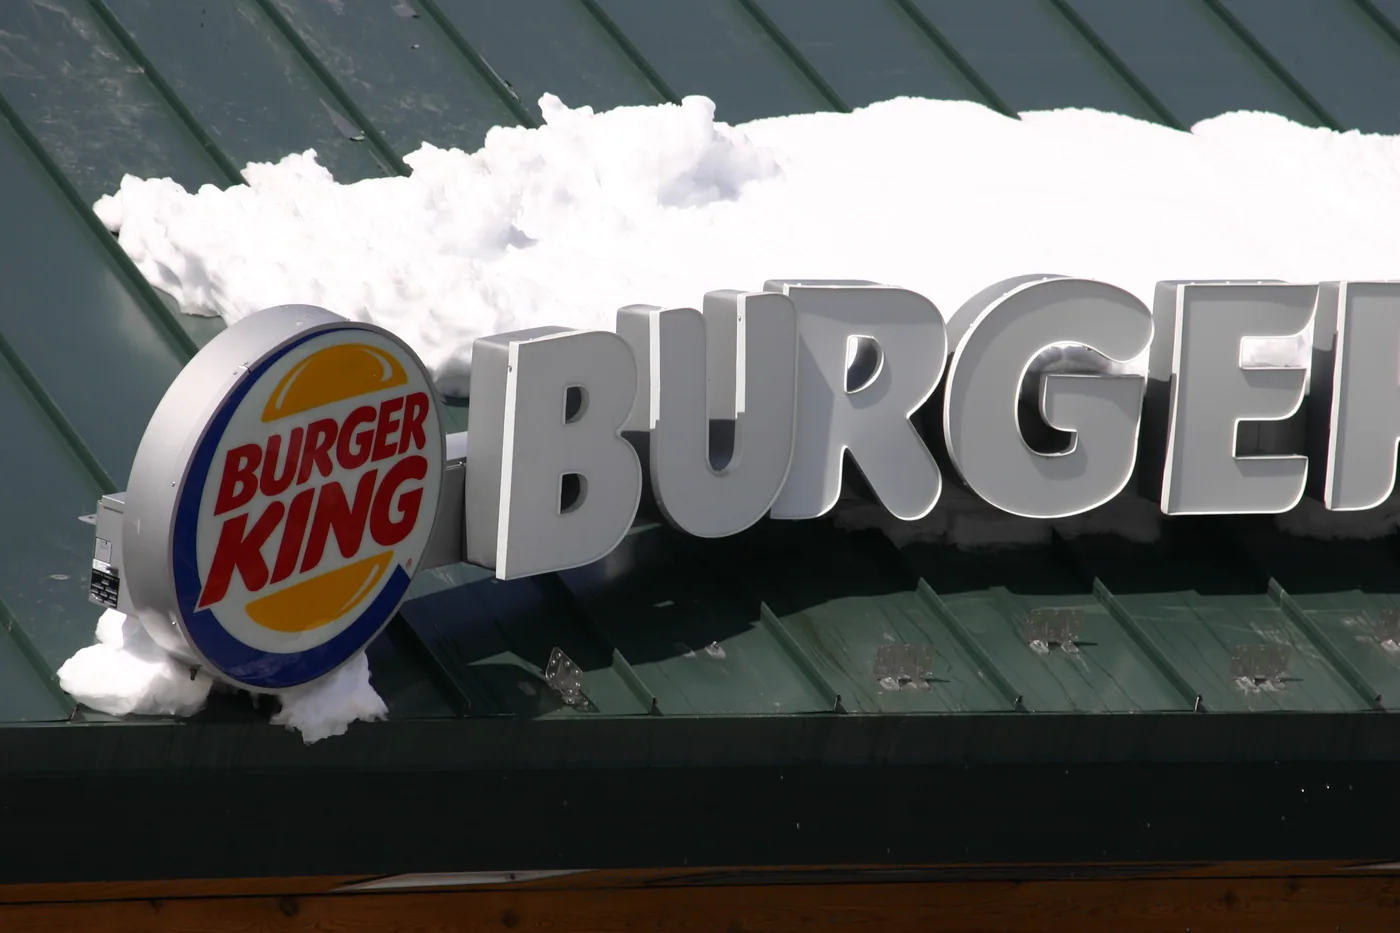
Anything mounted on a roof will hold snow. It should be designed to withstand the snow load or snow retention should be specified. Notice the single staggered row of snow guards BELOW the sign. A professionally designed layout would have had multiple staggered rows of guards spaced up the entire roof area. Also notice the snow guards were screwed down on this concealed fastened roof. |
|
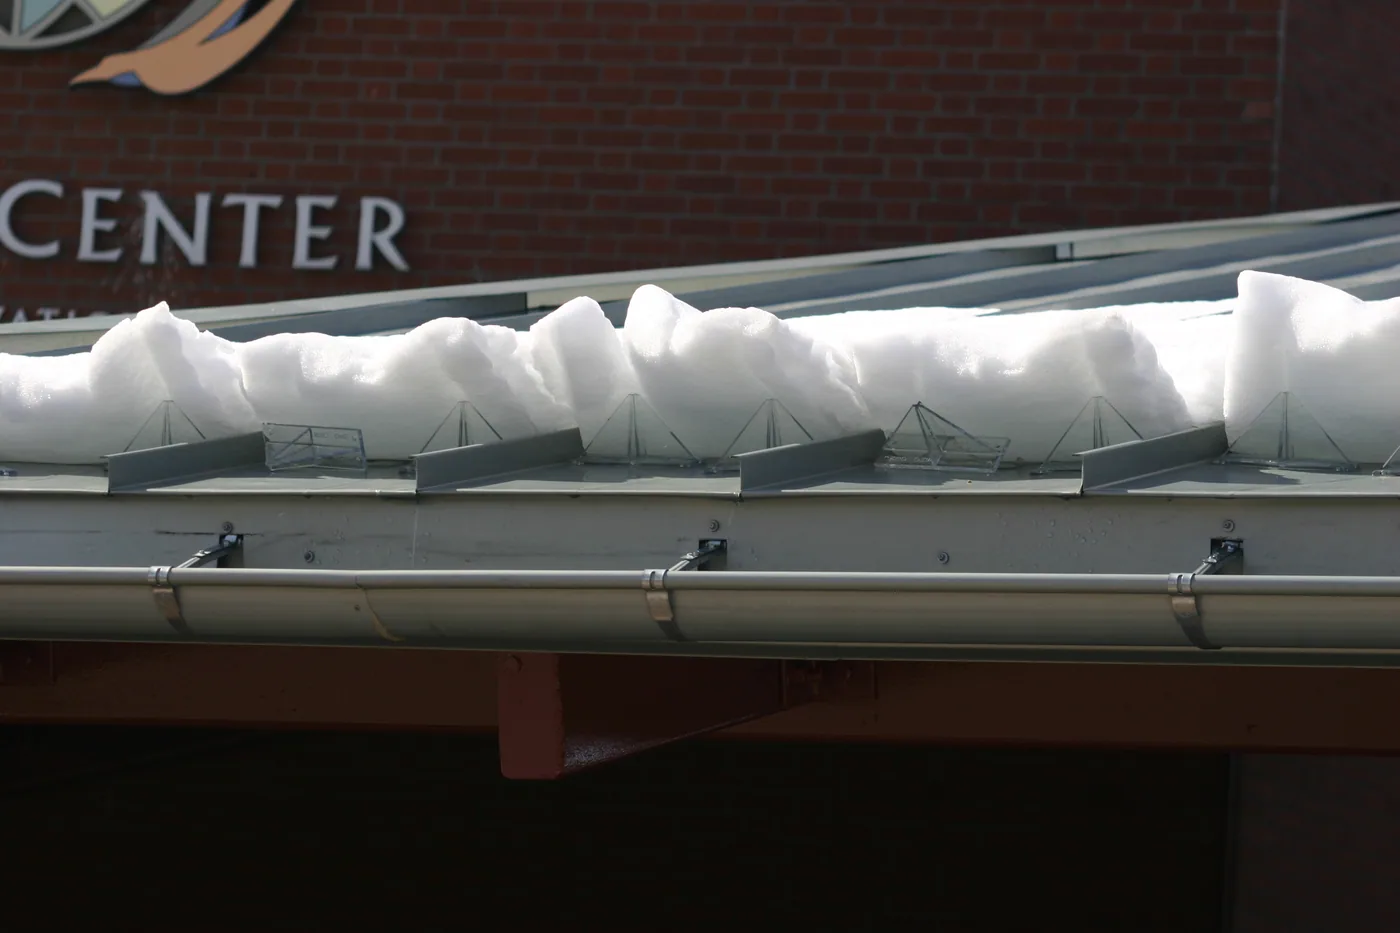
Rule #1 Follow the instructions. These snow guards were mounted sideways in a straight line across the roof allowing this light snow load to dislodge them. |
|
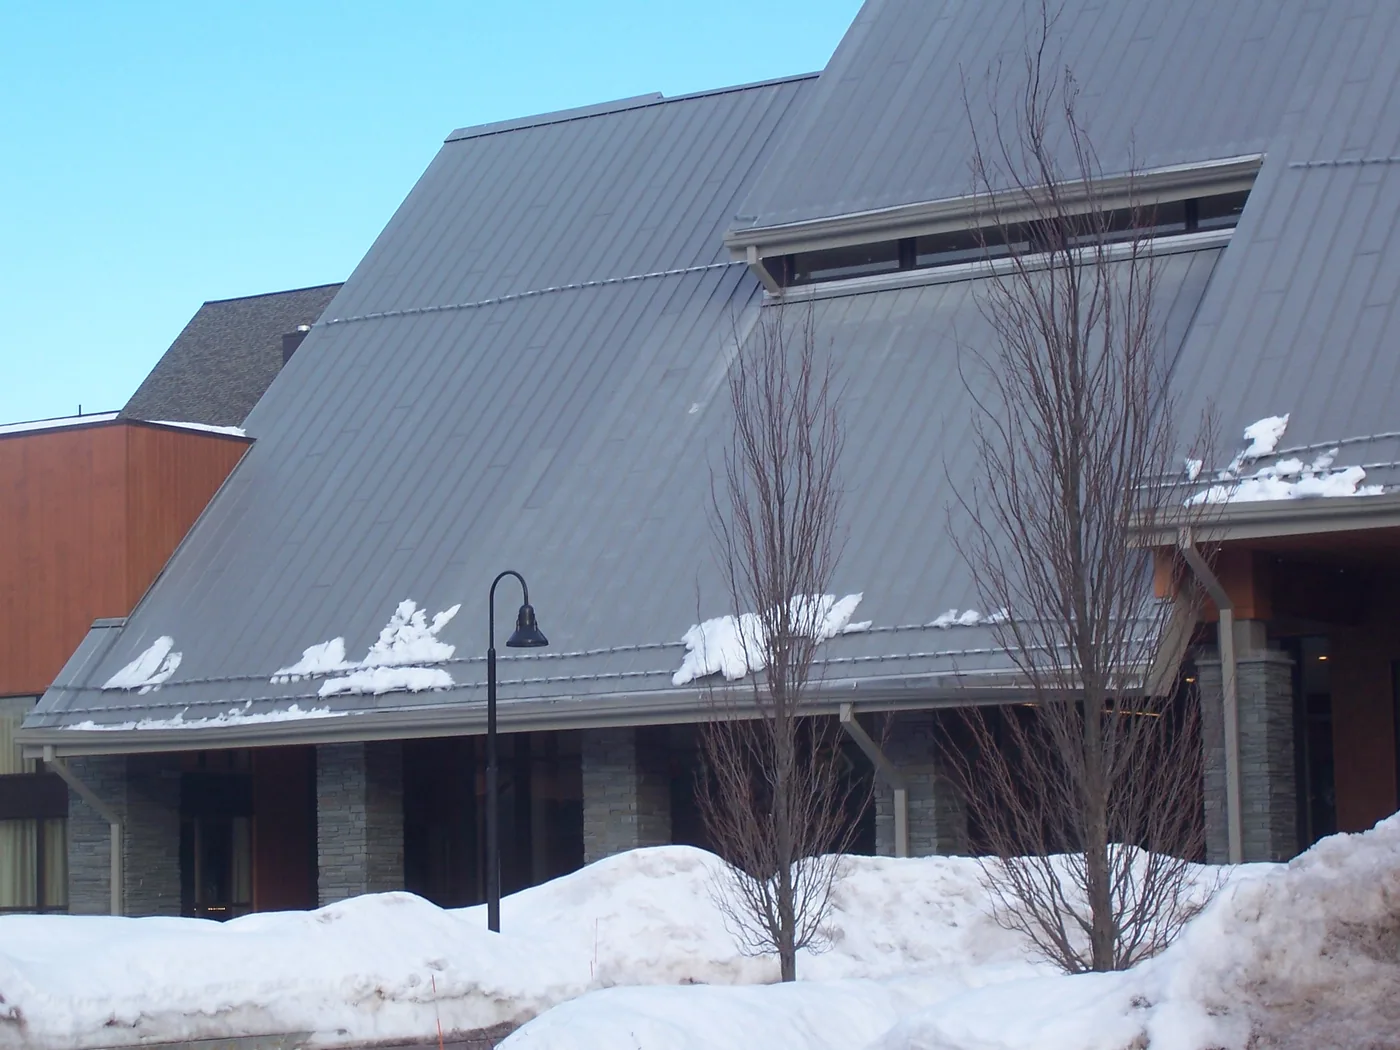
Here is a failure of a compression style clamp system. Notice the two rows of bar mounted at the eave. The extreme pitch and distance that snow is allowed to slide before reaching the second row of bar is exceeding the bars capability. Improper spacing contributed to the failure of this system. This failure could have been avoided by equally spacing the bar up the roof. |
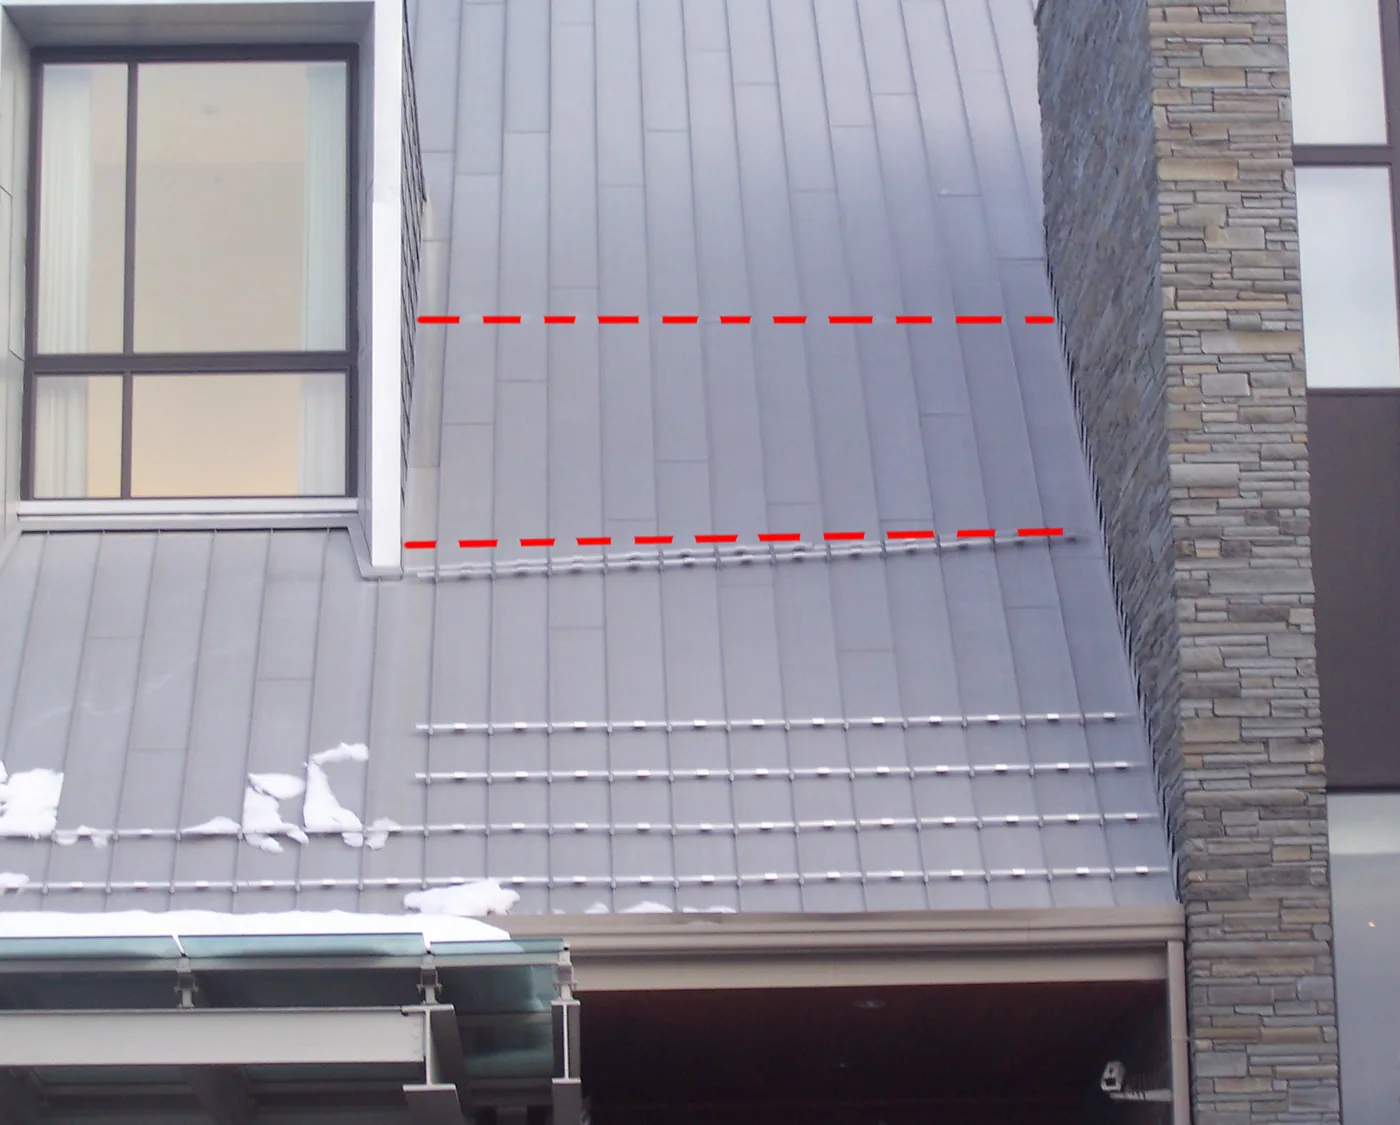
This image shows the opposite side of the same roof. Notice that the top row slid down due to overloading from improper spacing. It then forced the next row to also slide. The rows should have been equally spaced up the roof in order to avoid this type of failure. Concentrating most of the protection down by the eave caused this bar system to fail. This system used compression style clamps which do not use set screws that permanently lock on to the seams.
Here is another compression clamp failure. The bars were
concentrated near the eave causing the top row to slide down the
seams. Proper row spacing and a bar system with clamps that
utilize set screws to permanently attach to the seams will prevent
this type of failure.
|
This photo shows a failure of a bar system in CO. Notice that 3 rows of bar are concentrated close to the eave. Snow retention should be equally spaced up the roof area to control the dynamic loads of sliding snow and ice. Two-thirds of the snow load on this roof was being held by just the upper bar. The lower two bars only held one third of the snow. In addition, this system failed because it used isolated placement and extended the bars too far across the panel at the end of the run. These clamps were also installed over batten strips, which is not a good idea. This failure could have been avoided by equally spacing the rows up the roof, by extending the runs the entire length of the roof, and by using clamps that would have attached under the batten strip, not on it. |
|
Terminating the bar before the end of a run is a recipe for disaster. The damage to the seams and bar could have been avoided by equally spacing the rows up the roof and by extending the rows the entire length of the roof. |
|
In this illustration of seam mounted snow guards, notice the middle guard has been twisted to the side from uneven loading. Unfortunately, the seam is damaged as well. |
The next three pictures feature a bar failure in Littleton, CO.
|
This is what it looks like when clamps, installed with round tipped set screws, fail and have to be re-attached. This view is from the down slope side looking up. The original snow retention application crushed the seam as the bar was overloaded. |
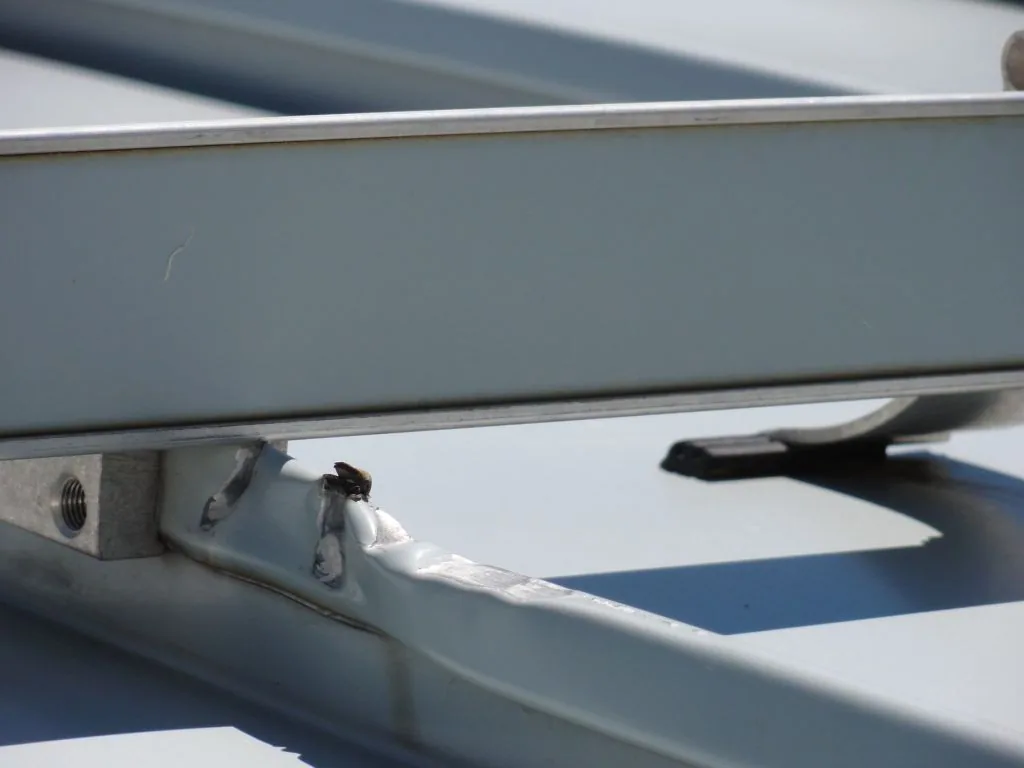
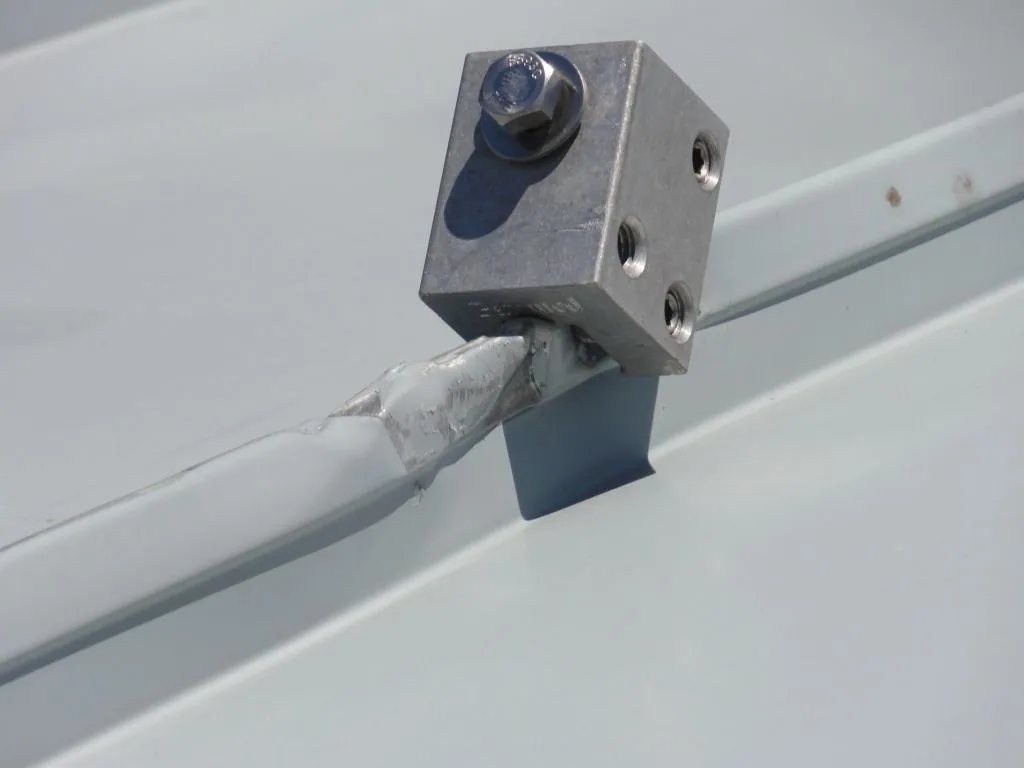
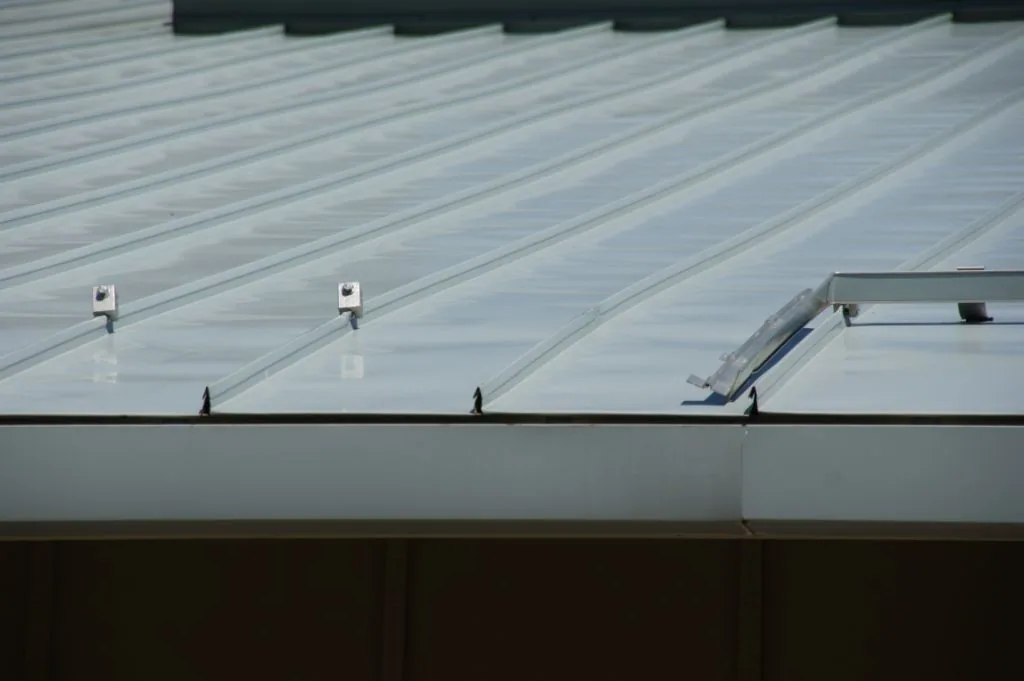
This project was quoted by one manufacturer for 4 rows and by another bar manufacturer for two rows. The clamps of the 2 row system cantilevered up causing the highly torqued round tip set screws to rip the seam open. 4 equally spaced rows with a clamp mounted on every seam would have reduced the clamp loads considerably and avoided this type of failure.
Insisting on conservative safety factors is far more important than choosing the least expensive system with the fewest rows.
|
Pencil thin round bar is extremely ineffective at holding back snow and ice. The most effective method is flat faced bar mounted perpendicular to the panels. Notice the snow and ice ramping over and sliding under the bar. |
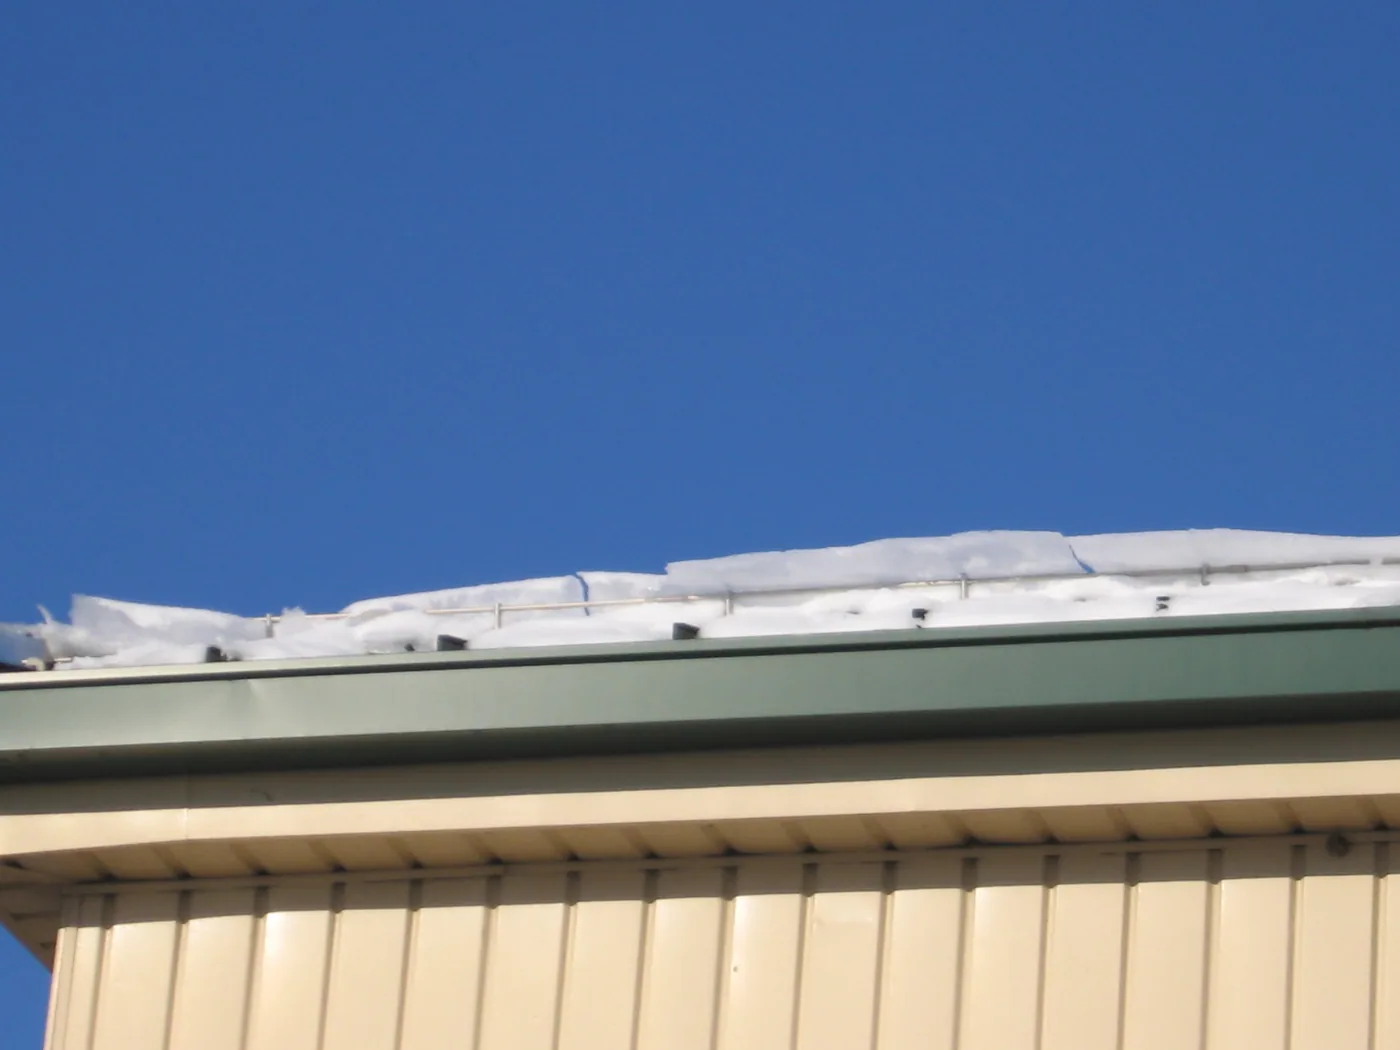
Understanding the Snow Guard Layout Theory
Understanding The Snow Guard Layout Theory
Army Corp Research - Evolution of Modern Snow Guard Methods
The layout theory presented in this course is to hold snow and ice in place with multiple rows distributed up the roof. Allowing snow to gain speed and then trying to catch it near the eave creates much larger dynamic loads and increases the potential for system or roof damage.
As the metal roofing industry has improved its technology, so has the snow guard industry. Stones and logs have been replaced with thermoplastics, stainless steel, and aluminum. One of first studies of snow guard methods on modern metal roofing was done by the U.S. Army Corp. of Engineers.
They had to develop methods to protect military buildings and property from the damage they had been sustaining from sliding snow and ice. They learned that to properly calculate the safest and strongest methods, they had to assume that the friction between roof and snow is zero. They determined that snow guards could be mechanically fastened or glued down in rows in order to effectively protect the roofs from further damage.
Modern systems should be designed to HOLD the snow and ice in place with multiple rows up the roof. Concentrating the protection near the eave is ineffective and dangerous. Trying to STOP the dynamic force of sliding snow and ice can cause serious damage to the roof components and pedestrians. The idea is to HOLD it, not attempt to CATCH it before it flies off the roof. Once it begins to slide down the roof, the snow load increases dramatically and can quickly exceed the design loads. It is also possible to experience a snow guard failure without the equipment actually coming off of the roof. This happens when snow and ice are allowed to generate enough velocity to slam into the lower rows of guards allowing it to fly right over them and down to the ground.
This design theory is the basis of modern snow retention layouts. This method has been conceded in studies by both the Army Corp of Engineers and the American Society of Civil Engineers. Both reports can be found online.
Layouts for snow guard systems should be based on these basic design considerations:
“the rows should be spaced uniformly, multiple rows of reasonably strong snow guards are preferred over one very strong last line of defense placed near the eaves.” Snow Guards for Metal Roofs, American Society of Civil Engineers August 1996
“Multiple rows of snow guards spaced well apart up the roof (figure 24) are better at holding snow in place (i.e., avoiding the large dynamic loads created by sliding snow) than one row of last-resort snow guards placed near the eaves.” Commentary on Snow Loads US Army Corp of Engineers, August 1998
“A short snow guard on a long roof without other snow guards must be able to resist all the snow located within outward 45° angles up slope of its location. The loads at the ends of such a snow guard are about twice the average load on it." Commentary on Snow Loads US Army Corp of Engineers, August 1998
This is referred to as “Isolated Placement” and should be highly discouraged by design professionals. These types of installations tend to fail at each end and eventually damage the seams or the guards, and can potentially dislodge the panels due to overloading.
A snow guard is worthless without published professional test results. Design specifications and bid submissions should always include certified test results for the submitted product.
|
This 130psf snow drift occurred on a roof with a light 20psf design snow load. Snow drifts must be considered when calculating snow retention systems. They can far exceed the design snow loads and cause failures and severe panel damage. Having local knowledge of prevailing winds and using conservative safety factors when designing the snow retention system will help mitigate these issues. |
|
|
Prevailing winds can create snow drifts far exceeding the design snow loads. |
|
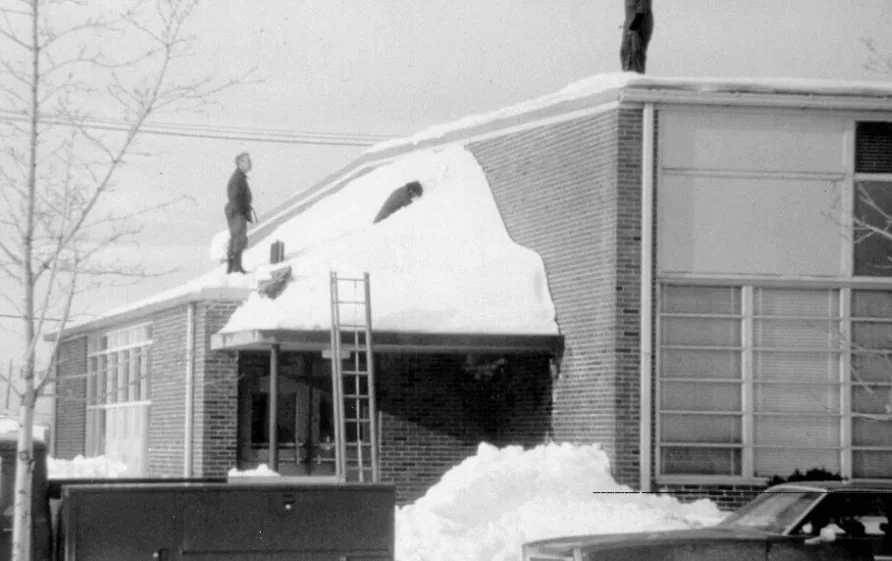
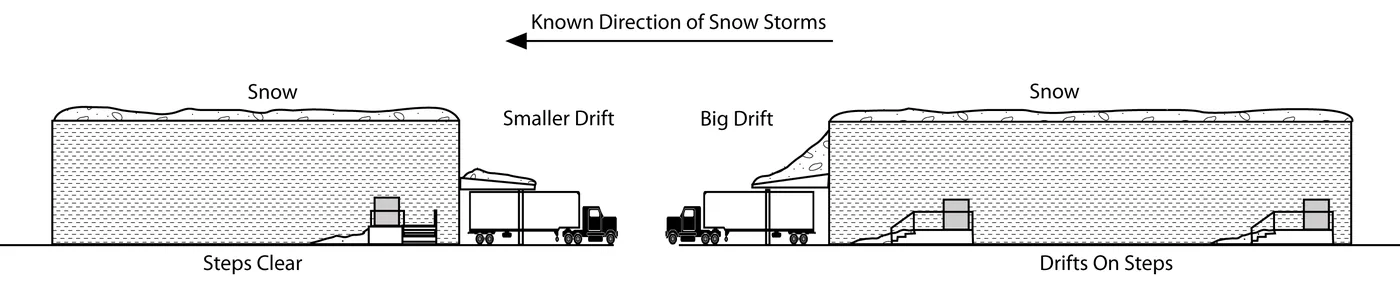
|
Military vehicle damage due to falling snow and ice from a metal roof. This type of damage prompted the U.S. Army Corp of Engineers to develop effective methods of Snow Retention. |
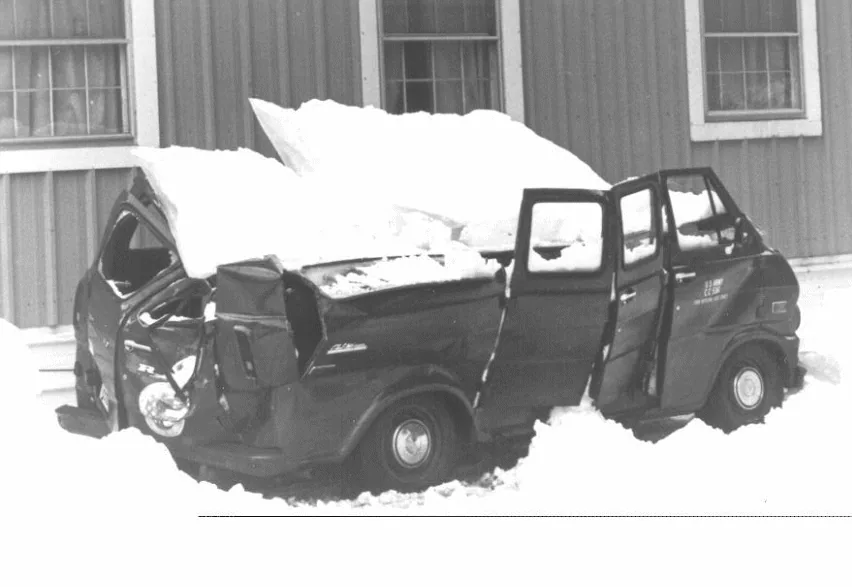
Snow Guard Layouts
The course identifies roof-area width, panel run, panel type, panel dimensions, local ground snow load, roof pitch, and special conditions such as drifting areas as basic project inputs for designing a snow guard layout.
A professionally designed and tested snow guard system that is properly installed should last the life of the roof. Here is a brief overview of the most important topics to consider when designing a snow guard system.
Start by writing down the following for each roof area on your building:
Roof area overall width (eave length)
Panel run (panel length from peak of roof down to the eave)
Panel type (standing seam, r-panel, etc.)
Panel dimensions (width between seams or on center width between major and minor ribs.)
Local Ground Snow Load
Determine your roof pitch
special design considerations such as drifting areas.
Without a proper snow guard layout, the strongest snow guard in the world is worthless. Today, anyone can input their roof dimensions, pitch, and ground snow load into an online website. The system will offer the option of 3 attachment methods including adhesive, screws, or a seam clamp mounted bar system. After all the options are selected, the best layout is calculated and a line drawing is created that shows the recommended quantities, optimal row spacing and project costs.
The idea is to hold the snow and ice in place, (where it originally landed) not just try to “catch” it before it avalanches over the eave. No snow guard system will hold 100% of the snow and ice. Nearly all failed snow guard layouts have just one or two rows and they are usually installed only down at the eave. This typical amateur type of layout has a high failure rate because it attempts to “CATCH” sliding snow and ice, instead of “HOLDING” it where it landed on the roof. By the time the snow and ice start to slide, it’s game over.
Rows of pad style snow guards “Field Method” are to be installed in a staggered pattern, never in straight lines. Pad style snow guards that are installed in staggered rows have a significantly less chance of failure. The staggered pattern helps the snow and ice field coagulate to eliminate the possibility of movement.
On longer runs, evenly distribute the load across the roof structure with multiple rows. Roofs are designed to hold the snow load, but are not designed to withstand uneven loads concentrated at the eaves.
|
Excellent example of an evenly spaced bar system “Fence Method”. The 4 rows are spaced evenly up the roof to prevent the snow and ice from building dynamic loads that exceed the design. Remember that the weakest link in a clamp on system is the seam, so using a clamp on every seam combined with a conservative safety factor and evenly spaced rows will help protect the seams from damage. |
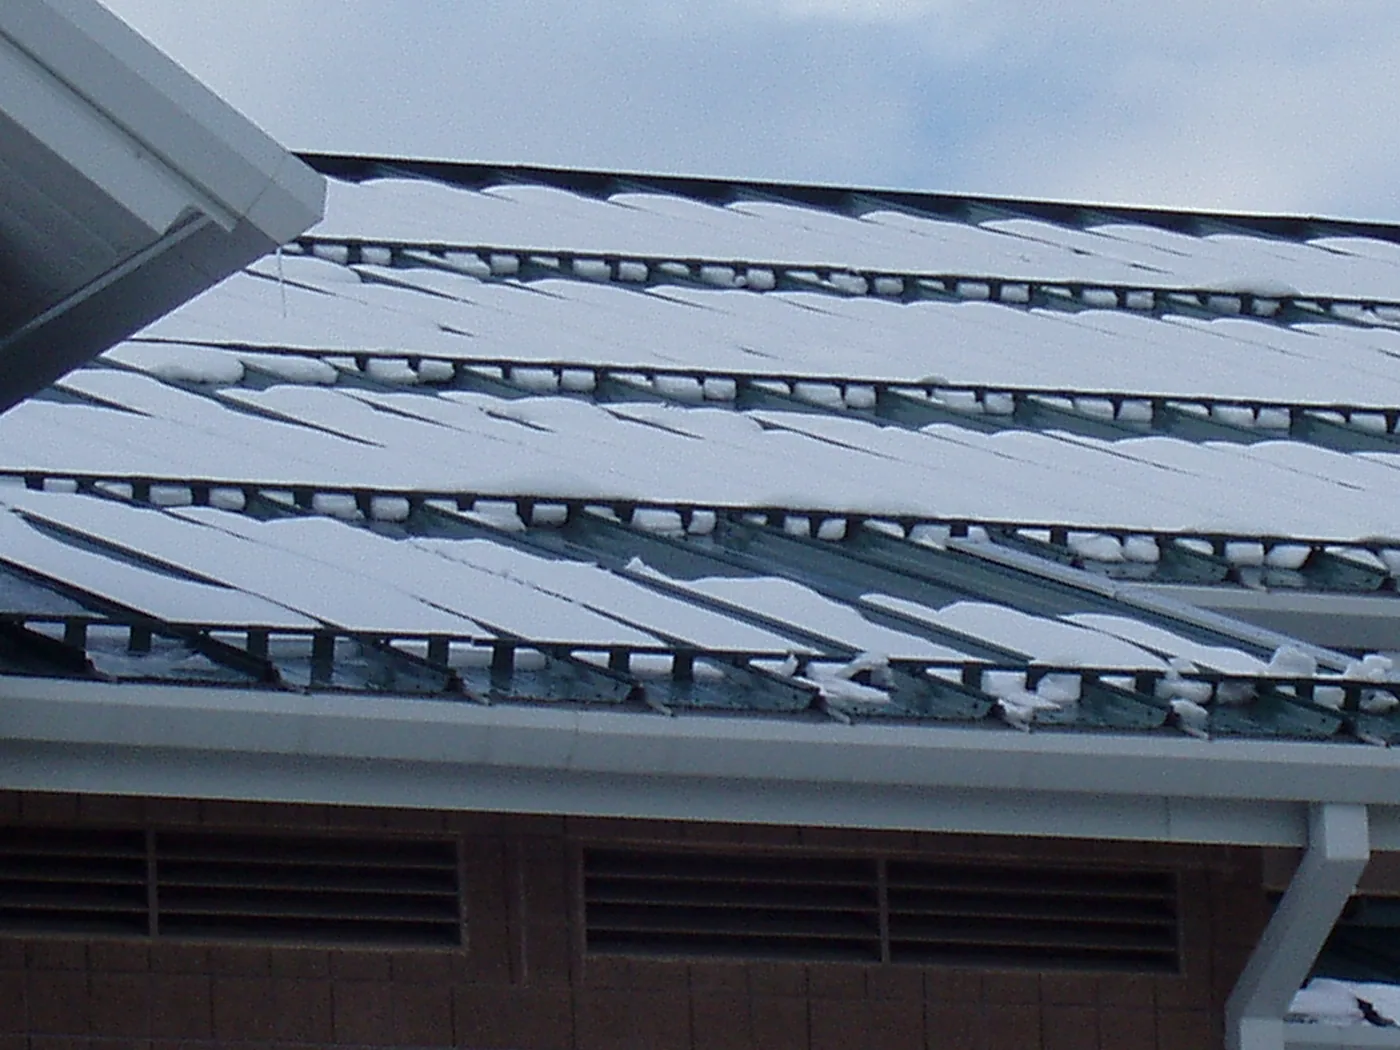
Standing seam panel damage due to converging snow in a valley. This is a good reason to use multiple rows going up the roof. If all the rows are down at the eave, there is nothing to prevent this type of damage. |
Figure 12 |
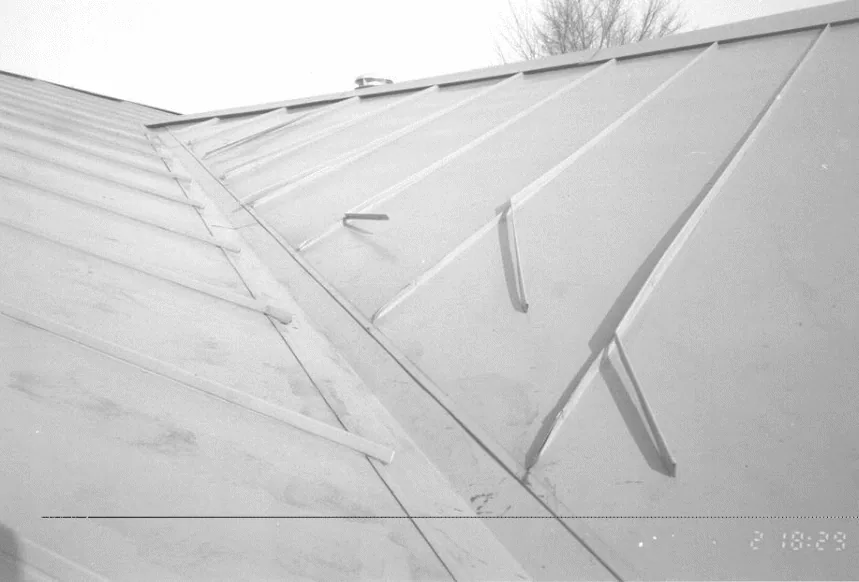
“Flow of snow down valleys can bend the standing seams of metal roofing (figure 12), reducing their strength and violating their waterproofing integrity.” Commentary on Snow Loads US Army Corp of Engineers, August 1998
|
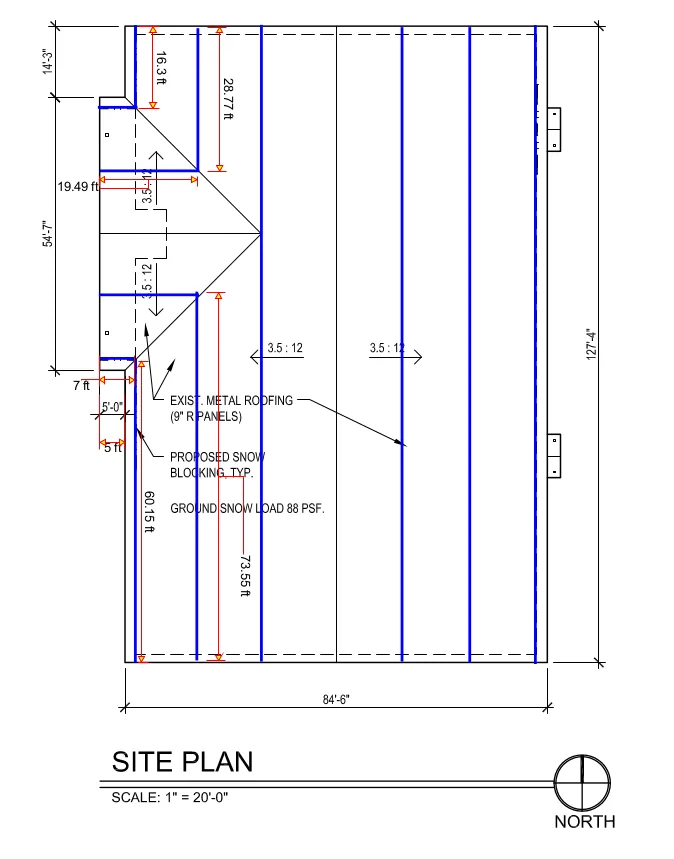
Bar system layouts should look similar to this roof plan. The project specific layout calls for 3 evenly spaced rows of bar with mechanically fastened brackets every 18 inches with a 3.5/12 pitch, 88lbs. ground snow load with 42 foot runs on each roof area. This layout will contain the snow and ice every 14 feet going up the roof. Concentrating rows down by the eave would leave a potential 30 foot run exposed. This could cause severe panel damage because of the dynamic loads exceeding the design load. Evenly spaced rows distribute the weight proportionately on the roof structure. |
|
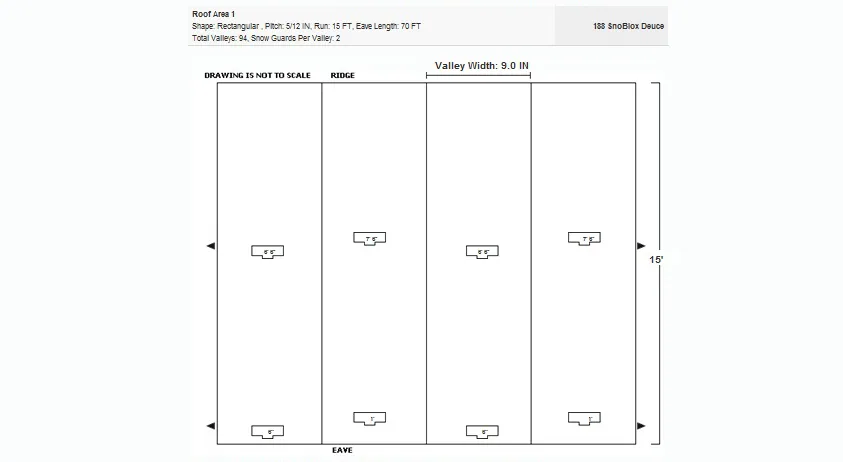
This is an example of a proper snow guard layout. This layout shows a 24 inch wide panel that requires two staggered snow guards per row, per panel. This is a 45 foot run from ridge to eave with a 1/12 roof pitch and a 20psf snow load. Notice that the rows are staggered, spaced evenly up the roof area and not just concentrated down by the eave. This manufacturer has a lifetime warranty against breakage if the customer follows the recommended layout. The email would contain the exact number of guards and accessory components needed, row spacing dimensions, and pricing. |
Technical and Historical References Cited in This Course
The original course material cites the following research, testing organizations, and technical sources. They are listed here to make the source basis easier to identify while preserving the course content above.
- American Society of Civil Engineers — Snow Guards for Metal Roofs, August 1996.
- U.S. Army Corps of Engineers — Commentary on Snow Loads, August 1998.
- Architectural Testing, Inc. (ATI) — Independent laboratory testing referenced throughout the course for snow guard, adhesive, and clamp performance.
- Published manufacturer test results — The course repeatedly recommends certified or independent test data when specifying snow retention products.
- Relevant historical patents and field installations — The course discusses the development of polycarbonate snow guards and non-penetrating bar systems through historical examples and dated installations.